2014 Family Photos

SHARE THIS +

holiday-family-photos1 I don’t believe I have a single staged family photo from my childhood, not even one of those awkward family photos from the Sears portrait studio. I think I’ve seen an intermittent photo of just myself as a baby, sitting in Santa’s lap or atop a pony, maybe even on a carpeted backdrop from KMart, but the point was, we never did family photos. I’m sure it had something to do with the rather chaotic, dysfunctional state of affairs our family was in for many years, and when things were good, we were more apt to take a random Easter photo standing out front of our house, than getting dressed up and hiring a photographer to take tastefully staged pictures. No matter the state of dysfunction your own family may have been in, I’m sure this is the same for many of you, am I right?

holiday-family-photos13 
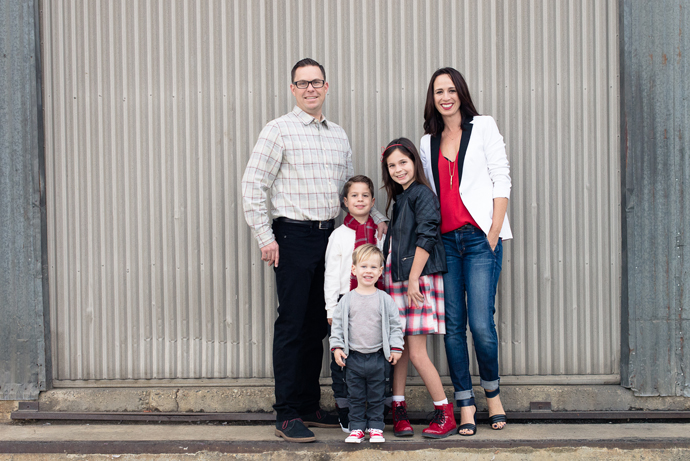
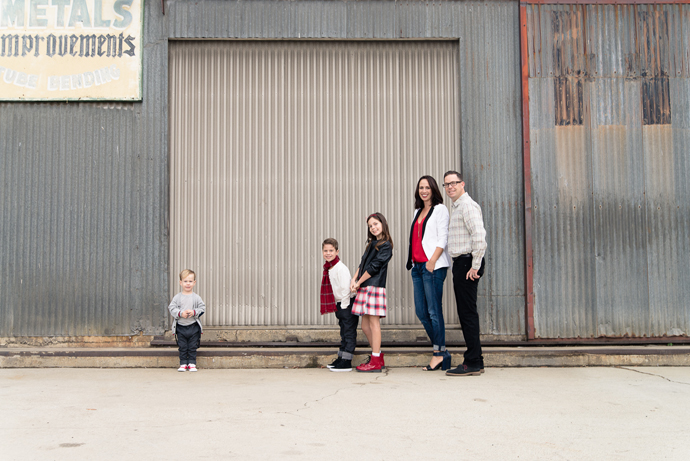
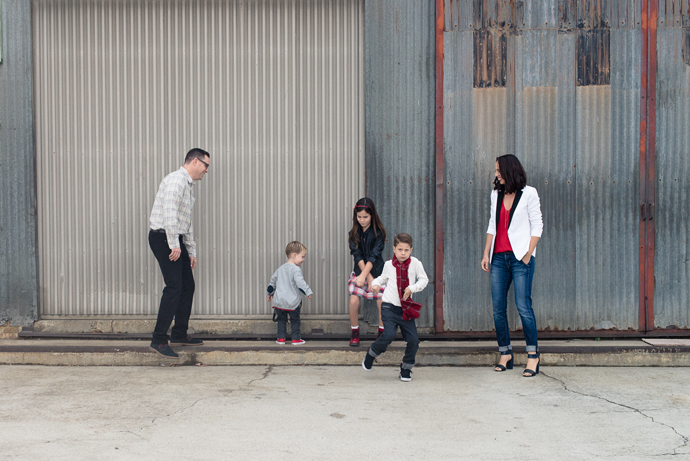
But family photos are sort of a big deal now, especially since digital took over and families could get affordable, fun, less-uptight photos taken just about anywhere. Miranda of M.Shanti Photo took ours again, and found a great backdrop in Signal Hill, a little subcity in Long Beach. We’re not really sure what the building is used for, as we saw an older lady open it up and feed several cats while we were there, so maybe it’s just an old building she holds on to as a shelter for stray cats from all over the neighborhood? Who knows really, it looked cool in photos so that’s all we were concerned with, but if it doubles as a sanctuary for homeless cats, all the better. holiday-family-photos3

holiday-family-photos12 
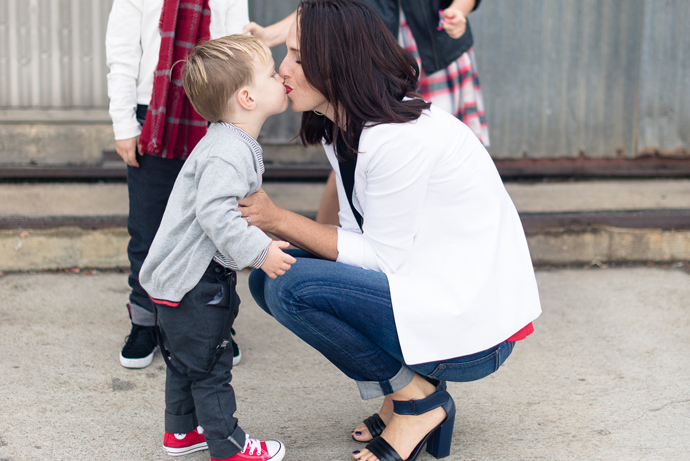
The kids know Miranda just as well as a family member since they see her on an almost weekly basis. Getting them to loosen up for her is always a problem. Not really.

holiday-family-photos5 
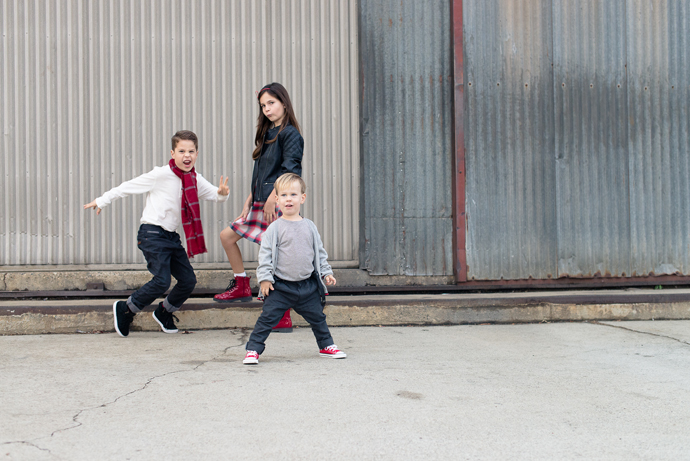
She had some ideas of poses she wanted to see us in, so once we arrived we got those out of the way first, and then we sort of just had fun. It was sprinkling during most of the shoot, and at the end it began pouring rain, so towards the end we were sort of just frantically running around trying to get some decent photos captured. For a twenty minute shoot, I think she did a damn good job.

holiday-family-photos4 
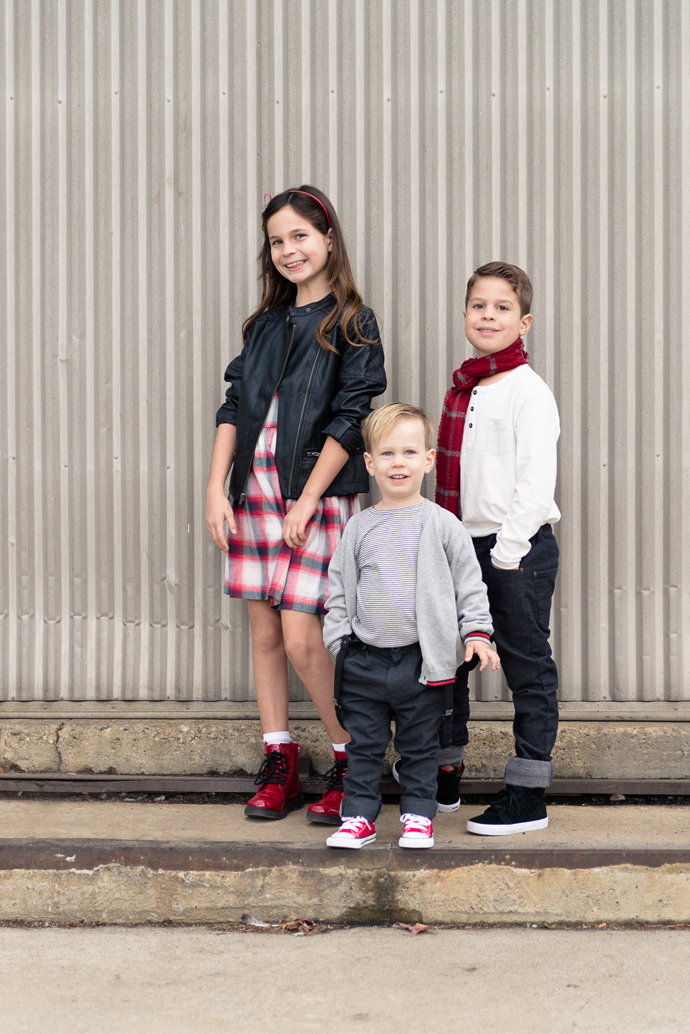
Coordinating our outfits is always an interesting and time-consuming venture for me. I really should try to plan earlier or try not to worry so much about it, but at any rate, I’m happy with how all our outfits came together this year. The day before Thanksgiving I went to the mall by myself and searched around, as I was uninspired this year. Usually I have an idea of where I want to go with the outfits, and center them around something I already own, but I was coming up blank. So I just started looking around, and came across the patent leather red boots Taylor is wearing, and I knew I had a starting point.  holiday-family-photos10 
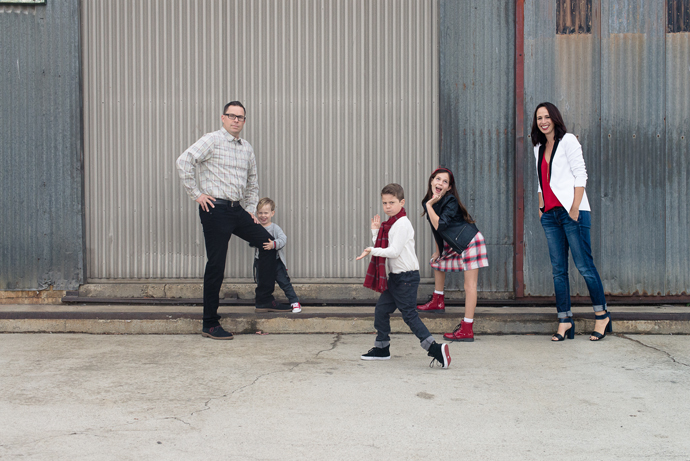
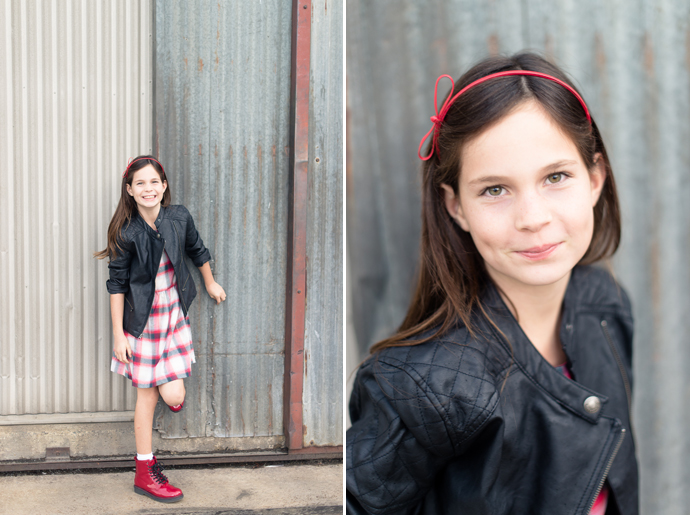
After finding the red boots, I still wasn’t sure how we were going to go, so I just walked out of Zara and started going to different stores. I went into Gap Kids and found the plaid dress, and the combo of the boots and plaid reminded me so much of the style I loved from my youth, I went with it, adding in the leather jacket for some warmth and texture. So Taylor’s outfit was really the jumping off point for the rest of us. holiday-family-photos11 
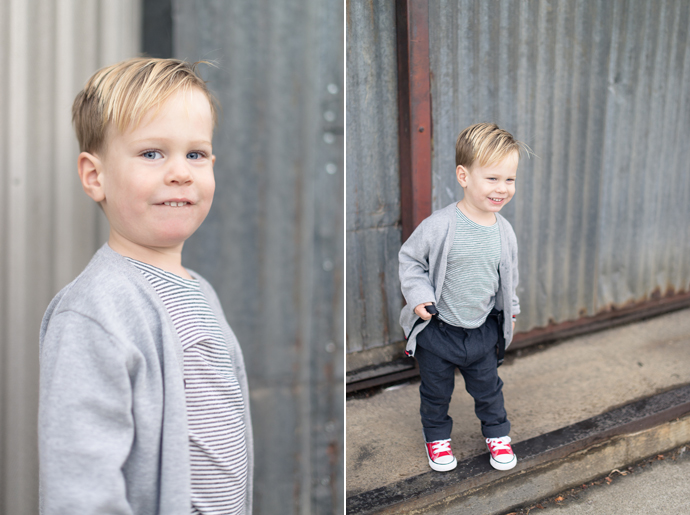
I couldn’t find anything I loved for Hayden that was red. All was either red plaid, red stripe, all patterns that just felt overdone, so I decided to go more black and white for the boys, and add in pops of red. Note the red piping on Hayden’s cardigan, and of course his Converse. holiday-family-photos9 
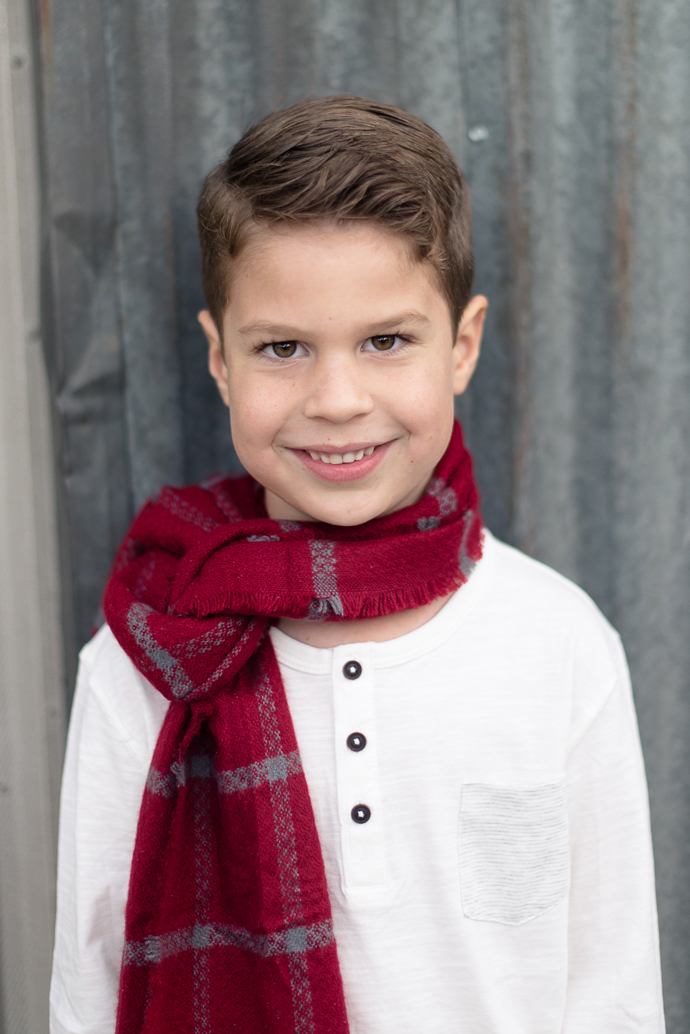
Had I found bright red jeans for Syd, I would have went with those, but then I saw this scarf and knew it was just enough. He also had a bit of red trim on his black hi-tops.  holiday-family-photos8 Art’s outfit was the hardest and easiest to put together. Red for guys is sort of hard, you’ve either got a red sweater or scarf, but red vests or red jeans just aren’t him and I knew would be too much, so I settled for the tiniest hint of red in his shirt. Good enough.
holiday-family-photos7 
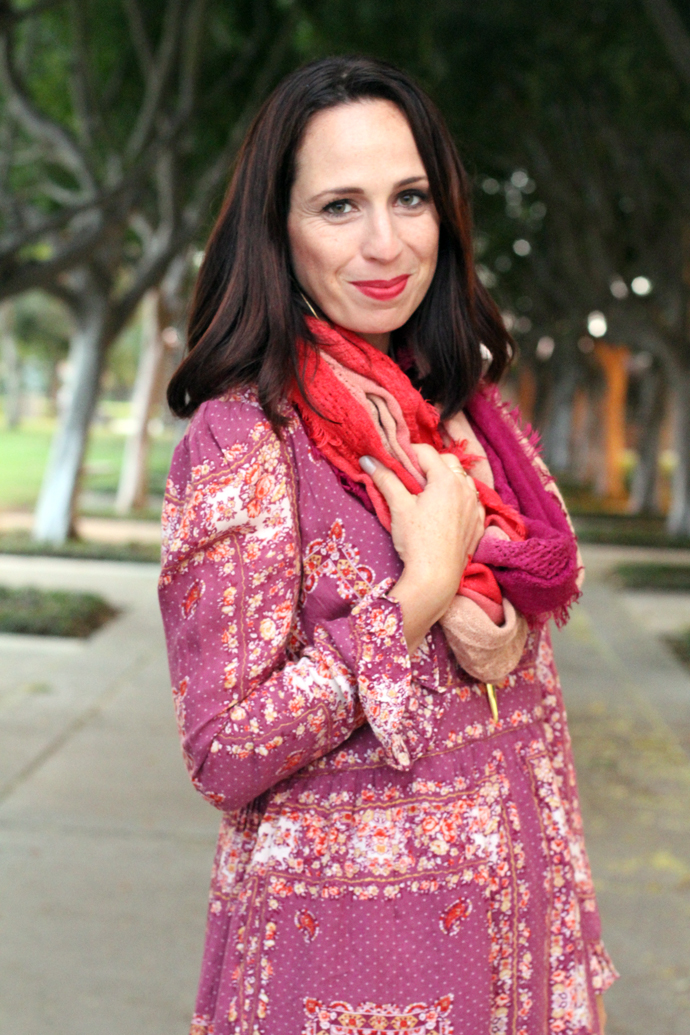
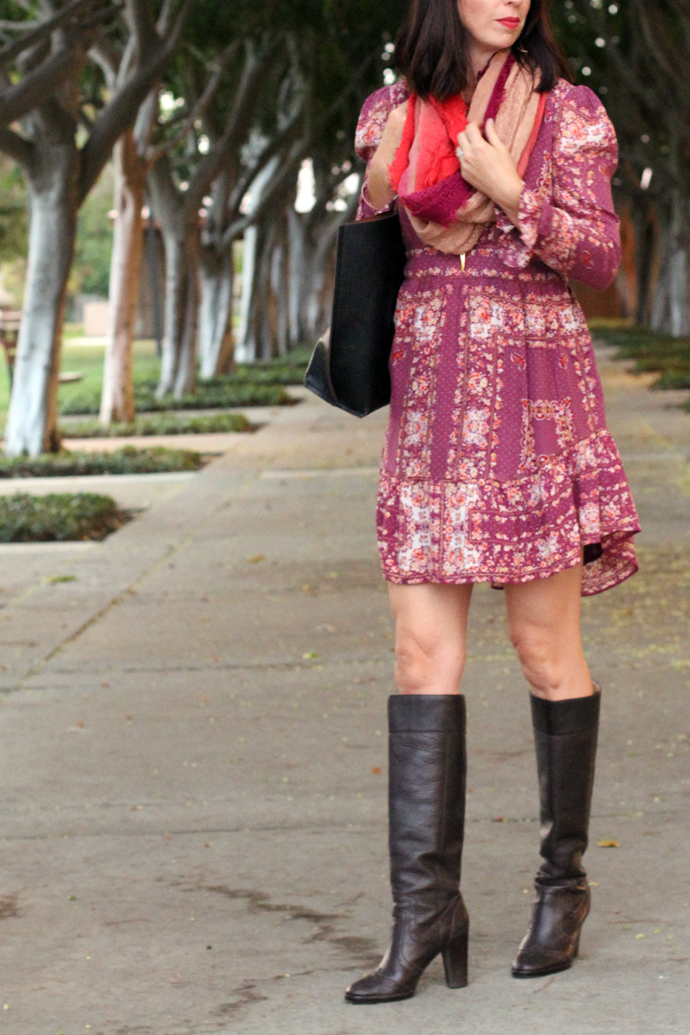
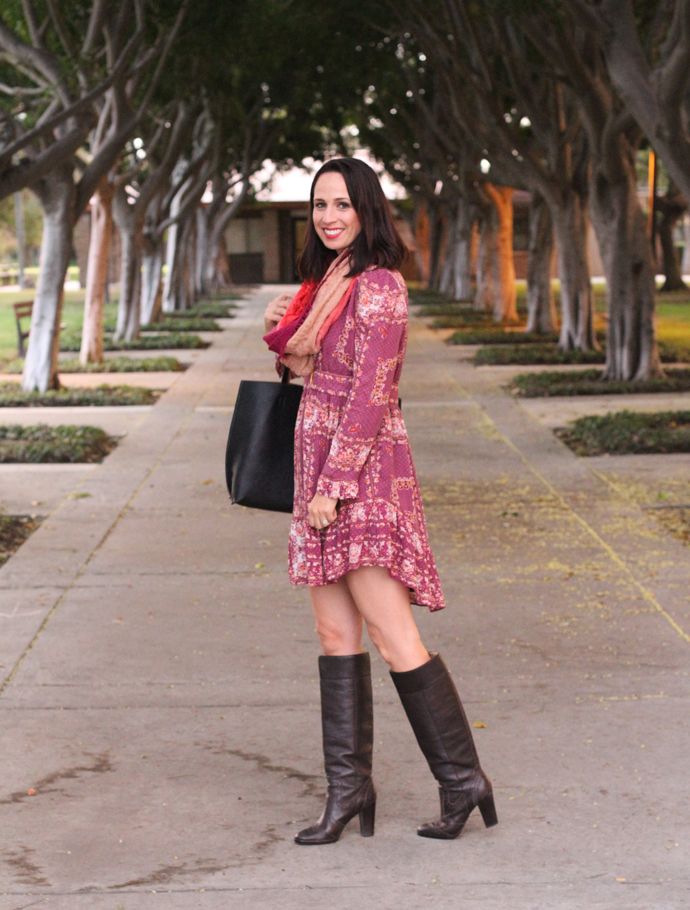
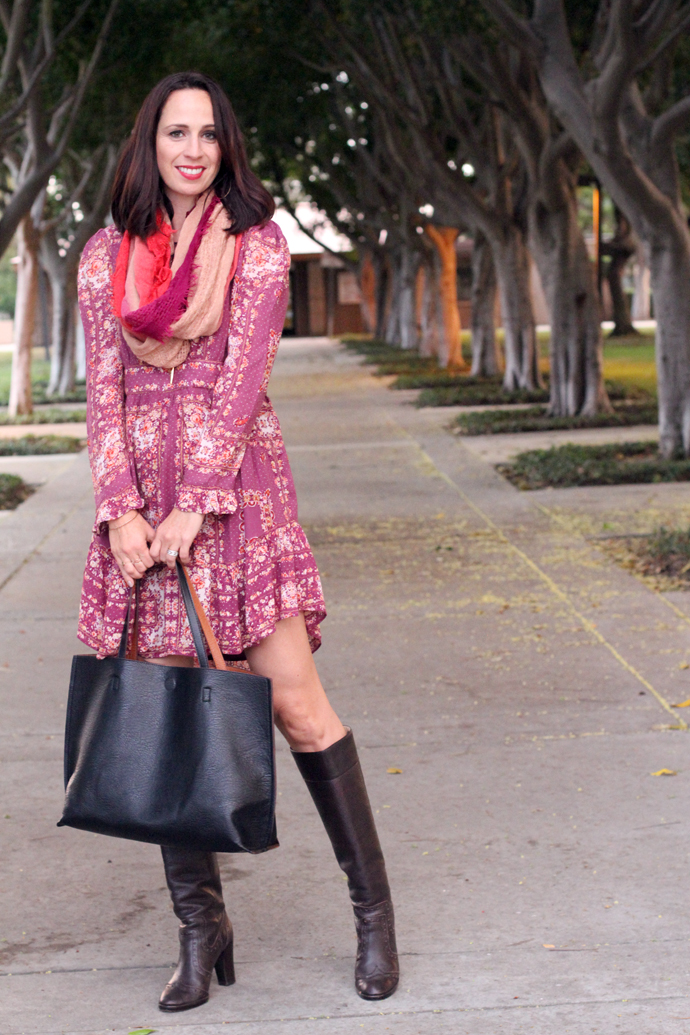
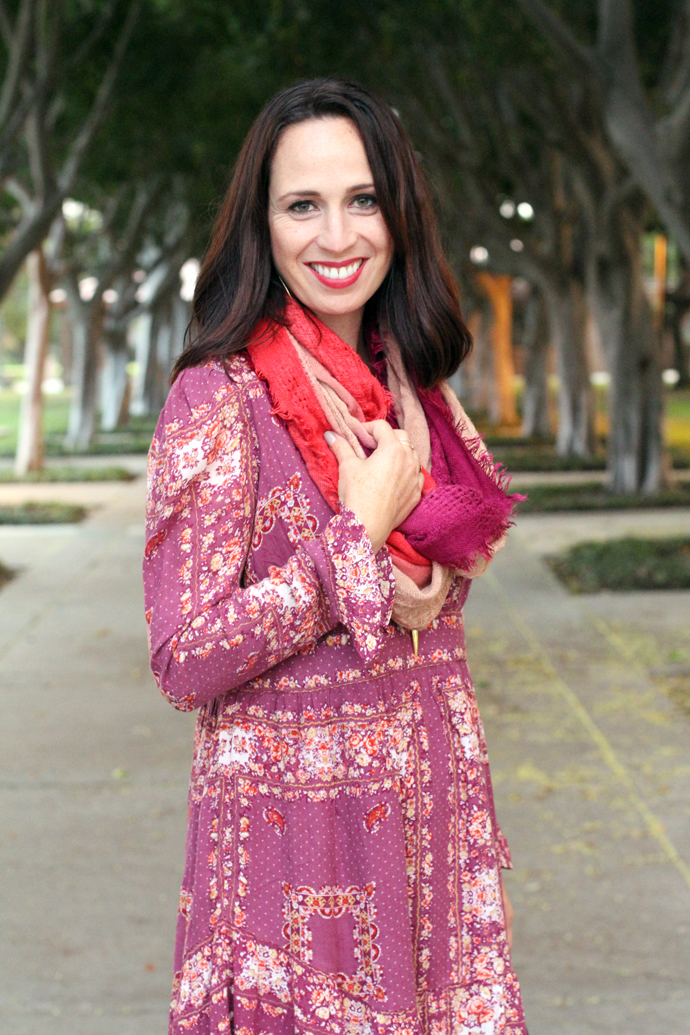
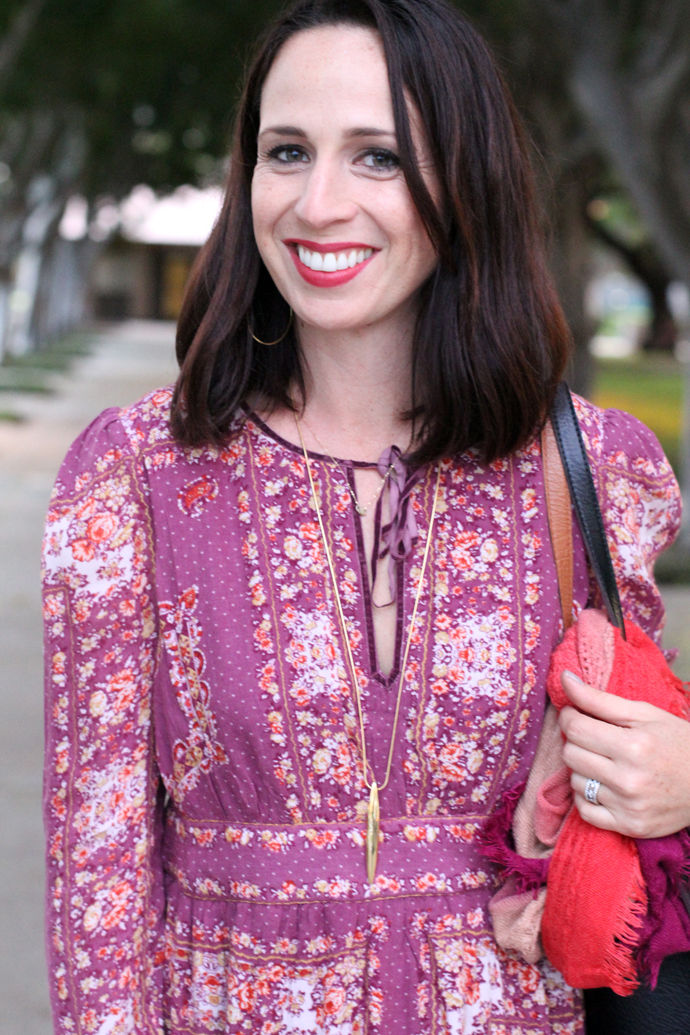
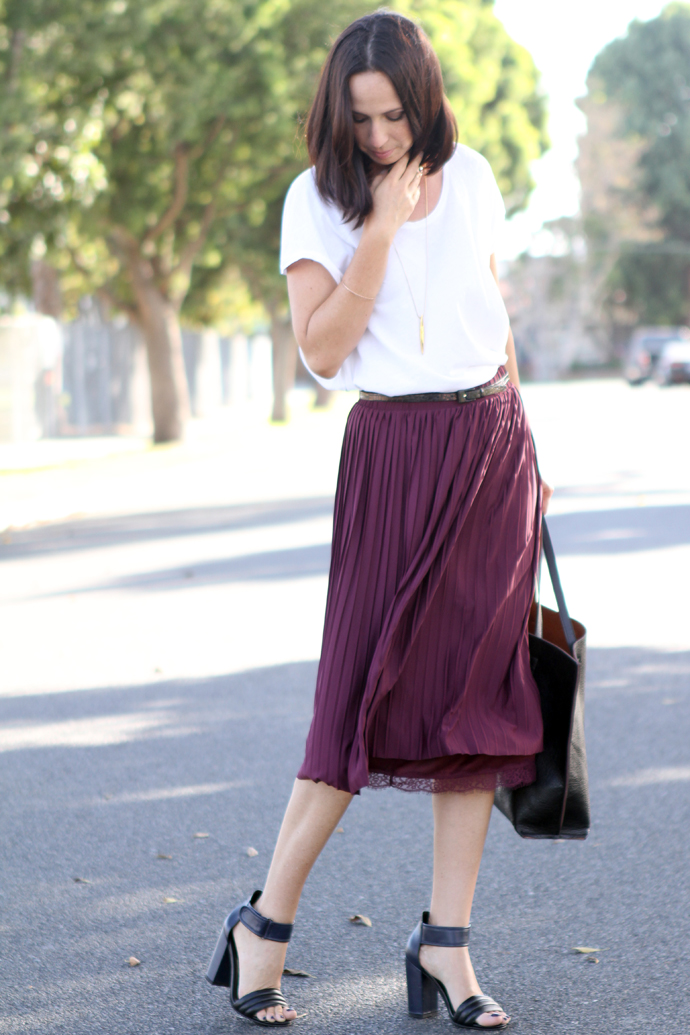
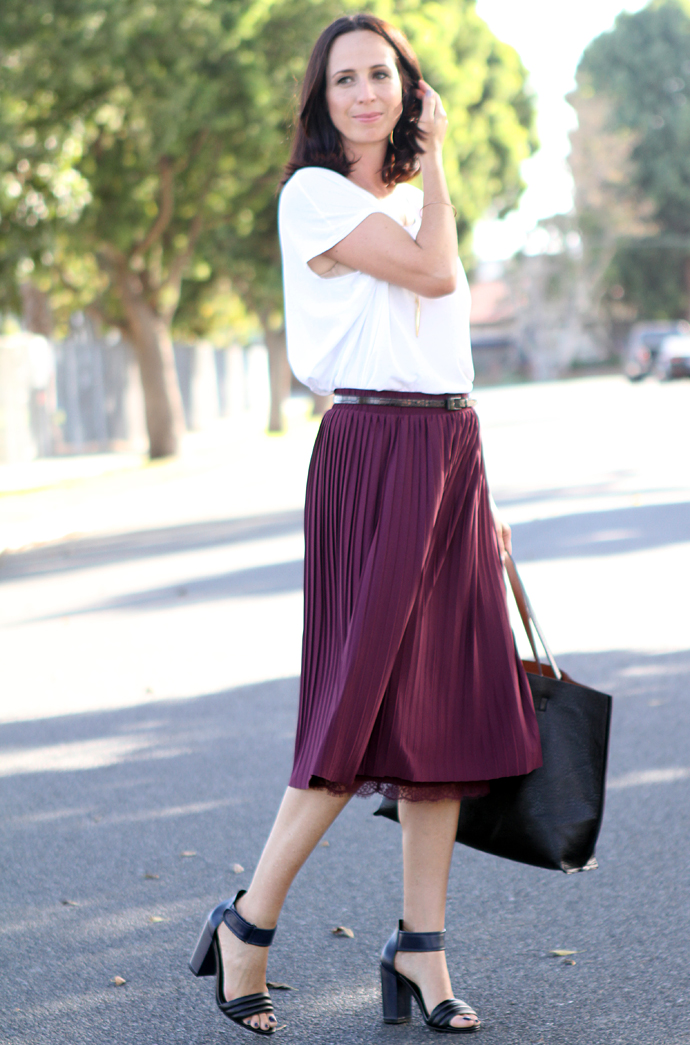
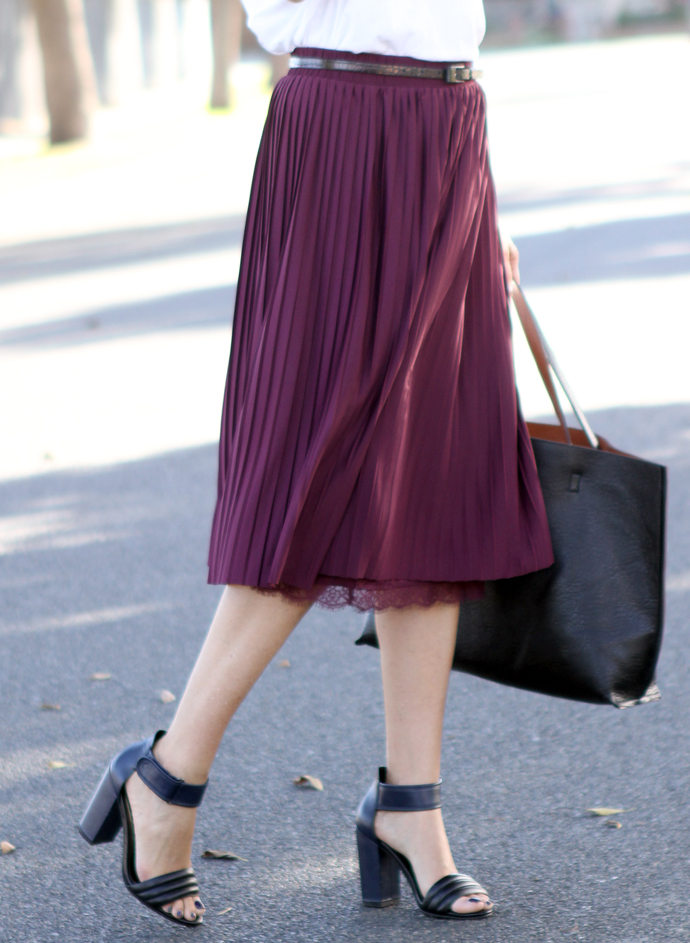
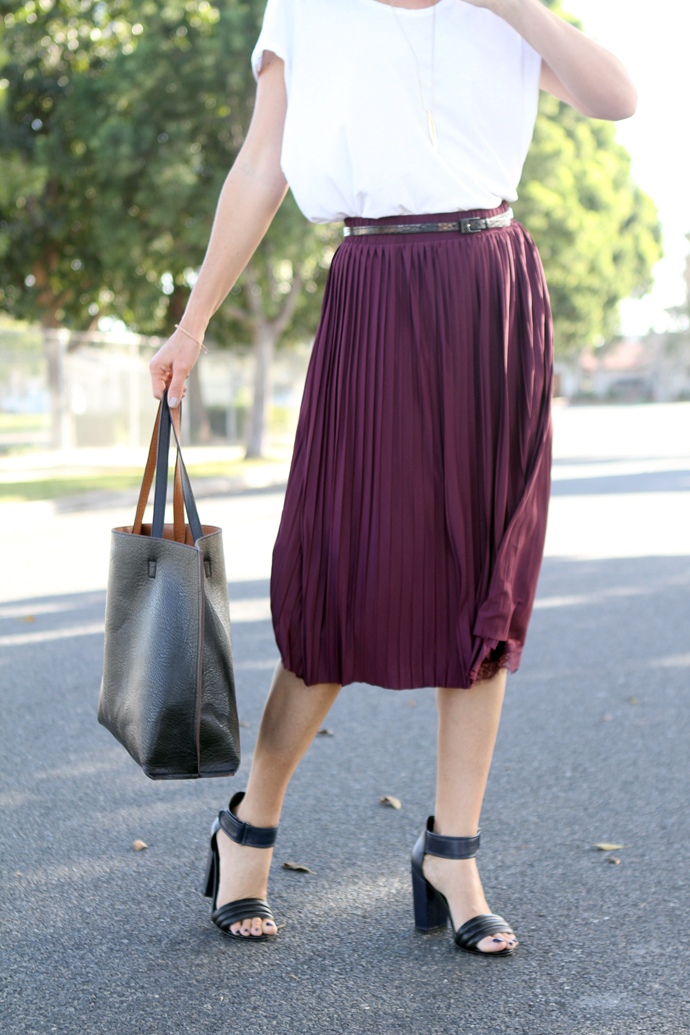
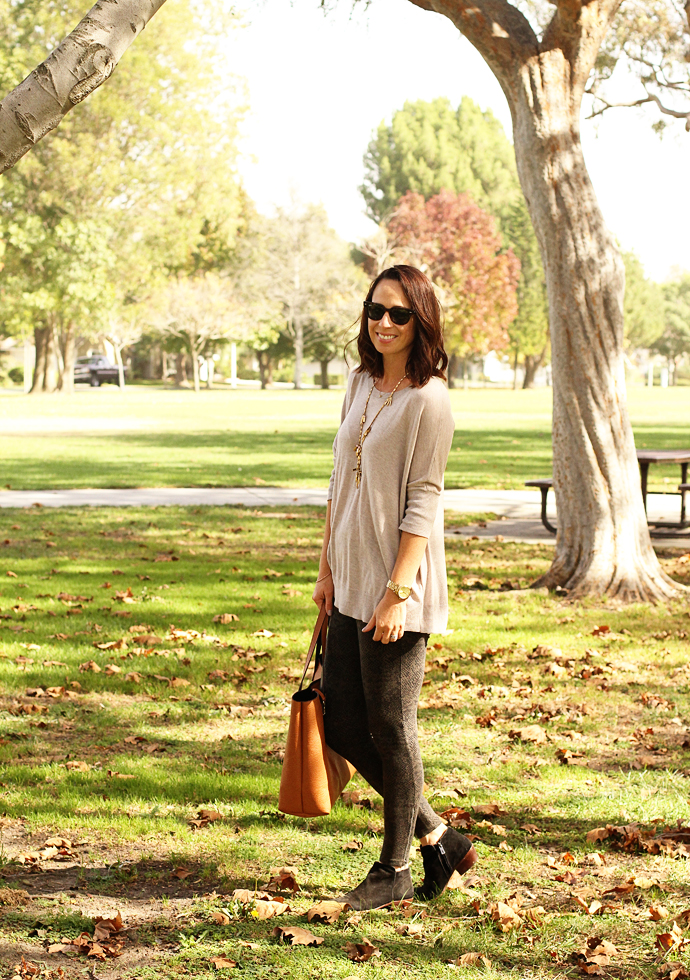
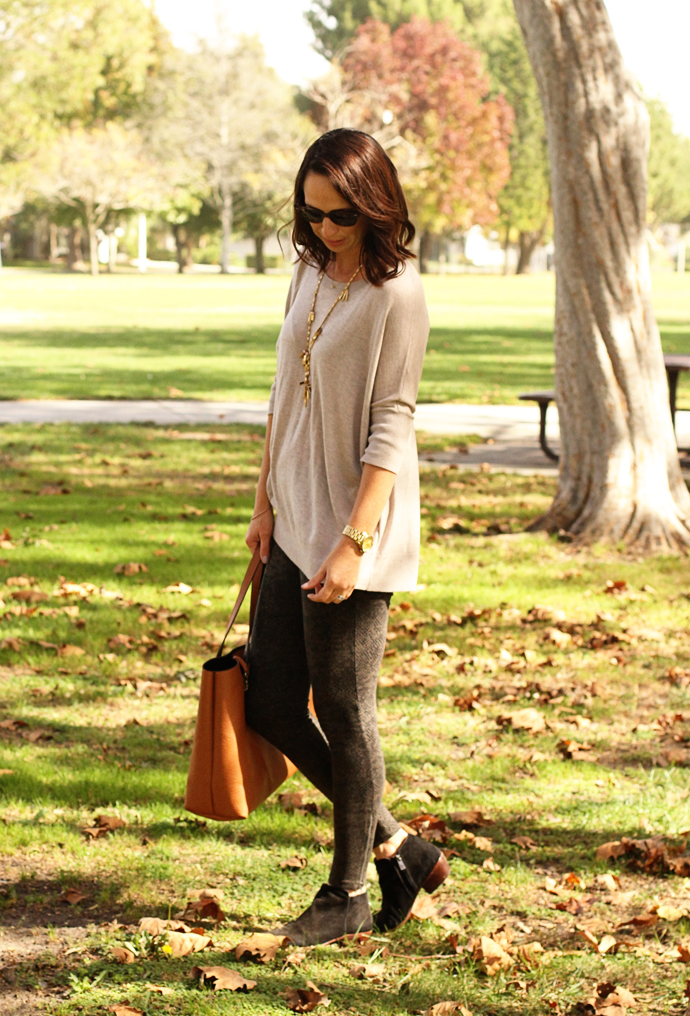
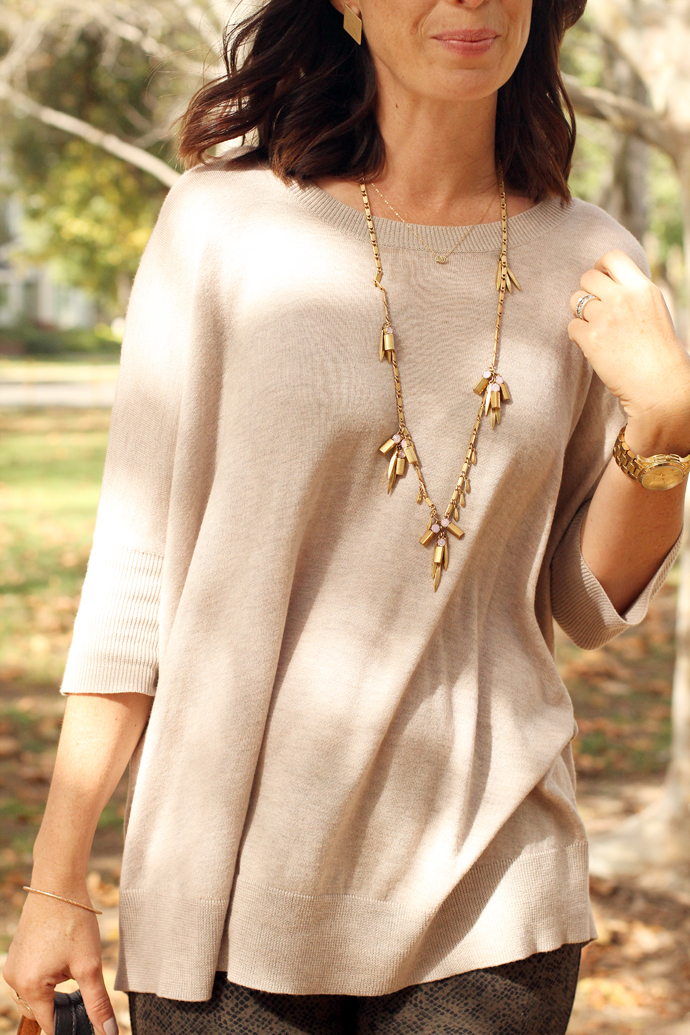
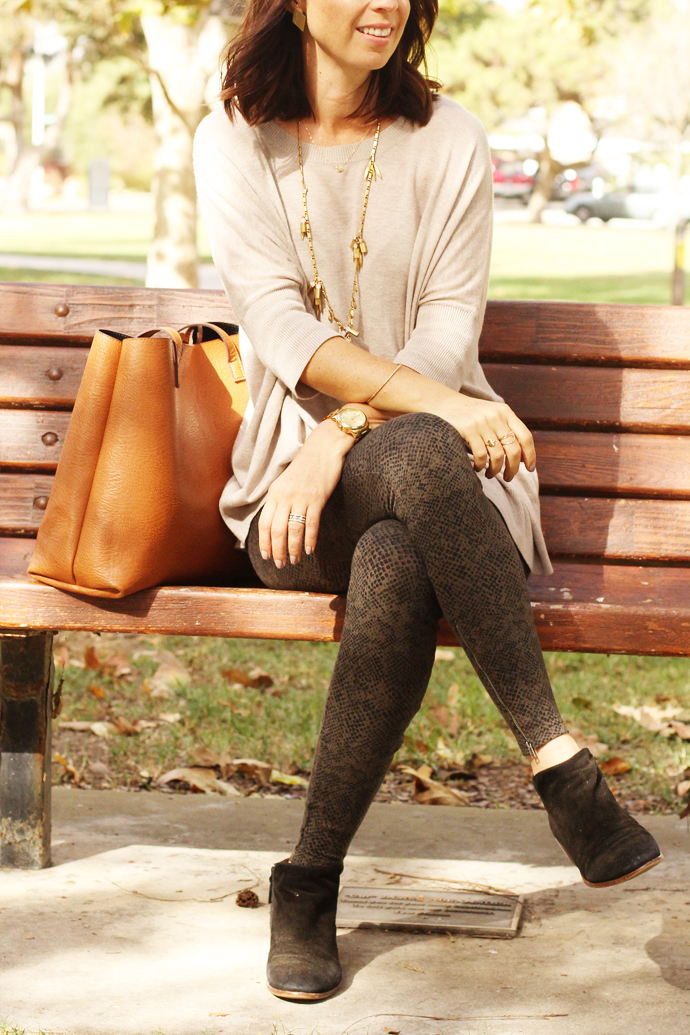
My outfit was the only one which used items I already had on hand. I did buy a plaid shirt in case I didn’t like the way the blazer looked when I got home, but I ended up loving it so took the plaid shirt  back.  holiday-family-photos6 
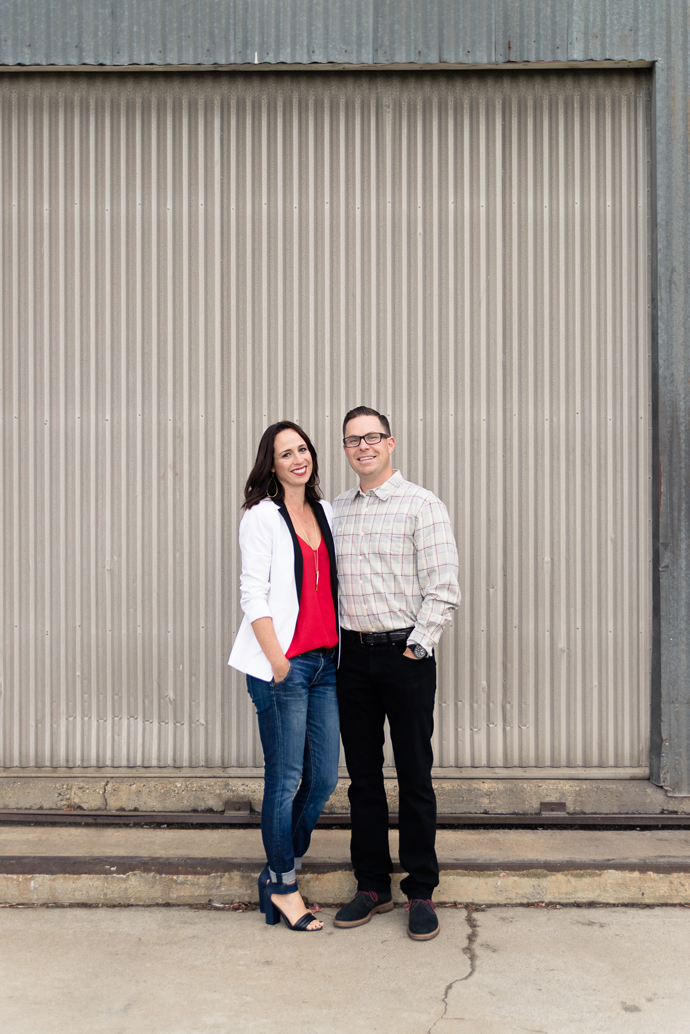
The end result is a look that coordinates, blends in together without being too matchy-matchy, but also stands out because of the subtle pops of red. We’ve done jewel tones before, brights, standard white and denim a long time ago, so even though black, white and red is a very typical holiday look, it was new for us this year.   holiday-family-photos14 holiday-family-photos15 
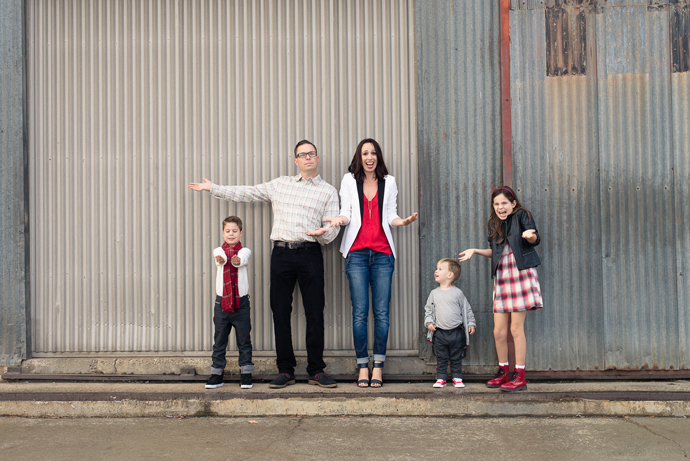
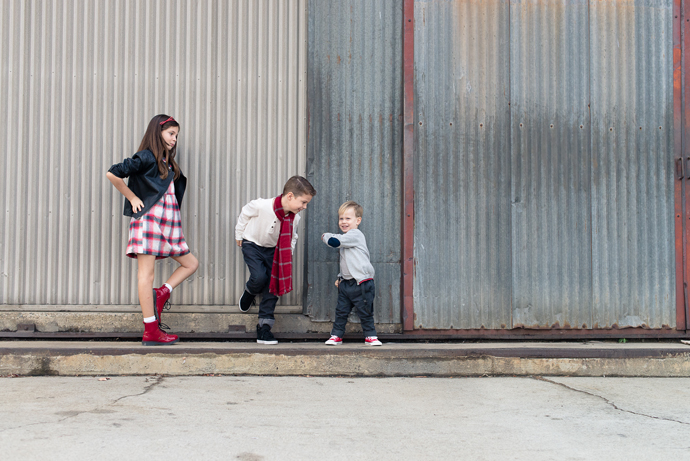
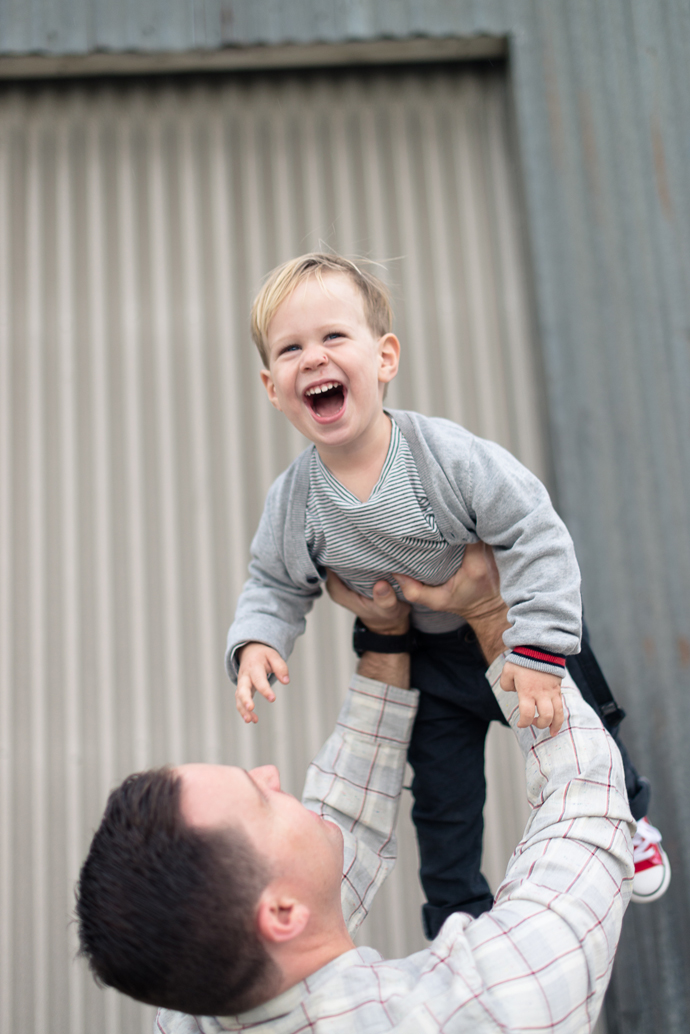
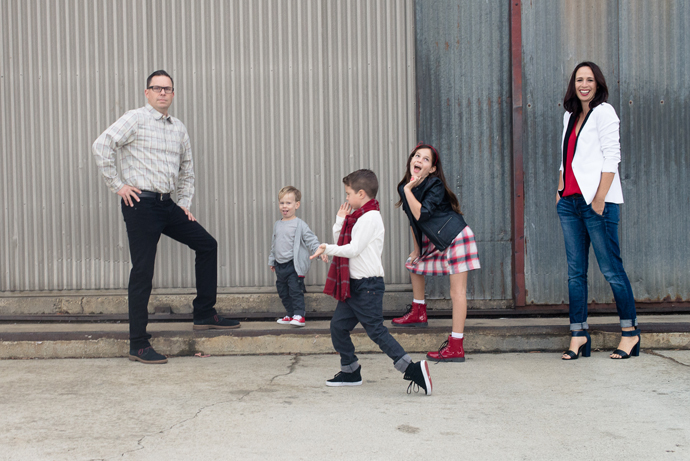
Miranda asked us to dance here, and all of us had no problem with that, except for Hayden. He just stared at us.  holiday-family-photos-14 Finally towards the end of our dance sesh, he did a little half-turn, either to try and get in the groove or to ignore us, still not sure. Our Christmas cards from Paper Culture came today and I love how they turned out so much. For the first time I ordered two different styles to mix it up, and will give the card with the funnier poses to friends and close family, and the more simple, kid-centered card will go out to extended family and work clients.  holiday-family-photos16 I can’t wait to turn these photos into prints for our wall and frames. How about you guys? Are you big on the family photos, or do you think they’re too much work? They are fun to have when all is said and done, but they’re certainly a lot of work and stress to prep for, I don’t disagree. My goal for next year is to somehow take the stress out of the prep process so I can enjoy the actual shoot more.

Outfit details:

Andrea – tuxedo blazer old from Club Monaco, similar here, blouse J. Crew, jeans Elizabeth & James, heels Shoemint

Art – shirt Grayers from Nordstrom, jeans J Brand Kane style, boots old from Nordstrom

Taylor – dress and jacket Gap Kids, boots Zara

Syd – pants, shirt & scarf Zara, Supra hi-tops already owned from Nordstrom

Hayden – pants, sweater & shirt Zara, hi-tops Converse


Week In Review – So Much Good Stuff

SHARE THIS +

new-puberty-corbis_custom-51c80e1a4cdb2b9bd7c78d1a95683ef1485d69a3-s1100-c85 I stayed up late ordering Christmas cards and making photo books for each of the kids this week, which left plenty of time online for my twitter and facebook feed to fill me in on some excellent reads. Some of my favorites are below, quotes from each article italicized. By the way, I had asked friends on my FTLO of Facebook page for recommendations on photo books, and I discovered some new companies, so thanks a lot! I decided that for this round of books, just to go with Artifact Uprising. I have so many photos that it gets overwhelming trying to decide which memories to capture and feature, so in the end I decided to just focus on IG for the past year. I created “All About Me” books for each child, for the year 2014, and the AU program was really easy to use. I can’t wait to see them in real life.

1. Celebrating Bad Food: An Interview With Christopher Kimball – hands down my favorite read of the week, just because I am fascinated with Christopher Kimball, founder of Cook’s Illustrated and America’s Test Kitchen. The interview discusses the myth of food as art, print media, obesity in America, current hipster food trends, and the driving marketplace for junk and fast food. Basically, all of my favorite things! “People always go, “oh, my grandmother never used a recipe.” Well, that’s because she cooked ten hours a day or whatever, so she had it down cold. If you only cook three hours a week, you need a recipe. So I’m a big believer in: you’ve got to have technique, you’ve got to have experience. Because you can’t be an artist in the kitchen, assuming that’s something you want to be in the first place. I’m not sure I agree with that anyway. The objective is to turn out good food that’s healthy, that people enjoy then you sit around the table.”

2. How Girls Are Developing Earlier In A New Age Of Puberty “The family can serve as a huge buffer against some of those negative effects of early puberty,” she says. “There’s also been some research to show that certain aspects of the neighborhood context and also schools can be protective. … It can completely mitigate the risk associated with early puberty on girls’ emotional and behavioral functioning.” So thankful we’re not here yet, however the emotions are rnning wild these days…preteen angst is not far off, I can smell it!

3. Is the Food Babe A Fearmonger? Scientists Are Speaking Out – an interesting critique of the Food Babe’s use of science to back her claims and grow her army. Look, I don’t think I need to state I’m a real food advocate, and while some may believe we should all stick together, no matter what the methods, I don’t necessarily agree. I appreciate what she’s trying to do, but I don’t agree with much about how she’s doing it, by instilling fear into the average person who just needs some lessons and cajones in the kitchen. I have personally seen so many people, friends, readers get so overcome with anxiety about what they should eat, because of so many outlandish claims out there, that they don’t do anything to change. I just wish she would tone down the fear rhetoric and offer viable solutions for people, real people with food budgets and families and busy lives who can’t fastidiously pore over every ingredient list. “I personally think this is largely a distraction from more real concerns about the food system, like advertising aimed at kids, the environmental impacts of food production, food waste and hunger.”

4. Contemporary Christmas channel on Spotify so good, and so telling of my age. Fellow mid-late thirties out there, I think you’d really appreciate this playlist

5. NPR’s Best Books of 2014 – still going through both of these to note the overlap, if any. What are some of your favorite books of 2014?

6. NY Time’s 100 Notable Books of 2014

7. Typical of a high speed car chase in LA – make sure to note the red truck and skateboard.

8. Athleta Downalicious Vest is everything to me right now. I wear it almost every single day, no kidding.

9. Tarte Fiery Lip Tint is also everything to me right now, I also wear this almost every single day and my kids still ask if I’m going out somewhere when I put it on.

10. A Guide to the Terrible, Delicate Art of Making Parent Friends I’m lucky to have found a good group of mom friends, and their spouses have also become my spouses friends, but I appreciate how hard and delicate it all is. There are several friendships that have dissolved over the years because of either schedules, or we discovered eventually, that we didn’t have as much in common as we previously hoped for. “Now consider that, in order for this budding friendship to last more than one playdate, all four of you must jibe somewhat as people AND as parents, which means that at least in some small way, your general interests, taste and socioeconomic standing must gel, but critically, so must your general approach to parenting.”

11. The Secret to Homework We are in a big battle with homework over here, with Taylor getting upwards of 2-3 hours of homework a night, it’s frigging ridiculous and I’m fighting back. In current discussions with the principal and teacher, so wish me luck. More and more evidence these days is showing that homework for the sake of homework doesn’t work, and can actually be a hindrance to learning. If you have or have had a 4th grader, I’m curious what your child’s homework load looks like each night. Please share!

12. The Red Tent was made into a Lifetime mini-series, airing December 7th and 8th! One of my favorite books of all time, I hope Lifetime doesn’t screw it up 😉

And that’s all she wrote folks! Have a great weekend. Taylor marches in the town’s Christmas Parade tonight, and tomorrow we get our tree! Tis the season!

image credit 


DIY Leather Chain Necklace

SHARE THIS +

Leather and chain DIY necklace

Lately I have been experimenting more with jewelry making. I love crafting handmade items as much as the next self-proclaimed-DIYer, but when it comes to crafts I am usually more comfortable with a power tool in my hands rather than delicate jewelry pieces. When a friend gave me a piece of lovely black soft leather that was too small for any project but jewelry I put my crafting skills to the test. For thisfrte3 season I really wanted a necklace that was equal parts masculine, feminine, and chic. With this leather chain necklace I think I got pretty close! Additionally I was surprised by how easy it was to make, and here is how…

Supplies you will need:

Leather and chain DIY necklace

– A scrap of soft leather in the length of the necklace swoop you are wanting to create. Mine was about 16 inches long.

– Fabric scissors.

– Jewelry chain that you can buy in a role. I used 60 inches for this necklace.

– Jump rings. I bought a bag of 30 but used 16 for this project.

– A lobster clasp. Who knew that was what they were called??

– Hammer and nail or a hammer and small circle leather punch.

– Pliers to cut the chain.

Leather and chain DIY necklace

Step 1: Begin by cutting several strips of leather to the length you desire (Mine were cut to 16″ each). I cut 4 strips but I think more or less strips would still have a lovely effect.

Leather and chain DIY necklace

Step 2: Next, using the hammer and leather punch (or nail) punch one hole in both ends of each leather strip.

Leather and chain DIY necklace

Step 3: Through each hole in the ends of the leather strips attach a jump ring. The trick with jump rings is to twist them open, not pull them apart. That way it can twist back closed without loosing the shape of the jump ring.

Leather and chain DIY necklace

Step 4: For step four, cut 3 chains to the desired length using pliers. I cut them in varying lengths: one at 16″, one at 16.5″, and one at 17″. That way they hang staggered on the necklace.

Leather and chain DIY necklace

Step 5: Then attach the ends of the three chains with a jump ring, attaching three ends together on one side and the other three ends together on the other side.

Leather and chain DIY necklace

Step 6: This step is a little tricky. Using a jump ring attach one end of each leather strip and one end of the chains that were connected in step 5 all together. Repeat this on the other side of the necklace with the other end of each leather strip the chains.

Leather and chain DIY necklace

Step 7: Next, create the two ends of the necklace by cutting two 6″ sections of chain. At the end of one section connect a lobster clasp using a jump ring. Then at the end of the other chain connect a jump ring.

Leather and chain DIY necklace

Step 8: For the final step attach the two ends to the necklace body with a jump ring.

And bam! There you have it! A fun chic necklace to add to your winter wardrobe.

Leather and chain DIY necklace

Leather and chain DIY necklace

Leather and chain DIY necklace


Savory Parmesan Kale Spinach Bites

SHARE THIS +

kale-spinach-bites-appetizer I rarely go to Trader Joe’s anymore for the simple fact that each time I go in, they always steal too much of my money. They’re deals on cheese, some produce and various jarred items like honey and coconut oil make it feel like you’re going to walk in and save a ton, but they make all their margins on all the snacky packaged items. Veggie chips, all sorts of combinations on pita chips, tortilla chips and so many trail mix combinations it will make your head spin. But why am I going on and on, you know all this already. And let’s not even talk about their frozen foods section, because we could write a soliloquy to all the convenient options available. kale-spinach-bites So on my quarterly shopping trip to TJ’s last week, I got reacquainted with some of their items thanks to my new commitment to eat gluten free, which is mostly going okay. I  discovered some new to me items, and was happy some of my old favorites were already gluten free, and while browsing the frozen foods section, I discovered these little kale and spinach bites. They looked delicious, only problem was they were pricey for the quantity, and they were made with bread crumbs. All the other ingredients looked and sounded delicious and simple enough, and since I’ve gotten fairly used to subbing bread crumbs with almond meal, I figured I’d be able to recreate these bad boys to be gluten free. Turns out, I was right! It took a couple of tries to get the texture right and bitterness to go away, and I also got a little help from this Two Sisters recipe, but eventually we arrived at these little morsels of delight, and I’m very excited to serve them up on Thanksgiving.  kale-spinach-bites-ingredients In addition to the ingredients you see above, I also added in half of an onion and some lemon juice to help with the bitterness. So grab your kale, spinach, onion, garlic and green onions, and get cooking.  kale-spinach-bites-cooking Melt some butter or ghee with olive oil on medium high heat, and first saute your onion. Add in your spinach and kale, along with your seasonings, and saute a few more minutes, just until your greens are wilted. For my seasonings I added in about 1/2 tsp each of Flavor God Everything Seasoning and Garlic Lover’s Seasoning, but if you don’t have those at home, add in 1/8 tsp each of any combination of the following: onion powder, garlic powder, chili pepper, basil, coriander, parsley and thyme. Add in all of them if you have them on hand, or just a few if you’re pressed for time or short on seasonings. Finish off with a big pinch of sea salt and a few grinds of black pepper.  kale-parmesan-spinach-bites Once your onions and greens are nice and cooked, toss them in the food processor with the chopping blade, along with one roughly chopped green onion, and pulse for several seconds to get a nice creamy texture. I originally just minced my onions and greens, which left for an unpleasant texture. The food processor method is the way to go. If you don’t have a food processor, I recommend just chopping the cooked mix as fine as you can over and over again, or even add it to the blender for a few short seconds, scraping the sides to get an even grind.  kale-spinach-bites-mix Dump the processed greens and onions into a mixing bowl, and add in your egg, ricotta, almond meal, parmesan cheese, and a good squeeze of lemon juice, which I found helped eliminate any bitterness that may remain from the spinach and kale. I had received adult spinach in my produce box, which tends to be stronger. Had I used baby spinach, the bitterness may have been minimal, but either way, the lemon juice guarantees a balance of flavors.
kale-spinach-bites-raw Take a small spoonful of mixture and roll it into a ball, then roll into your almond flour/Parmesan cheese mixture to evenly coat. Place on a parchment lined baking sheet. You will notice that the mix is very moist and gooey, that’s okay. As long as it sticks together and can form into balls, you’re fine, but if you can’t get them to bind together at all, simply add some more almond meal.

kale-bites-with-parmesan Bake them for about 15 minutes, and set them under the broiler for about 1 minute to increase the browning process. The one side will be really crispy because of the browning process, the other side will be a little less crispy but that’s okay. kale-bites These are rich and creamy and fill a cheesy savory craving without feeling overly indulgent, a perfect treat for the season of celebrating.

Savory Parmesan Kale Spinach Bites
 
Prep time
Cook time
Total time
 
Author:
Recipe type: Appetizer
Cuisine: American
Serves: 24 balls
Ingredients
  • t tbsp each olive oil & butter or ghee
  • 5 ounces of spinach
  • 3 large kale leaves, preferably lacinto kale
  • ½ yellow onion
  • 1 green onion
  • 1 garlic clove
  • 1 egg
  • 1 cup almond meal or hazelnut meal, plus 1 cup more for the coating
  • ½ cup Parmesan cheese, plus ½ cup more for the coating
  • 2 tbsp ricotta cheese, optional
  • 1 teaspoon of desired seasonings, see note above
  • Juice of ½ lemon, about 1 tbsp
  • salt and pepper
Instructions
  1. Roughly chop the onion, kale and spinach. Heat the oil and ghee or butter in a large saute pan over medium high heat. Add in the chopped onion and garlic, and cook until softened, stirring occasionally, about 5 minutes. Add in the spinach and kale and seasoning, and cook till wilted, about 2-3 minutes.
  2. When cooked through, transfer kale spinach mix to the food processor, along with the green onion, and using the chopping attachment, pulse until mixed and finely chopped, about 10 seconds.
  3. Transfer contents to a medium bowl and mix in the lemon juice, egg, ricotta cheese if using, ½ cup of the Parmesan cheese and 1 cup of the almond meal, along with a big pinch of salt and some pepper. Mix until well combined.
  4. Combine the remaining almond meal and Parmesan cheese in a small bowl, along with a bit more salt and pepper, and set aside. Begin rolling 1 inch balls of the kale spinach mix, and then coat thoroughly in the almond meal/Parmesan mix. Place coated balls onto a parchment lined baking sheet.
  5. Bake at 375 for 15 minutes, and then allow them to cook under the broiler set at high for 1 minute.
  6. Serve immediately

In addition to this party-perfect holiday recipe, I’d like to recommend some other savory and sweet treats that other talented bloggers across all types of cooking, have created. Whether you’re looking for the perfect appetizer or something to satisfy a sweet tooth, there are plenty choices below. Take a look and stop on by some of these other great sites:

Savory Treats

Holiday Sweets


Daily Style – Boho Redefined

SHARE THIS +

IMG_8988 IMG_8981 As I near 40, my closet continues to shape itself up in a way I’m happy with. Never one to identify with a “signature style”, my shopping habits, and therefore my closet, has always been a mashup of both feminine and boyish styles; some bold prints tempered back to a endless sea of grays, blacks and browns, and very few pops of color, but the color that exists has proven itself to time and time again, make me feel my best. It’s not like I’m some mystery when it comes with defining my style, it’s more that I can’t make up my mind, and so you’ll often find a little bit of everything hung in closet and folded in my drawers.  IMG_8986

This pretty floral dress is not something I’d typically buy for myself, but both the combination of the color and print, made me feel completely me. My husband agreed, and kept telling me throughout the day how much he loved the dress on me. I rarely dress for my husband, but when we both find something he loves as equally as I do, it’s definitely a nice perk.   IMG_8999

I initially thought I’d wear the dress back to some more masculine motorcycle boots, to add a touch of edge to the soft ruffles and print. But after a few changes, I landed on these very old riding boots, and it seems they do the dress the most justice. As it gets colder though, I think some cable knit sweater tights and those moto boots I was originally thinking of, would be a fantastic way to style this.

In partnership with Zappos, myself and a fellow style-loving blogging buddy, Jennifer of Just Add Glam, did a little shopping for each other. We used Zappos’ site to pick out a couple of pieces we felt would complement their signature style, and hopefully be something they would love. I browsed her site and within 15 minutes, I had a pretty good idea of what Jennifer’s style was all about; feminine styling, colorful pops of color, polished silhouettes and bold accessories. She loves to wear hats and statement jewelry, and she’s got a killer shoe and handbag collection. I’d be lying if I said I wasn’t a bit envious of her wardrobe and her ability to wear heels and dresses, without worrying about chasing after a toddler.  IMG_8991

I initially thought I would gift her a cute handbag and maybe a hat, but since her handbag collection seemed to be vast, and hats can be tricky, almost as personal as finding the right pair of sunglasses, I took my chances with a dress. I chose a knit jersey dress from BCBGeneration because it looked really polished and put together, perfect for Jennifer, but the asymmetrical hemline added a touch of uniqueness to her usual mix of dresses with fuller skirts or bold colors. To complete the gift, I thought this beaded Kenneth Jay Lane necklace was spectacular and would really stand out against the black dress. You can see how she styled it in her post here.

In return, Jennifer gently nudged me out of my comfort zone by gifting me this gorgeous dress by Free People, along with the prettiest complementing accessories. The necklace is by Vince Camuto and is a simple long gold pendant, and I’ve been wearing it daily back to a simple white tee or as seen here, dressed up a bit more. The infinity scarf  by BCBGeneration is a great add-on that works perfectly with the colors of the dress, and works just as well with a chambray shirt and comfy jeans.  IMG_9015

Zappos offers free (2 day!!) shipping and no hassle returns 365 days of the year. You can find a heck of a lot more than shoes on Zappos these days, and they’ve curated one of the most well-thought out collection of brands and items I’ve seen on a shopping site in a very long time. Ordering couldn’t be easier, as are returns, so rest assured that whatever you gift to your family or friends, can easily be returned for something else they love or need. To find great gifts for everyone on your list, in every budget category, visit the Zappos gift guide. Also, for the first 500,000 orders placed between Black Friday and the end of business today, Zappos will donate $1 per order to Feeding America, so you know I love that. That’s up to 5 million meals!! I love doing good while shopping all at the same time.

This post is sponsored by Zappos, but all opinions are my own. Thank you for supporting the brands that help make this blog possible.


Daily Style – Perfect Pleat

SHARE THIS +

IMG_8790 Midi Pleated Skirt – Target; Short Sleeve Tee – Splendid; Bag – Nordstrom, also seen here and here; Shoes – Shoemint Faith, on sale for $34.99!; Necklace – Vince Camuto

I’ve had a love interest in midi skirts for a couple of years now, as evidenced here and here. The problem is, it’s hard to find a good midi skirt that is both flattering and affordable, and most mainstream stores don’t regularly carry them in-store to try on for yourself. So I’ve ordered several online, and most go back because the fabric is weird or the waistband is too poofy or whatever. For years I longed for a good midi skirt to be carried someplace like The Gap or Target.

Finally, my wish was granted and I happened on this cute burgundy midi skirt piece of perfection at Target, for $19.99!
IMG_8799 There’s a lace slip underneath so just the tiniest bit of lace peeks out along the hemline. and the fabric is lightweight so it moves beautifully. Granted, the fabric is a little on the cheap side and I don’t anticipate this skirt lasting me for years and years, but I should get some decent mileage out of it.
IMG_8805 I love a full midi skirt back to a sleek top, but decided to try it here with a looser fitting tee, and I love how it worked together. Added a simple skinny black belt and it was the perfect little outfit. I think I’ll wear this for Thanksgiving in fact. IMG_8809 IMG_8810 What are you all planning for Thanksgiving this year? Staying close to home or traveling? Anyone in charge of cooking the big feast? We’re going to my sister’s house and I’m luckily only in charge of bringing a couple of sides and the fixings for my Apple Cider Moscow Mules. I think I could bring those alone and everyone would be happy! IMG_8818 Wishing you all a wonderful week and a lovely holiday with family or friends, or both!


DIY Home Hair Color by Madison Reed

SHARE THIS +

IMG_8766 The women in my family have been dying our hair at home for as long as I can remember. A visit to my Grandma’s house involves as many memories of her feeding me homemade enchiladas as it does watching her walk around with a plastic shower cap on her head, waiting for the coloring process. The women in my family go gray early, like in their early thirties, and so a lifelong of coloring treatments at a salon when you start that early, adds up. Therefore most of the women, including my grandma, aunties, mother and my own sister, have long dyed their own hair. All this to say, I grew up around the idea, and started dying my own hair when I was 16, so I’ve never been intimidated by the process, having watched it hundreds of times. My stylist has been dying my hair for the past couple of years, but it’s cost prohibitive to maintain the lovely color more than about 3 times a year, so for many months of the year I walk around with a sad looking, faded color.

When I learned about Madison Reed, and read their commitment to providing an easier at-home coloring experience, that was better for you, I was all ears. The grays were coming in fierce and my hair was looking more orange these days than a lovely chocolaty brown, and of course the holidays are always a good incentive to save some cash. During crunch time, I’ve always gone back to dyeing my own hair, as it’s a fairly easy way to cut a luxury item out of the budget, but with my recent commitment to detoxify my whole beauty routine, I wasn’t sure where to even begin on finding a beauty supply store brand that I could trust. If you’ve ever dyed your hair at home, you know all too well the fumes and stinging scalp that comes along with the process, all signs that you’re subjecting your body to something not so good for you.  IMG_8632 Enter Madison Reed. Before we get started on the tips for dying your hair at home, I wanted to point out some of the biggest (and important) benefits of Madison Reed, so you don’t miss them.

  • Madison Reed just added five new colors, which expands their line to a total of 32 shades – all 32 colors are PPD, resorcinol, ammonia, and paraben free.
  • Madison Reed hair colors are instead enriched with Ethanolamine, Micropigments, Keratin, Argan Oil and Ginseng Root.
  • Instead of ammonia, they use Ethanolamine which gently swells the hair shaft to deposit color in the cuticle. Ethanolamine has no pungent smell and does not dramatically increase hair porosity, leaving hair stronger and allowing hair to hold color longer.
  • Keratin is a naturally occurring protein in hair, and is added to replenish lost protein, restore your hair’s natural elasticity, and prevent breakage and hair loss. 
  • Argan Oil is a plant oil produced from the kernels of the argan tree and contains high levels of vitamin E, carotenes, and phenols that contribute to its moisturizing properties, and helps restore shine, softens hair, and leaves hair feeling silky.
  • Ginseng Root rejuvenates the scalp and hair follicle to add volume.
  • Each of color is a blend of three unique tones that create one rich, multitonal shade by introducing natural-looking highlights and lowlights – an effect previously only achievable in salons

All these bullet point benefits mean that there is no noxious smell during the coloring process, no scalp stinging during or after the process, no allergic reactions, no fear of hormone disruptors or harsh preservatives, and beautifully rich color that leaves your hair feeling shiny and soft. That is not a quote from the company, I wrote that all by myself because it is 100% true. It’s also cruelty free. After using this product, I can’t tell you how much I love it. I’ll admit I was a bit skeptical about how well it would work without all the “chemicals” I’ve come to rely on from a hair dye, but I keep touching my hair because it looks and feels so good! IMG_8631 The concept of Madison Reed is to not only bring you safer hair color, but to also dumb down the process to make it fail-proof. No tiny pamphlets to unfold and pour over the directions; all you need to know about how to dye your hair is written and illustrated out in a 5 step process, right in the packaging. You seriously can’t do this process wrong. Everything you need including the supplies, are all included in your package; gloves, barrier cream to put around your forehead and ears, a cleansing wipe for touch-ups, a cap, and even a generous sized bottle of shampoo and conditioner, good for multiple washes.  IMG_8639  Some tips to help you feel comfortable with the process, since I’m assuming many of you have never colored your hair at home before.  Untitled-1 If this isn’t the first time you’ve dyed your hair and you have grow-out at the roots, you’ll want to apply your color to the fresh new hair at the roots, and leave that in for an extra twenty minutes. If this is your first time dying your hair, then you can just apply the color all over. But assuming you’re not a color virgin, this is the process I use. First, divide your hair into sections, as instructed, and you’re ready to begin coloring. After having watched the women and my family and my own colorist hundreds of time, I’ve found the easiest way to apply the strips of color on your roots is to use the tip of the applicator, as a comb, to create small parts along the hair line as you go, then apply the strip. Dab the strips of color with your fingertips to make sure it absorbs into your roots, and then flip that strip of hair over, and proceed onto the next section of hair, working in many multiple rows.   madison-reed-diy-hair-color Getting the back of your hair is admittedly the trickiest part since you can’t see divide your hair into rows as neatly, but the good news is the underside of your hair will hardly ever get seen, so even if you don’t do a “perfect” job, you should be okay. Once all your roots are covered with the dye, do little touch ups around the front of your hair line, and dab in the color. Now you let your color sit on your roots for 20 minutes. IMG_8723 IMG_8726 Once your roots have sat with color for 20 minutes, you want to apply the rest of the color throughout the hair. I used about half the bottle for my roots, which need the color the most, and the other half for the remainder of my hair. Once your hair is all saturated with color, simply comb it through as best you can with a large toothed comb, and then cover your hair with the cap. Let it sit on your hair for 15 minutes, but with the root and all-over hair color process, don’t stress about getting the timing exactly right. I used to be freaked out that if I left the color on my hair for an extra 3 minutes it would all fall out, but I have never had that problem. The barrier cream worked really well at removing the color inevitably left along my hair line, but the cleansing wipe was the back-up to removing any stubborn stains. You can see the difference between the photo above and below.  IMG_8740 I should also mention at this point that it is extremely helpful to wear a button down shirt when dying your own hair, because then you can easily take it off when it’s time to get in the shower and rinse your hair color off; no fussing with trying to get it over your colored hair. Also, it goes without saying that you should either use an old shirt you don’t care about, or cover your shoulders with an old bath towel to protect your shirt. When it’s time to wash out the color, you can try to do it in a sink but I’ve always found it much easier to just hop in the shower and hose off haha. The color running down your shower does not stain, but I do recommend using an older towel to wrap your hair in, as there is sometimes residual dye that comes off your wet hair the first 2-3 washings; I notice this even when I get my hair dyed at the salon, just par for the course.

Hurry and dry and style your hair as usual so you can see your beautiful color come to life. I used Catania Brown to color my hair, because I wanted a rich brown color that was a little lighter on the color spectrum, as I tend to get washed out during the winter months when I go too dark. Photos from high school of my wannabe punk days when I dyed my hair a brown so dark it was almost black, confirm I don’t look my best with deep dark colors. The hair color advisor shows each color on different hair styles so you get a good idea of what the color will look like in real life. I was nervous not choosing a color from a swatch of hair as I normally do in the beauty supply store, but it turns out the color finder system was really helpful, as the color came out exactly as I had hoped.  IMG_8770 And not only did the color come out amazing, the texture of my hair feels just like it does when my colorist does it in his salon; silky, shiny and moisturized almost like there’s a coating on it. That shine and texture you get from a proper salon coloring, is one of the biggest reasons why I color my hair.  IMG_8754 IMG_8753 I seriously couldn’t be happier with the way my hair came out, and I think my colorist is going to be bummed that I’ll be seeing him even less now. But since I can’t yet cut my own hair, he’ll still get plenty of my money.

For 50% off your first coloring purchase at Madison Reed, simply type in BETTERCOLOR at checkout. You can try just one box for $29.95, which will obviously be just $15 with the code, or get on a regular color delivery plan with deliveries every 3-10 weeks, for $24.95.

This post is brought to you by Madison Reed, the revolutionary new hair color that’s better for your hair. Click here to learn more about Madison Reed. All opinions are my own. Thank you for supporting the brands which help support this site. 


Harvest Carrot Quinoa Salad

SHARE THIS +

Roasted Carrot Quinoa Salad I think a lot of times I get hung up on thinking that Thanksgiving is a time for indulgence as much as it is about being grateful and spending time with my loved ones. I’m all for going along with traditions, but sometimes I also think there is a place for new traditions to be made. At my house we like to experiment with new recipes and we even have a yearly informal recipe contest. Along the way we’ve found some new recipes that we just love and the stories of their origin become part of the bigger story. If you couldn’t tell, we take Thanksgiving very seriously. I think there is a place on the table for a non-traditional sort of recipe, like this Roasted Carrot Quinoa Salad. It’s a salad, yes, but it’s incredibly hearty. And if you’re leaning towards giving your Thanksgiving menu a little healthy revamp, this would be a great side to add to the list.
Roasted Carrot Quinoa Salad Ingredients I was sort of channeling Ottolenghi when I was putting this salad together. There’s a hint of earthy, spicy cumin and coriander in the fresh lemon vinaigrette. The pomegranate arils add a sweet, vibrant burst with every bite. The carrots become tender and caramelized in the oven. I found some gorgeous heirloom red spinach that make a great leafy base, but any of your favorite leafy greens would work here. The protein-rich quinoa makes it hearty and filling. And of course, golden raisins and sliced almonds round things out. Healthy Roasted Carrot Quinoa Salad-2 This can be made several days in advance. The salad should be dressed just before serving, however, if you do plan to make it ahead. Also, add the spinach right before serving. It’s pretty tender and wilts easily. Leftovers will keep for several days stored in an airtight container in the fridge.

Note: Butternut squash can stand in for the carrots, and bulghur could be used instead of quinoa.

What must-have sides are always on your Thanksgiving table? Or do you like to mix it up and try new recipes? Healthy Roasted Carrot Quinoa Salad

Harvest Carrot Quinoa Salad
 
Prep time
Cook time
Total time
 
Author:
Recipe type: Main
Cuisine: American
Serves: 6
Ingredients
  • 1 cup red quinoa
  • 2 cups vegetable broth
  • 1 pound rainbow carrots (about 5-6), peeled, sliced into ¼" rounds
  • 4 ounces fresh spinach (I used red heirloom)
  • ½ cup fresh pomegranate seeds
  • ½ cup sliced almonds
  • 2 Tablespoons plus 2 teaspoons olive oil, divided
  • 2 Tablespoons fresh lemon juice
  • ½ teaspoon ground cumin
  • ½ teaspoon ground coriander
  • Salt and pepper, to taste
Instructions
  1. Preheat oven to 425°F. Line a rimmed baking sheet with parchment paper.
  2. Place quinoa in a fine-mesh sieve and rinse well. Transfer to a 2 quart pan and add the vegetable broth. Bring just to a boil, then lower heat to simmer. Cover and let cook for 15-20 minutes. Remove from heat and set aside.
  3. Meanwhile, toss carrots with the 2 teaspoons olive oil. Place on prepared baking sheet. Roast in oven for 20 minutes, or until tender. Remove from oven and let cool slightly.
  4. In a large serving bowl, toss spinach with the cooked quinoa. Top with the roasted carrots, pomegranate and chopped seeds.
  5. Whisk together olive oil, lemon juice, and cumin. Season with salt and pepper. Pour over the salad and gently toss. Serve immediately or cover and refrigerate until ready to serve.
  6. Leftovers will keep for several days in the fridge. To keep longer or make in advance, do not add the vinaigrette until ready to serve.


Apple Cider Moscow Mules

SHARE THIS +

apple-cider-mocow-mules-1 When I was in Lake Arrowhead with my boot camp group for Oktoberfest, I made my first ever Moscow Mule. I didn’t realize how crazy easy they were to make, as the copper mugs they are traditionally served in, always made them seem like some elusive, intimidating cocktail that only the hippest of bartenders could master. But nope, all it is is some vodka, fresh squeezed lime and ginger beer. So easy to make that it in fact doesn’t seem all that special without the copper mug, and I even went as far as throwing my own Moscow Mule into a Powerade bottle and smuggle it into Oktoberfest. It was a wild group of girls, and I was a much more daring version of myself for 36 hours. I even competed in a sauerkraut eating competition. Anywayyyyyssss… apple-cider-moscow-mule Back to the mules. To give them a seasonal twist, I swapped the lemon juice for the apple juice, and added some fun cinnamon and apple garnish. This version is just as easy to make as the original, and can be made for single servings or in a big batch, as I did on Halloween night.  apple-cider-moscow-mule-ginger-beer apple-cider-moscow-mule-ingredients You can use either unfiltered, not from concentrate apple juice, as that always has a stronger flavor than regular apple juice, or you can use actually apple cider, but don’t use sparkling apple cider, since you’ll already be getting fizz from the ginger beer. You can also infuse your vodka with ginger for an added punch, by adding a good knuckle size peeled knob of ginger to a mason jar full of vodka, and let it sit over night. If you have a juicer, you can also juice some ginger and add that to the cocktail shaker for am enhanced ginger flavor. apple-cider-moscow-mules-garnish apple-cider-mules I made a batch where I added the ginger beer to the whole mix, and that was a rookie mistake. It tastes much better if you add the ginger on top right before serving, and then you can stir things around a bit with your cinnamon stick swirler. Cinnamon sticks can be found on the cheap in the Mexican food aisle in any major grocery store, by the way. Feel free to slice your apples or use a peeler for an apple “twist.” Whatever you do though, make sure you drink these slow, because they’ll kick you with a punch after downing one too quickly, they go down that smooth. By the way, I got my Moscow Mule Mugs on Amazon and they were about $10 cheaper last week when I ordered them, and now I see they’ve jumped up in price. They’re still a fair price at $51 for a package of 4 16 ounce mugs, but I hear Target has them for $10 a piece, not sure what size they are. I searched around though, and these seemed to be the average going rate. The mugs don’t change the flavor of the drink, obviously, but they make it more fun and festive for sure.
apple-cider-moscow-mules

Apple Cider Moscow Mules
 
Prep time
Cook time
Total time
 
Author:
Recipe type: Drinks
Serves: 1
Ingredients
  • 4 ounces of apple cider or unfiltered apple juice
  • 4 ounces of vodka, preferably infused with ginger *see note in text
  • 2 ounce splash of ginger beer
  • ice, cinnamon stick and apple slices for garnish
Instructions
  1. Mix the ice, vodka and apple cider in a cocktail shaker and mix vigorously. Pour over ice in a mule mug, and top with a heavy splash of ginger beer. Garnish with cinnamon stick and apple slice.
  2. To make this for a large party, pour equal parts vodka, about ½ pint, and apple cider in a beverage container. Mix with ice, and when ready to serve, simply pour mix over individually cups of ice, and then top with ginger beer. Do not add ginger beer to large batch of vodka/apple cider. Leave a tray of garnishes out and allow guests to top off their own.


Daily Style – Casual Snakeskin

SHARE THIS +

IMG_8292 Python Leggings – Splendid LA also available at Nordstrom; Cashmere Blend Dolman Sleeve Sweater – Splendid LA also available in Charcoal at Nordstrom; Sunglasses – Ray-Bay Wayfarer 51mm; Booties – Sam Edelman Petty; Reversible Faux Leather Tote – Nordstrom


Over the weekend, Kristen hosted a Splendid event at the Fashion Island mall. It was family-friendly and they were having crafts and such, so I decided to take Taylor and Hayden since Syd would be at a Cub Scouts event. Taylor loved the craft Open House Creative whipped up, and I loved these damn snakeskin leggings!  IMG_8293 They have some sort of a terry type backing, giving them a little more structure than your standard legging, and the added size zip makes these feel more like a jean or pant than regular leggings. But they’re just as comfortable as regular leggings, therefore a win-win on all accounts. They sort of remind me of the pajama jeans as seen on TV, but much more stylish and better overall. Okay, that was a really poor comparison. Let’s say they are just damn comfortable.
IMG_8498 I do not like showing off my bootie in most cases, so I paired it back to a very loose and longer cashmere-blend sweater, and wore the whole look back to the classic Petty booties. Three years later and these booties just won’t quit.  IMG_8525 And of course the great reversible tote bag is going everywhere with me these days. I can stuff tons in it, and last week Hayden spilled his juice all down the inside, and the only thing to get ruined were the entire contents of my bag, but not the bag itself, so that’s a win! Always gotta look on the bright side, am I right?  IMG_8538 Hope you all are having a great week. I’ll be back tomorrow with an apple cider Moscow mule recipe, so stay tuned!