Week In Review – Spring Favorites

SHARE THIS +

Weekly-Loves---Spring-Favorites Hi guys, and Happy Friday! Before I go on, can I just remind you all to enter this giveaway, for $100 credit to Kika and a beautiful gift basket from LaFresh? Also, I’m just 2 away from reaching 2000 Facebook fans on my page. I’d love to reach it this weekend!  Thanks in advance. Okay, moving on.

I’m deep in the throes of party prep for the Cricut party I’m hosting tomorrow night at Oh Hello Friend’s studio. It will be a fun evening spent with friends and family, some who I’ve known for years, and some who I’ve been lucky enough to meet through blogging. It’s a day busy with spray painting and making desserts, but I still wanted to share a few things I’m really enjoying these days, and cute things I’ve found around the web.

1. This baseball tee from J. Crew is fantastic. It fits perfectly, it’s really soft, and is 25% off. This will be a Spring favorite, most definitely.

2. I don’t own these sandals, but they sure are chic, right? And quite affordable considering they look very high-end. The Lacey from ShoeMint.

3. I do own a pair of these Painted Bird hand-crocheted sandals though, and I am thoroughly enjoying them. Made in India, I found them at the Penelope Lane Boutique last weekend and have barely taken them off since. They are also having a 25% off discount code this weekend. I have the Mermaid color way and love it, but this more neutral pair, with a pop of color, are pretty too. They run big so size down!

4. I bought this nude Mac lipstick in Blankety a few months back, but have mostly been wearing it in the past few weeks. It’s a nice neutral shade for Spring and Summer.

5. My birthday is next week, and I’ve put rings from Another Feather on my wish list. This trio stacks beautifully.

6. Aren’t these hand painted wooden Easter eggs just gorgeous? There’s more designs too!

Other stuff I’m digging:

  • This article titled, The Terrible Tragedy of the Healthy Eater, is the best thing I’ve read so far this year. Definitley tongue in cheek, I can relate to so much of it. I think us healthy eaters can be our own worst enemies, at times, and can demonize just about any food, if we try hard enough. Like my friend Mary said, “Makes me feel part of a well-meaning anxiety tribe.” Touche.
  • These Easter basket filler ideas are great. Very cute and creative.
  • This carrot cake sure is cute.
  • New Parenting Study finds that if American parents read one more long-form think piece about parenting they will go fucking ape shit. Damn right.

Have a great weekend everyone!


A Backyard Dinner Party

SHARE THIS +

Mark'sBday-1019 It’s been a little over 6 months since our very good friends moved cross country to Memphis. In a way, I think it’s natural to say that life has resumed as normal since they’ve left, but in so many ways, and quite often, we feel their absence. If just the kids were friends, or just the parents, it would be a different story, but when the entire family is close, it makes their absence that much more obvious. But we focus on the positive, and skype when we can, and the kids write letters back and forth, and we do our best to keep in touch, although it takes no work at all to keep the bonds of friendship tight. We’ve seen our friends 3 times since they’ve moved, and each time we just pick up right where we left off. I had a dream the other night that they moved back to California though, and it was so real, I think it just may happen. Mark'sBday-1026 They visited last month for their spring break, and since their visit was right around Dr. Mark’s birthday, we decided to host a surprise party for him, adults only. I had every single intention of keeping this small dinner party a very casual affair, and in fact 2 days before the party, I hadn’t done much more than order the food. But the night before the party, I decided that this was a special occasion that required a bit of extra attention. Since the weather had been beyond glorious in California, we moved the party outside, and the day of the party I ordered a few simple flower arrangements and rented white table cloths. It was rushed and frantic in the last hour, but no one knew the difference, and the results were so impressive, yet so simple and easy to achieve, I wanted to share with you a few simple things I did to make the tables glow and the mood feel a bit more elegant, yet still casual. Mark'sBday-1011 The key to those beautifully glowing tables were 2 strings of white twinkly lights, hooked up to an extension cord we ran along the ground. You can order white twinkly lights on Amazon, or Target often stocks them year round. We bought ours during summer last year and took them on our Yosemite camping trip, and just leave them in the garage all year round, in a place that’s easy to reach. Twinkly lights, as you know, can transform a room for a special occasion, and they did just that here.

Once the white lights were strewn along the center of the table, I laid out some smilax I had purchased from my local florist for $15. It is a very wispy leafy green that can easily be hung together or laid out in patches to resemble garland. This was laid over the white lights so they glowed from underneath, and the greenery added depth and filling to the table, since I only purchased 3 small floral arrangements. The tables, when put together, spanned over 16 feet, so we had a lot of space to fill in, but didn’t want to spend a lot of money. The smilax worked like a charm.
Mark'sBday-1008 In between the floral arrangements, and nestled in between the lights and smilax, we lit about 20 small votive candles. They provided a nice flicker on the table, for about 2 hours, but then of course they burned out. But the white twinkly lights still kept the table glowing beautifully.

The large bulb lights hanging above the table are always hung and we light them up when we go for a night swim. We bought them over 5 or 6 years ago on Amazon, and they’re still going strong. They’re called cafe lights, and ours pretty much look like the ones you see here. There are large size bulbs that are usually hung at restaurants and such, but these smaller ones light up quite nice and are more affordable.
Mark'sBday-1020 Mark'sBday-1017 We had a looped play list going throughout the night, and the night stayed so warm, we even felt too hot by the fire pit. We never needed to turn on the outdoor heater. Of course now it’s turned cold(ish) again in Southern California, and I’m looking at these photos longingly. But we’ll have more of the same soon, so I’ll just cozy up and be patient. Mark'sBday-1023 Of course all of these little details may seem silly and unnecessary, but I loved putting in a little extra effort for friends who mean so much to us. The result was very much worth it in the end. Mark'sBday-1033 It was a wonderful visit, and I’m already daydreaming about the next time we get to spend time with our friends again. These photos perfectly captured such a beautiful night for us all. Until next time.

Photos courtesy of M. Shanti Photography


Almond & Date Smoothie, With Maca

SHARE THIS +

Almond Date Smoothie With Maca Some days, you just can’t look at another leafy green vegetable based smoothie or juice. Some days you miss the old you, who’d stroll through McDonald’s on a Tuesday afternoon and order a McFlurry and fries on the side, to dip in my McFlurry. Sigh.

But then you remember you invested in that fancy Vitamix and so you better put it to good use, and you’ve sort of committed to this healthy lifestyle thing, so you make yourself a smoothie that is still healthy and nutritious, but feels a little decadent too. That’s where this smoothie comes in. The other day Hayden and I stopped for a snack, and I ordered a very similar smoothie from the juice bar. I took note of the ingredients, and went home to see if I could recreate my own version. After a couple of attempts, I landed on this concoction, and it couldn’t be more delicious. Almond Date Smoothie With Maca This smoothie is filling, and would make a really good breakfast on the go, or when you need a comforting mid-morning snack. The day I ordered it, I was in need of some comforting, it was just one of those days, and this did the trick. Almond Date Smoothie With Maca Ingredients You’ve probably noticed that I added maca powder to this smoothie. Is it entirely necessary to get the same taste? Definitely not, but if you’d like to see if you can reap some of the reported benefits of maca, you can certainly give it a try. A note on the ingredients:

Maca: A plant that grows in the Andes mountains, maca is believed to improve energy, enhance mental clarity, and improve libido in both men and women. While all evidence is anecdotal and not scientific, a lot of the readers who commented on it on the GMMDI IG feed reported experiencing vast improvements in energy and sexual interest. There are no harmful side effects, so if you can afford the $20 price for a bottle, it definitely couldn’t hurt. I spoke to a gentleman at Lazy Acres though, and he did recommend buying the gelatinized form of the powder, as the raw powder can be harder to digest, therefore making it harder for your body to absorb all the nutrients and benefits. Maca is not recommended for pregnant or nursing women.

Almond Breeze Almond Milk: Almonds are naturally low in sugar and a great source of nutrients including fiber, protein, monounsaturated fat, manganese, magnesium and copper, just to name a few. Of course it is also dairy-free and great for vegans and those who are lactose intolerant, and is a great source of calcium, with fewer calories than milk. We drink both cow’s milk and almond milk in our family, but for our smoothies, we always use almond milk because it gives them a lighter texture and adds a nice distinct flavor.

Almond Butter: Nutritionally, almond butter and peanut butter are almost identical, although almond butter does have a slight advantage over peanut butter in terms of a few vitamins and minerals including Vitamin E and magnesium. Both are great though, so you can use either one here, although if you’re following Paleo, you obviously want to just stick to almond butter since peanut butter is a legume, which is forbidden on paleo.

Cayenne: Even just a pinch of cayenne can be beneficial. Cayenne can help relieve pain, aid in appetite suppression, and is even sometimes used to treat psoriasis. Almond-Date-Smoothie-With-Maca If this smoothie sounds like it’s something you’d like to make out with, or at least take on a date, see the recipe below, and please let me know if you give it a try. Happy Wednesday friends!

Almond & Date Smoothie, With Maca
 
Prep time
Cook time
Total time
 
When you're craving something indulgent, yet still nutritious, this smoothie hits the spot.
Author:
Recipe type: Smoothie
Cuisine: Healthy
Serves: 16 ounces
Ingredients
  • ¼ cup Dates, pitted and roughly chopped
  • ½ cup Oats, can be quick or slow cooking
  • 1 tsp Maca powder, preferably gelatinized
  • ½ tsp Cinnamon
  • ⅛ tsp Cayenne pepper
  • 3 tbsp Almond butter
  • ½ cup Almond Breeze Almond Milk
  • ½ cup shredded unsweetened coconut
  • 1 whole ripe banana
  • 1 cup ice
Instructions
  1. Place all ingredients in a powerful blender and blend until smooth.

Almond Breeze This post was sponsored by Almond Breeze Almond Milk, although all opinions expressed are my own. I’d like to thank Almond Breeze for their support, so I can develop some wonderful recipes for you all over the next several months. If you would like to see the other recipes I created in the month of March, using Almond Breeze Almond Milk, you can visit my Instagram where I provide the recipes within each post.

On St. Patrick’s Day I made a Lucky Green Smoothie using peaches and kale as the base fruit and veggies., and over the weekend I made a delicious batch of Strawberry Chia Pudding. I’m most appreciative that Almond Breeze is a sponsor, so I can devote some time creating great recipes I can share both on my blog, and on Instagram!


Final Giveaway – Kika & La Fresh

SHARE THIS +

I have one last giveaway for you all, before we head back into regularly scheduled posts. This past week has been exciting and exhausting. Launching the redesign was almost like starting from scratch because of all the new features and design details we incorporated in, and it still needs some tinkering. But I’m so, so thrilled with where it’s at right now, and appreciate all the kind words you sent my way. The two winners of the first 2 giveaways have been announced on each post, and emails have been sent out. You can check to see if you were the winner here and here. If you didn’t win the first 2 sets of prizes, there’s one last wonderful opportunity for you to win some amazing items right here. Alice-Ink-Frontjpg Los Angeles based clothing designer Kika is a mother/daughter duo who design all of their creations with sustainability and environmental impact in mind. All fabrics are eco-friendly including 100% organic cotton and Tencel, and all their clothing is sourced and produced in the United States. Local, sustainable, eco-friendly, Kika stands for and upholds all the principles which are so important and necessary in this world of fast-fashion. Kika is giving away a $100 shop credit to anything in their store. LA-Fresh La Fresh is also based locally in Southern California, and I was fortunate enough to meet their reps at ExpoWest, and I was immediately drawn to their company values and mission. I took home a few samples, including their travel size face wipes and makeup remover, and within a few days I contacted the company to see if they’d offer up this giveaway, because I knew you all would love their products too! La Fresh offers a wide range of all natural beauty products that are conscientiously produced and sourced, and use considerable less packaging and water than many other beauty brands. They’re affordable too. They’re offering up this wonderful basket of goodies including travel wipes, face cleanser, makeup remover pads and nail polish remover pads.

You can enter this last giveaway below, but please note this is open to US residents only. Giveaway closes on Sunday April 6th at 11:59 pm.  Good luck!
a Rafflecopter giveaway


Ascot + Hart Giveaway

SHARE THIS +

Ascot-and-Hart The next giveaway I’m excited to tell you about, is from the always stylish and lovely ladies of Ascot + Hart. Laura and Jen are giving away one of their newest tees from their line, plus a fab pair of shoes. The Love Is Always On Time tee is super soft, thanks to a special enzyme wash treatment, and features a slightly looser fit than a typical tee. They’re also giving away a pair of canvas booties, perfect for spring to summer shoe, in a sunset red graphic print.

Enter to win right down there

a Rafflecopter giveaway


New Design & A Giveaway To Celebrate

SHARE THIS +

Hello and welcome to the new For The Love Of! I’ve been working on the new site with my lovely and talented designer Sara Jensen for the last two weeks, and I couldn’t be happier with how it came out. When I reached out to Sara, looking for a new design, I had several major objectives in mind; make the site wider and feel more open, make it easier to navigate, and make it a space where I can feel just as comfortable writing about food as I do style and DIY. I also wanted to keep the logo Alex of Type A Calligraphy originally designed, just tweak it a bit. I think we’ve achieved the objectives.

The section I am most excited about is the new project galleries in the top navigation bar. If you click on any of those links, you are given the option to view posts in a grid or in a stream. Categories like DIY, Food & Wellness, and Personal Style are best viewed, in my opinion, as a grid. This will allow you guys to quickly and easily find a project or post you may be looking for, or find a few new posts to browse, which you may have missed. The Life With Kids category is probably best viewed as a standard streaming blog.

I still have some things to fix, including re-tagging a lot of posts I’ve missed, and adding featured images to many older posts. When viewing the gallery, you will notice that a lot of the older posts are missing their thumbnails – I’m working on adding all those, but for now, most things are able to easily be viewed and found.

Another very exciting feature is the addition of printable recipes! This feature is for now, only available on new posts going forward, but if I find some time I may go back and and recode old recipes to make them printable. We’ll see how that goes. Going forward, I’ll be adding a lot more recipes, and expect to find some amazing posts by my new Food Editor, Lindsey Johnson of Cafe Johnsonia. Her first post, an Early Spring Salad, is already published and ready to go. It looks amazing and I feel very honored to have her on board.

A couple of new DIY’s have been posted for you to browse. Alix is still on board as my DIY Contributor extraordinaire, and her latest post, Geometric Wall Art, is amazing as usual. I published a new jewelry DIY as well, and it is as easy as it is cute. You’ll find the tutorial for the Gold Chain Bracelet below, or by clicking here.

I continue to get lots of questions on my Gwyneth Made Me Do It Instagram account, many of them the same, so I’ve added a FAQ section, and will be listing new questions/answers as they arise or I think of them.

There are still some kinks to work out over the next couple of days, but we’re on our way, and to celebrate, I’m hosting some great giveaways over the next couple of days. I think you’ll really love all the items that are up for grabs, and each offer up something unique. Today’s giveaway caters to the little ones, but don’t worry, the remaining giveaways are all about you ladies. Clothes, shoes and some beauty items, so please make sure to come back and visit each day. First up, a giveaway worth over $300. One winner will win the following items. givwaway2 1. $50 Little Hip Squeaks gift credit for any item of your choice. I love Amy and the brand she’s built, and have treasured every piece I’ve bought for Hayden this past year. I am also a new contributor for the LHS blog, and couldn’t be more honored! 2. SiliSqueeze pouch of your choice. While browsing the ExpoWest booths a few weeks back, I spied this product from across the floor, and rushed over to find out all about it. An eco-friendly feeding pouch, these essentially allow you to feed your babes and kids homemade or premade foods like applesauce, yogurt and smoothies, in an easy to squeeze, spill proof pouch. You get to control the ingredients, and save yourself a lot of money in the process. 3. $75 Land Of Nod gift credit for any item of your choice. You know I love The Land Of Nod, and their commitment to good design and the support of small entrepreneurs. I am honored to have their continued support. 4. Mothers Organic item of your choice (may we suggest a carrier?)  Mothers Organic is an online store specializing in eco-friendly and organic products for moms, babies, kids and families. Their selection is amazing, and their owner is wonderful and wholly committed to the care and support of eco-friendly companies. 5. $100 gift credit to shop Tea Collection. I am a devoted Tea Collection fan and have clothed all three kids in their items since Taylor was born. You will love anything in their store.

For a chance to win, simply enter below. Good luck everyone! The giveaway is open to US Residents and will run through next Monday, March 31st and closes at 11:59 pm.
a Rafflecopter giveaway


Early Spring Salad

SHARE THIS +

early-spring-salad-beets-celeriac-fennel-2
Spring is wonderful, isn’t it? I feel like it’s a small gift from the universe to keep me going until summer arrives. As someone who loves to cook (and eat) it also means fresh fruits and veggies will soon start reappearing at the farmers market. Now I live near the mountains, so it’s still pretty cold where I live for a good part of the year. It can be very hard to come by fresh, locally grown produce during the winter months. I admit that I grow weary of roasted root vegetables and squash. I’m tired of hearty soups and stews. (Well, almost.) What I really want is raw, bright salads. And during these early weeks of spring, I know I can rely on mixing winter and warmer weather produce – it kinds of bridges the gap in a way. So I’ll keep eating tasty root veggies a little bit longer, but I might just give them a little springtime flair by adding microgreens. This Early Spring Salad is wonderful. I haven’t been a fan of beets for very long, but I will tell you that if I hadn’t already started trying to love them, this salad would have been Cupid’s arrow. early-spring-salad-beets-celeriac-fennel-3 I like salads with crunch. I like salads loaded with different flavors, textures, and colors. This salad fits my criteria. Celeriac (celery root) is one ugly root veggie, but it’s absolutely incredible. I love it cooked – it goes well with potatoes, but it is refreshing raw. The light celery flavor goes splendidly with the shaved fennel and shredded beets.
early-spring-salad-ingredients-2 The goat cheese adds a nice creamy, tangy element and the nuts are for texture. It’s great with hazelnuts, but just about any nut would do. And really, after that, all it needs is a little coarse sea salt, fresh ground black pepper, a squeeze of fresh lemon juice (orange would work too!), and a drizzle of good olive oil. It’s pretty simple and tastes fantastic. It’s also good served over your favorite baby greens. early-spring-salad-ingredients Tell me – how do you bridge the gap between winter and spring? What are you most looking forward to? early-spring-salad-beets-celeriac-fennel

Early Spring Salad
 
This early spring salad combines the best of winter; crunchy root vegetables, with just a hint of Spring added in, by way of microgreens. It lets your taste buds know Spring is on its way.
Author:
Recipe type: Easy
Cuisine: Salad
Serves: 4
Ingredients
  • 1 small celery root
  • 1 large beet
  • 1 medium fennel bulb
  • 1 cup microgreens (or other sprouts)
  • 3-4 ounces fresh goat cheese, crumbled
  • ½ cup chopped nuts (hazelnuts, almonds, walnuts, pecans)
  • Juice of 2 lemons, divided
  • Olive oil, for drizzling
  • Coarse sea salt and fresh ground black pepper, to taste
Instructions
  1. Prepare the veggies - peel the celery root and beet. Shred or grate into separate bowls. (I used the grating disk for my food processor.) Squeeze half of one of the lemons over the shredded celery root and toss to coat. This will prevent it from turning brown. Cut the stalks and leafy top of the fennel off of the bulb. Cut the bulb in half and cut a V into each half to remove the hard core. Discard the core. Using a mandoline or a sharp knife, very thinly shave or slice the fennel. (It doesn't matter if it's cross- or lengthwise.) Place in another bowl and squeeze the other half of the lemon over the top and toss to coat. This will also prevent browning.
  2. Assemble salad - have four salad plates ready. Layer the beets, celeriac, and fennel onto the plates. Top with some of the microgreens, crumbled goat cheese, and nuts. Season well with salt and pepper, then squeeze a little fresh lemon juice over the top. Finish by drizzling with the olive oil. Serve immediately.
  3. Note: You can prepare the salad components ahead of time and assemble at the last minute. Keep them covered and refrigerated until assembly time. The celeriac and fennel will probably turn brown (like apples and pears), but it won't affect the taste. Add a little more lemon juice to the bowls and toss to help prevent that.


DIY Geometric Wall Art

SHARE THIS +


Final4 When it comes to furniture I am always more drawn to the neutral colors with lovely lines. For some reason I have a hard time entering a committed relationship with a green velvet couch or a cheetah-print armchair. Don’t get me wrong, I appreciate those loud pieces of furniture. I sit in them at the store and pretend like they are coming home with me. But when I finally settle on that one couch, it’s a neutral color with toddler-resistant fabric. That is why, when it come to decor, I feel a strong need to incorporate pops of color and interesting textures. For spring I knew I needed a something fun and funky to liven up my fireplace mantel. The simple hexagon art I came up with turned out to be just the statement piece my living room so separately needed. And now you can learn how to make a hexagon art piece too! Final5
Supplies:
– A piece of wood cut to the size you want your painting to be. (I used particleboard that I pulled out a construction garbage bin while my husband made fun of me)
– A hexagon stencil. For my stencil I just printed off a hexagon shape onto heavy cardstock and then cut it out.
– Pencil
– Yardstick or a large poster board with straight edge
– Craft paint in the color combination you desire
– Paintbrush
Supply
First, I wanted to create a straight line where the top of my painting would begin. Using poster board I aligned the top edge of the poster board with the side of my wood piece and traced a straight line all the way across the top. This line acted as a reference line for the rest of my painting. Step1_2 Next, I lined up an edge of my hexagon stencil with the traced line and traced around the entire hexagon. Step2 After the first hexagon was drawn I moved the stencil down and lined up one edge of the hexagon stencil with an edge of the already traced hexagon. I then traced around the stencil to create two traced hexagon shapes that share one edge. Now, to complete the hexagon pattern just repeat aligning the hexagon stencil with an existing traced hexagon, and then trace the stencil. I traced hexagons in an abstract pattern across my entire piece of wood. Step3 For the final step I painted in the hexagons in alternating colors making sure to not double up on the same color in two touching hexagons. Step4_2 The final product was a very cool and colorful statement piece that even my husband noticed, so two thumbs up for me! Final3 Final2


DIY Gold Chain Bracelet

SHARE THIS +

Finalc A few weeks back, BuzzFeed contacted me to ask if I’d like to create an original DIY post for their site, that was an Anthropologie hack. I of course was thrilled and honored and said, “Yes, yes, yes!” And then I found out this wasn’t a paid gig, and I went “wahwah”, but went forward with it because I thought it was still a great opportunity for exposure and such. Then when the post went live, they linked to my wrong site, and again I went, “wahwah”, but I got this really great DIY out of the whole thing, and I’m excited to share it with you because I just love how it turned out. I’m getting a lot of use out of it as well.
The DIY is really easy and quite affordable. Let’s get started.

Supplies (all available at a local craft store):

  • Gold chains in various styles and sizes of chain links. I used a total of 6 different types of chain, and 1 style of crystal chain, often referred to as a Chanel chain. It’s the chain with the crystals encased in gold.
  • 2 10mm Gold Jump Rings
  • Gold loop and toggle closure. Mine has a bamboo look to it, but that’s optional
  • Jewelry pliers and wire cutters. You can find very high-end jewelry making tools, which are quite expensive, but if you’re just planning on occasionally playing with DIY jewelry, all craft stores carry a decent line of jewelry making tools which are just a few dollars.

Supplies Cut all your chains according to desired wrist size. I cut mine 6.25 inches in length, and when added to the jump rings and toggle clasp, it fit perfectly around my wrist and left for some room to slide around and hang on the wrist nicely. I also cut a total of 8 lengths of chain – 1 length of chain for each style I had, plus 2 lengths of the crystal chain for added sparkle. Step1 Once all your chains are cut, line them up in the order you want them, and attach them individually to your jump ring.  If your jump rings come closed, as some do, gently pry them open by sliding them apart, as opposed to pulling them apart. This will make it easier to close it back together. Step2 Once all your chains are attached to the jump ring, attach the jump ring to each end of the loop and toggle closure, and using your pliers, gently close your jump rings on either side. Step3 Make sure you attach your toggle closure to either side before closing your jump ring. Step4a Step4b
Your bracelet is now complete!  This took me less than 20 minutes to assemble, and cost about 1/3 the price, including the fancy Swarovski crystal chain.  Finala Wear this wtih a simple white tee and jeans, to dress up an otherwise casual outfit, or wear it with a pretty black cocktail dress for an evening event. I love that it’s versatile and looks well made, even though it’s handmade. If you’re interested in comparing, the original Anthropologie bracelet I hacked it off of can be found here.


Placenta Encapsulation

SHARE THIS +

pe-post

Over 8 years ago, I gave birth to my first child; a beautifully healthy 7 pound little girl, with a face like her daddy’s and toes just like mine. I went through the usual range of emotions that a new mother goes through — happiness, joy, anxiety, worry, fear, and delirium. I was exhausted but thankful, and when I began crying at the drop of a hat a couple of days after giving birth, it was brushed off as the “baby blues.”

Several weeks later, and instinctively I knew that this overwhelming case of sadness I was experiencing wasn’t simply the baby blues. I went in to see my OBGYN and after a series of questions, many of which I cried at answering, she diagnosed me with Postpartum Depression, and sent me on my way with a prescription for Zoloft. Things got better, I got a little happier and a little less worried, but still, I never felt that overwhelming sense of connectedness, that “baby moon,” that I had heard so many women talk about.

Two years later, with the birth of my son, came my second diagnosed case of PPD — and another prescription for Zoloft. This time it worked a little less, and I felt a little less better, but sadly struggled through the first year of life with two children under 2. I look back at pictures of myself in that first year and my eyes look so soft and dull.

When I became pregnant with my third child, my biggest fear, above childbirth and sleepless nights, was the looming thought of going through PPD again. It rattled me, it made me cry just thinking about it, it made me scared beyond belief. My fears were not calmed when my OBGYN told me that because I had experienced PPD with the first two, the likelihood of experiencing it a third time was even greater. So sure she was that this would be my reality, she asked me to possibly consider going on anti-depressants while still pregnant, in my third trimester. She said that taking proactive measures such as this could help keep the symptoms from even manifesting themselves.

I respectfully declined, and went home to seek out another way.

An old high school friend and certified doula brought up the possibility of encapsulating my placenta. Coincidentally this was at the same time that January Jones came out, announcing that she had encapsulated her placenta, so I was somewhat aware of what the process entailed. I also knew that this type of thing was, needless to say, considered a bit strange. While it’s often joked about in Western culture, and even seen as cannibalism, no eating of the placenta is involved. The placenta is freeze-dried and then ground up and placed into gel cap pills, which are then taken just like a regular vitamin. If January Jones could do it, I knew I could do it.

Choosing to ignore the silly tabloids, I started doing my own research and discovered that we are the only mammals who don’t ingest their own placenta after giving birth, and that in other countries, including China and Italy, it is quite a common practice. Ingesting one’s own placenta has been touted as having many health benefits, being packed with nutrients which are lost during the birth of a child, and when replenished, could aid in the postpartum recovery process. Reported health benefits include less fatigue, higher milk supply, replenishment of iron, and the balancing out of hormones. Many women have also reported its effectiveness in treating and even combating the baby blues and postpartum depression.

Of course, the reported benefits of placenta encapsulation have never been scientifically documented because this process has never been studied, so doing so comes with a big leap of faith. Especially when I was considering placenta encapsulation as an alternative to pharmaceutical drugs. But after struggling through months of sadness, even with the treatment of antidepressants, I figured could it really hurt to try? My OBGYN reminded me that there were no proven medical benefits of placenta encapsulation, but neither were there any negative side effects, and told me she supported whatever decision I made.

So I took my placenta home, because after experiencing full-blown PPD times two already, I knew I was willing to try anything. And if you’ve experienced PPD yourself, you can probably understand where I’m coming from. Three days after giving birth, my doula lady friend drove to my house, picked up my placenta, and returned it in pill form just 2 days later. After doing mounds of research on the process, I had read about the woman who felt all jittery after ingesting her placenta, so I was a little hesitant, but swallowed away anyhow. What did I have to lose after all?

With each passing week I went PPD symptom free, I became more and more hopeful that the pills were working. I still felt tired, but never felt the deep levels of hopelessness I had experienced the first two times. Milk supply had never been an issue and I can’t say that I reportedly had an over-abundance of milk after taking the pills. But the miracle was, I felt happy. Downright joyous even.

I was experiencing full-blown baby-moon fever and was infatuated with my little boy. I had loved my first two with an innate fierceness that can’t be helped, but I couldn’t say I felt that high that many women report, staring at them in awestruck wonder. It wasn’t their fault or my fault, but the stupid extreme hormonal shifts that some women experience, and others don’t. But this time, I was feeling that high, and all the wonderful feelings that come with it, including extreme gratitude. Gratitude for even being able to experience such happiness this time around. A feeling I never thought I would get to enjoy.

Those feelings of happiness helped redefine motherhood for me.

Hayden is now 18 months old, and while I secretly worried as each month passed, that the postpartum depression symptoms would creep back up, they never did rear their ugly head. Was it the placenta pills that did it for me? I couldn’t really say for sure, but in the end, who really cares? Whether it was purely coincidental or some sort of placebo effect, for the first time I got to experience being a mother to a beautiful newborn baby, without the cloud of sadness and gloom that had plagued each of my previous pregnancies. For that simple fact, I am eternally grateful, and would ingest my placenta 1,000 times over if I had to.

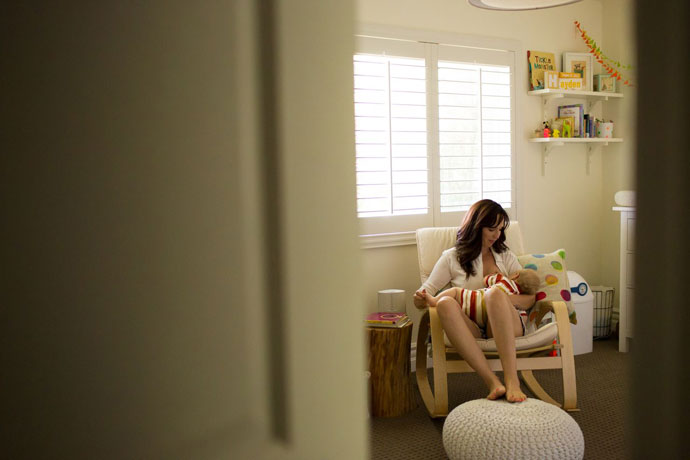
Placenta encapsulation isn’t for everyone, but if you’re considering alternative ways to ward off or treat the suck fest that is PPD, it’s at least worth looking into. And while my personal story isn’t supported by a shred of scientific proof, the hundreds of pictures I have, of me joyfully holding a beautiful baby boy with a sparkling gleam in my eye, is all the proof I need.

If you’re interested in the logistics of encapsulating your placenta, here are answers to a few commonly asked questions:

How did you find someone to encapsulate your placenta?
Through a referral from a friend, I found a local doula who was trained and experienced with encapsulating placentas. If you can find a midwife or doula in your area, chances are, they will know someone who can offer this service to you.

Was it expensive?
It was $300 here in Southern California, and that seemed to be about the going rate. I would imagine it may be cheaper or more expensive in different areas, and it is not covered by insurance. Considering I paid a $95 per month copay on my prescription antidepressant during my previous PPD periods, I figured this was a savings overall.

How did you handle all the details with your OBGYN and the nursing staff?
Considering I live in Southern California, the procedure wasn’t completely unheard of. I told my doctor ahead of time, and she simply let the labor and delivery nursing staff know to save the placenta for me. They then asked me what I wanted to do with it, and I told them just to save it for me until it was time to go home. It was kept somewhere, refrigerated, and they gave it to my husband when it was check out time, and my doula then came to my house the day we got home and picked it up. It is your body and your right to keep your placenta. It is absolutely against the law for anyone to say you can’t have it.

What was the process of turning the placenta into pills?
I don’t know the exact process, but basically, my doula picked it up soon after it was delivered (fresher the better), took it home and brought it back, in pill form, 2 days later. From what I understand, she simply dehydrates it in a special room of her house that is all sterile and such, then grinds it up, and puts the ground up powder in little gel caps.

Could you taste or smell it?
Absolutely not! It was fully encompassed in its gel cap and I did not smell or taste a thing. You are in no way eating your placenta, you are ingesting it, in ground up powder form. Eating implies chewing, and this is a totally different concept. I took 4 pills the first few days after delivery, and then just 2 pills from there on out. Your doula may advise you differently.

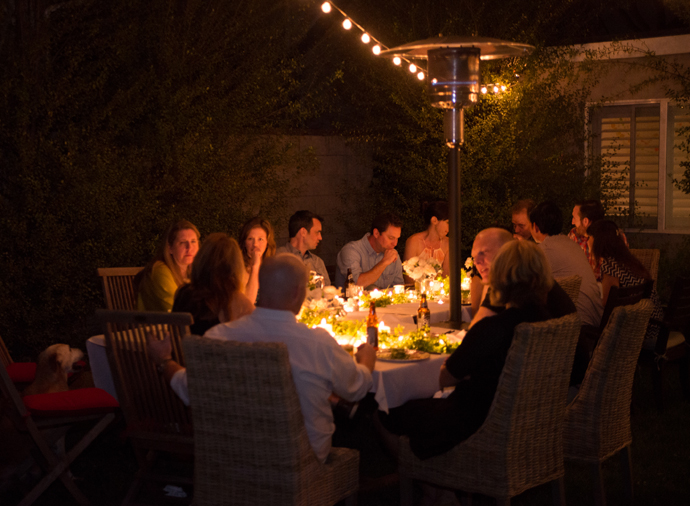
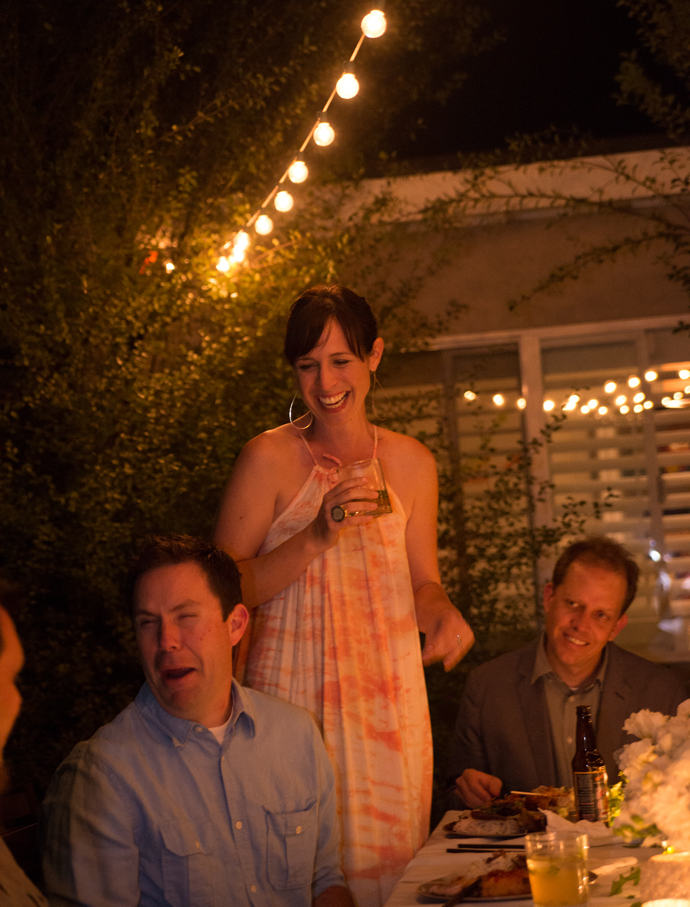
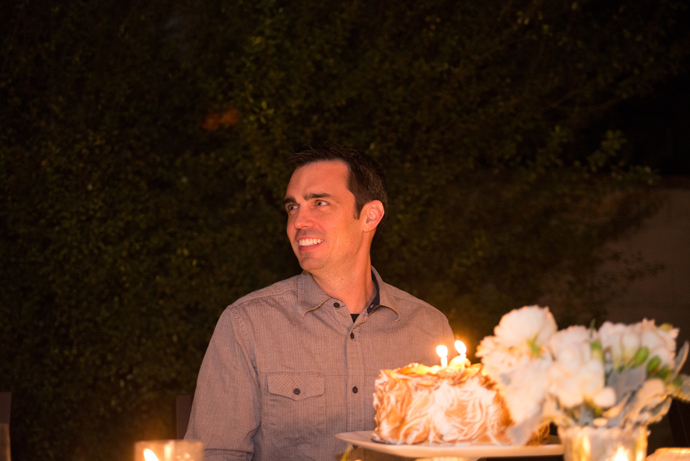
*photo c/o Yung Bean Photography
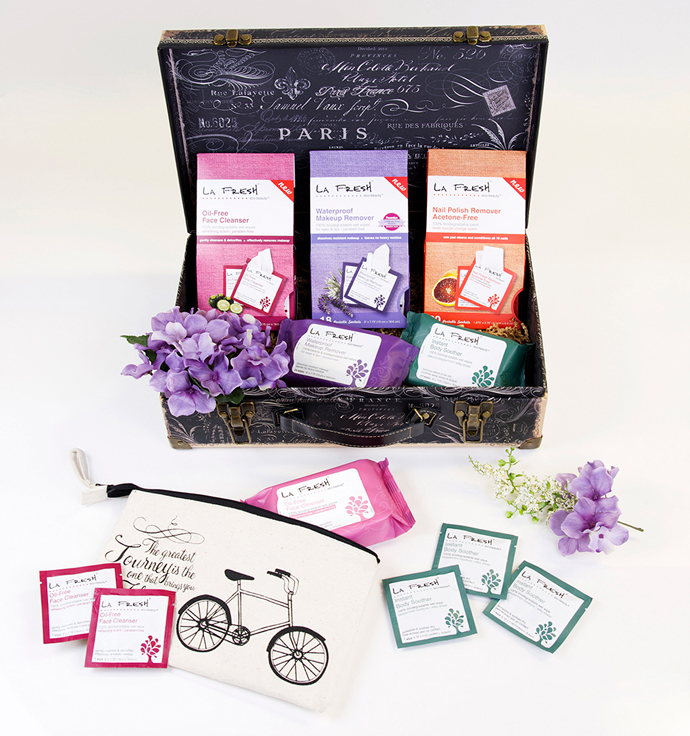
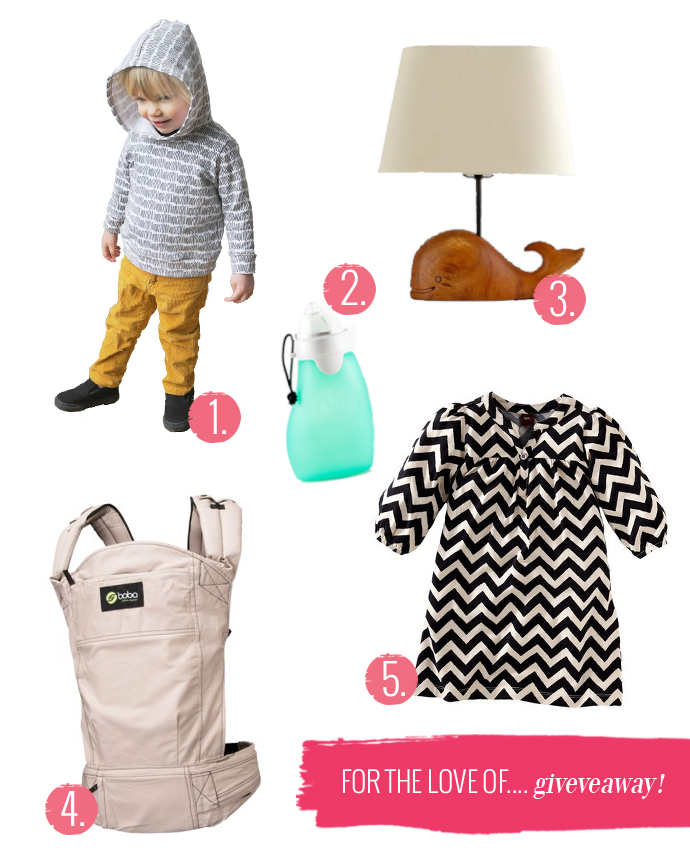