I love a good shortbread cookie, and if it’s covered in dark chocolate, even more reason to celebrate. I love the mix of the savory buttery flavor, mixed with the sweetness of the dark chocolate, a perfect combination if you ask me. So when I saw that Trader Joe’s had once again, brought back those loveable dark chocolate covered shortbread stars, but in a new heart shape for Valentine’s Day, I picked up a box and ate the whole thing in just 2 days. I looked at the ingredient list and while it wasn’t horrible, it was still given its fair dose of preservatives, and I got to thinking, why not make a preservative-free, healthier version I could enjoy at home, without having to worry about the ingredient content? See that there, somehow if I make it at home, I let myself off the hook in terms of feeling bad for devouring a whole box of these things.

Searching online for a “healthy” shortbread cookie automatically translated to a cookie that was gluten free and vegan. While I can certainly understand the need for this type of recipe, for those who suffer from Celiac’s or general gluten allergies, and of course those who are actually vegan, I am none of these, and so I failed to find a “healthier” version of a shortbread cookie online. It’s a common problem in fact, when searching for healthy baking recipes; you either seem to find extreme versions that eliminate butter, flour and eggs, or you find the so-called healthy version which uses apple sauce in lieu of eggs, but still includes cups upon cups of sugar and enriched flour. For those of us who are just trying to eat better animal fats, whole grains and don’t believe eggs are evil, baking can be a challenge. So I made my own shortbread recipe, using a pretty standard recipe and tweaking most of the ingredients. The results were wonderful. Keep in mind that I still used sugar and flour and butter, the ingredient choices I made are at least the healthiest versions you can get, and actually offer nutritional benefits.
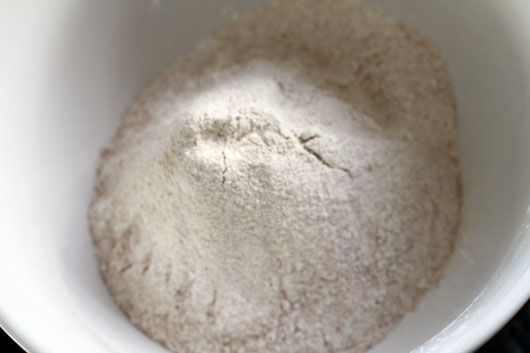
You start by sifting the whole wheat flour, with the arrowroot starch (in lieu of cornstarch, but you can certainly use corn starch), and the baking soda. Why whole wheat versus all-purpose flour, after all aren’t all flours still the same? I won’t bore you with all the details, which you can read here in this article, but basically, whole wheat flour, especially if you use a good brand like Bob’s Red Mill which is just whole grain wheat, is higher in protein, fiber, has a lower GI index which is important to diabetics and those who suffer from the effects of extreme blood sugar spikes, and has a richer vitamin and nutrient content. You can read the way whole wheat versus all-purpose flour is processed here, but basically, all-purpose flour is highly processed and during that processing, most of its vital vitamins and nutrients are stripped away, which is why it is then “enriched”, something you’ll read quite often on labels. I also used the arrowroot starch because I happened to have it on hand and can be replaced cup for cup with corn starch, according to the Bob’s Red Mill package, although there does seem to be differing opinions on that. At any rate, it is an easier starch to digest than corn starch, and isn’t as highly processed, but keep in mind you can certainly use cornstarch instead – makes no difference. I also added 1/4 tsp of baking soda, as advised when doing research on baking with maple syrup. Basically because maple syrup is more acidic, you add the baking soda in to help the dough rise. In terms of GMO’s for whole wheat flour and the arrowroot versus cornstarch debate, rest assured as there is no such thing as GMO whole wheat flour, as I explained in this article, and while I’m not as terrified as some are about GMO’s, I figure if you can avoid anything that’s overly processed, why not. Moving on.
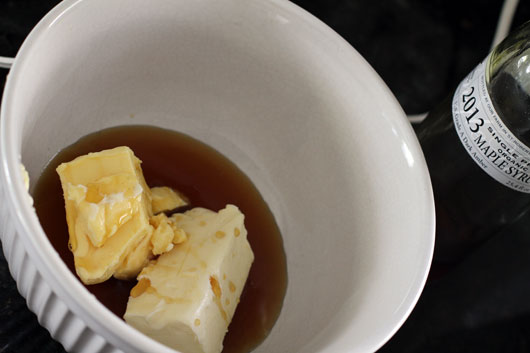
Next let’s cream our butter and syrup together. I did some research on baking with sugar alternatives, and found this article from Whole New Mom to be very helpful. Using it as a guide, I substituted 1 cup of white sugar for 1/2 cup, plus 2-3 tbsp of pure organic maple syrup. Sugar is sugar, but again as is the case with flour, not all sugars are created equal. Whereas white granulated sugar has no nutritional value, and causes extreme sugar spikes, maple syrup has many wonderful nutrients and antioxidants, and has a lower GI than white sugar. I also used grass fed butter, which has proven to have more healthy Omega 3’s, CLA (good fats), and is higher in vitamins A, K, D and E, and is loaded with antioxidants, in comparison to conventional butter. Butter is still better than margarine though, but butter from grass fed cows can’t be beat. I love Kerrygold butter and find it at Sprouts.
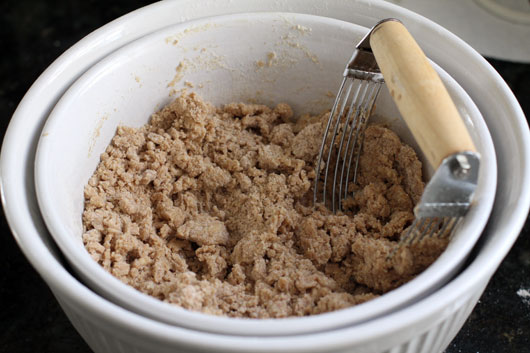
Combine your butter mixture with your dry ingredients using either a pastry cutter or a couple of forks. Your dough will be very crumbly, keep in mind. If you can find that when you combine some of the dough into a ball and it sticks together easily, add a couple of tbsp of maple syrup if you don’t think the dough tastes sweet enough. Keep in mind that maple syrup is sweeter than regular sugar, which is why you use less, but I have found that depending on the brand and grade, some maple syrups are super super sweet, and some are more mild. One of the most important things I’ve learned about cooking is to taste along the way, so give it a taste and if you want it sweeter, add a bit more syrup. Keep in mind too, that these cookies will be dunked in dark chocolate and sprinkles, so don’t go overboard. You want a restrained sweetness, not sickly sweet. By the way, don’t forget to let your baby lick the butter/maple syrup mixer wands while you’re working. Mix your dough together so that it is still crumbly, but can be formed into a ball, and then wrap in plastic wrap and refrigerate for 20-30 minutes or so.

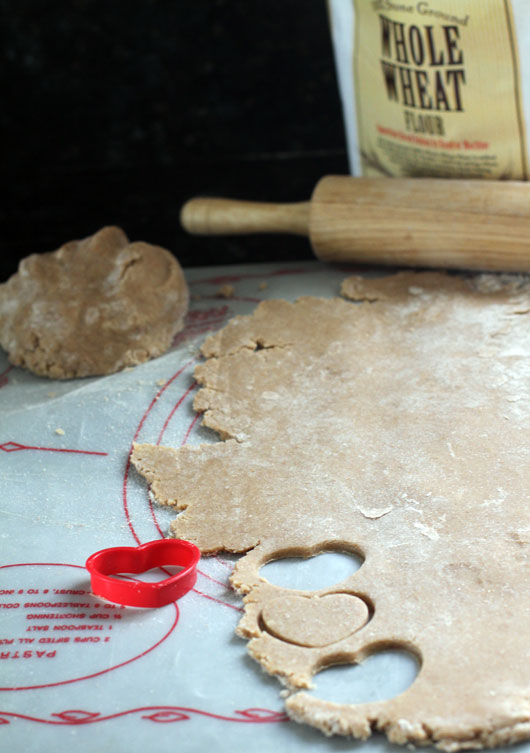
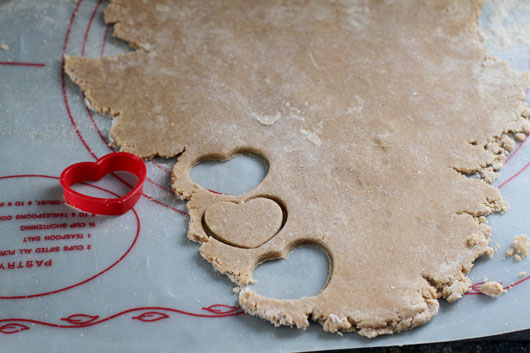
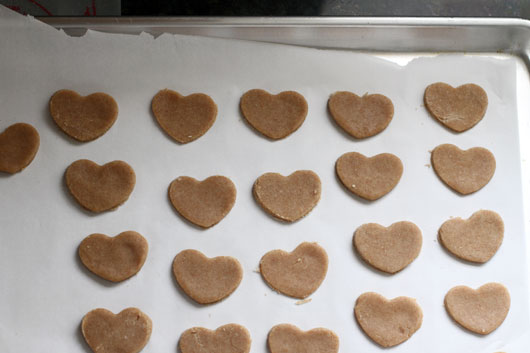
Divide your dough in half and roll it on a floured surface to about an 1/8″-1/4″ thickness. The edges will be crumbly, don’t worry. Because there’s not a ton of butter in this dough, it will seem tough at first to roll out. If this is the case, let it sit for a minute, or even work it with your hands a bit to let it warm up. I found that this dough actually gets easier to work with as it warms up, as opposed to sugar cookie dough which becomes a sticky gooey mess. Start cutting out your shapes, in this case, hearts of about 1.5″ in diameter, and place on a parchment lined baking sheet (or some other form of silpat type of mat).
Because maple syrup caramelizes quicker than white sugar, you want to bake these 25 degrees lower, at 325, for 15-18 minutes. I set the timer for 15 minutes and checked on them, letting one cool and tasting after a couple of minutes. They tasted done so I took them out at 17 minutes. It’s important to watch these and taste, since the coloring will be deceptive because of the brown color of the whole wheat flour. The second batch I made came out a bit thinner than the first, so I took them out at 15 minutes.
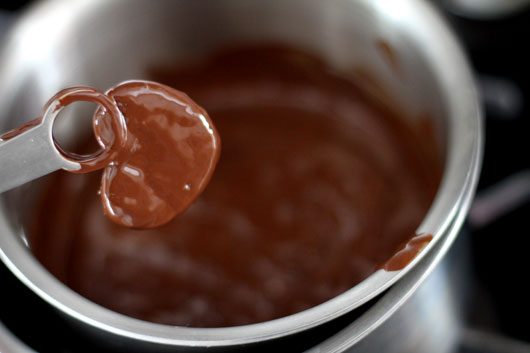
While your cookies are cooling, warm up some dark chocolate in a double boiler and add 1-2 tbsp of coconut or vegetable oil to get the chocolate a little more on the runny side. Dip your cookies in the chocolate using a small pair of tongs, and place on a parchment or mat surface.
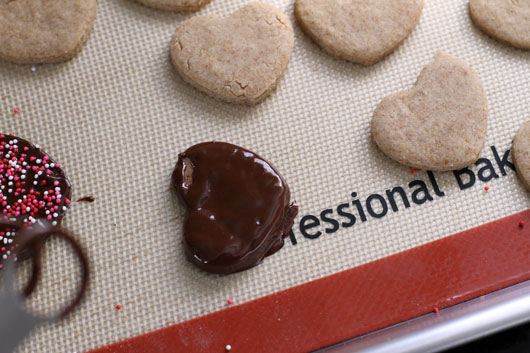
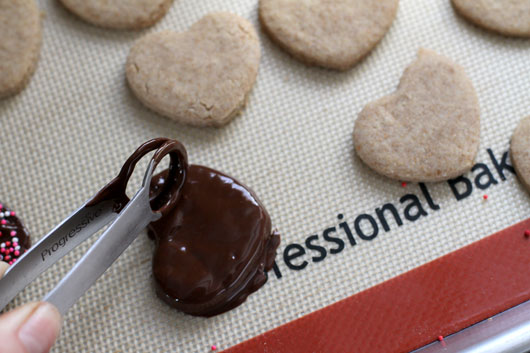
You may have a little dent in your chocolate, from holding it with the tongs. No problem, just smooth out a bit with your tongs.


Add your sprinkles, and place in the freezer for at least 15-30 minuites to let your chocolate set. When you’re ready to eat, let them warm up for a few minutes, as right out of the freezer they will be a bit hard. And that’s about it. These aren’t quite as tedious as royal icing cookies, but they are a process, I won’t lie. A process yielding very yummy results though. I’m packing these up in cello bags to hand out to the teachers and the kid’s classmates, although if I don’t get a move on they all may only be getting 1 little cookie! Keep in mind that this recipe makes a lot of these little cookies. I’ve made 50 so far, using half the dough, and with the kids nibbling at a good portion of it!


I’ve been hard at work, practicing my food photography, and played around with shooting these, and used a black and white background. I can’t decide which background I like better, what do you all think?

I love them both but I think I’m partial to the black. A marble slab background would be pretty too.

I hope I’ve convinced you that baking can be more nutritious. While sugar is still sugar, and fats are still fats, there are healthier alternatives that will definitely go easier on your body, and actually adding in some benefits. But I have a ways to go to perfecting healthy baking, so I’d love any resources you’ve found to be helpful. While I’m not opposed to gluten free and vegan options, I’d love to find great baking recipes using wholesome, less-processed ingredients, so please pass them my way if you know of any! Happy Valentine’s Day everyone!
Dark Chocolate Shortbread Heart Cookies
2 cups whole wheat flour
1 scant cup arrowroot or cornstarch (slightly less than 1 cup)
1/4 tsp baking soda
1/2 cup pure maple syrup, plus 2-3 tbsp if needed
1 cup/2 sticks softened butter, plus 2-3 tbsp if needed
Preheat oven to 325 degrees. Sift together the dry ingredients, and cream the butter and syrup in a separate bowl. Combine the wet and dry ingredients with a pastry cutter or fork and knife until dough is crumbly but will still come together. Roll into a ball and wrap in plastic wrap, refrigerating for 20-30 minutes. Divide in half, and roll dough on a floured surface, to about a 1/8″ thickness. Cut out desired shapes and place on a parchment lined cookie sheet and bake for 15-20 minutes. Let cool.
For chocolate coating: Warm a double boiler and heat up a bag of dark chocolate chips with 2 tbsp of vegetable or coconut oil. Dip cookie in chocolate and place on a parchment lined platter, adding sprinkles before chocolate sets. Place in freezer for 15-30 minutes to let the chocolate set and then enjoy!