Easy Homemade Nutella

SHARE THIS +

Homemade-Nutella Sometime a couple years back, I decided to try Nutella, and we quickly grew more than a little hooked. Since it was “hazelnut” spread, I naively figured that since it was nut based, it was a delicious, too good to be true healthy treat. I never even bothered looking at the ingredients, and when I began paying closer attention to those ingredient labels, I was dumbfounded to find that hazelnuts, weren’t even the first or second ingredient, but instead, sugar and palm oil came first. Not only did it list sugar as its main ingredient, but Nutella also contained soy lecithin and vanillin, an artificial flavor. Turns out that chocolaty spread was indeed too good to be true. We finished our last jar and said good bye.

I’d like to say we never looked back, but Syd has since longed for Nutella toast, and makes sure I know every so often, that he still really wishes we could eat Nutella. Sometimes making healthier choices leave me feeling like a real asshole of a parent.

I looked into making my own, but the process of roasting and then peeling each individual hazelnut seemed like way more work that I could find time for. Somewhere along the line I found out about actual hazelnut meal, but wasn’t sure if it was sold in bulk or prepackaged. I was having a hard time finding it, but then finally came across it from Bob’s Red Mill, sold at Whole Foods, and whipped up my own batch today with relative ease. At first, the kids weren’t too keen on it, claiming to like the flavor but not the texture. I couldn’t blame them all that much considering it was still very mealy, so I added coconut oil, more almond milk, and blended for a few more minutes to get it nice and smooth. Worked like a charm.

Homemade Nutella
 
Prep time
Cook time
Total time
 
Make a healthier version of Nutella at home with this easy recipe.
Author:
Recipe type: Dessert
Cuisine: American
Serves: 1.25 cups
Ingredients
  • 1 cup hazelnut meal
  • ⅔ cup raw cacao powder
  • ½ cup, or slightly less, maple syrup
  • ⅓-1/2 cup almond milk, depending on how thick/thin you want it
  • 1 heaping tbsp coconut oil, softened
  • pinch of sea salt
Instructions
  1. Place all ingredients in a powerful blender or food processor, and blend until a nice and smooth consistency is achieved.

Because this homemade version contains no preservatives and contains perishable ingredients, it is advised you store in the refrigerator. The yield for the following recipe is just over a cup, so you should have no problem going through this batch in a couple of weeks. Because Nutella is usually stored at room temperature though, try to allow some time for this version to warm up a bit before trying to spread on a nice piece of bread, but it would soften up nicely on warm toast. Let me know if you have any questions!


Week In Review – Reasons To Be Happy

SHARE THIS +

Pink Dress Last week I turned 38 and nothing in my life changed. I don’t feel different, sadder or better. 38 isn’t much of a monumental birthday. Not like 35 or even 36, when you go from being mid to late thirties. Or maybe 38 is considered late thirties now? I don’t know. At any rate, I just watched a rerun of Sex In The City, when Carrie is dating Aleksandr and she is tormenting herself whether she should continue to date him, knowing he doesn’t want kids, because she is after all, 38, a fact she reminds us of at least 20 times in that episode. I don’t know where I’m going with that reference, but I guess when I think of where I am at 38, it’s not so bad. It’s pretty good in fact, and it seems silly to worry about lines around my eyes and aching backs, when there is so much to be gosh darn happy about. And celebrate, like birthdays and the fact that today is Good Friday and on Sunday, we can rejoice in the fact that He Is Risen!

Other wonderful things to be happy about include the dress I wore for my birthday dinner. Found at Nordstrom for the great price of $58, it’s by Wayf, and I love the color, the silhouette and the fit of this dress. A great deal, and so so cute in that bright lemon yellow color too!

I really enjoy Joy The Baker, and her roundup of lovely Easter eats from her archives is wonderful.

I shared this post about the newest Parenting Study to be released a couple of weeks back on my Facebook page, but since Facebook only allows .009% of you to even see our posts anymore, I thought I’d share again because it is just too funny and still has me chuckling days later.

This hat I posted on Instagram is still making me laugh out loud, just thinking about it. Is it a lampshade, a flying saucer, a joke? You decide.

Also on Instagram, this progression shot of me over the last year and a half, is pretty much a great reason to celebrate changing our lives for the better, and eating clean!

This Pinterest board of Guys Reading Books is just about the cutest, hottest and smartest board I’ve seen in a while.

Flower crowned Easter eggs. Totally silly waste of time, but so, so cute!

Lastly, my watercolor sprayed Easter eggs were featured on a few nice sites this past week, which I’m always so thankful for!

Have a blessed week everyone, and remember to find something to smile about!


Gold Confetti Easter Art

SHARE THIS +

Gold Confetti Easter Bunny Art One of my biggest spring break projects to tackle during our 2 week “vacation”, is to clean up the craft cabinet. What was once a hyper-organized collection of beautiful supplies and tools, has since become a tangled mess of hoarded craft projects and things I don’t need. So I’ve been going drawer by drawer, shelf by shelf, and getting rid of the things I don’t need, and dreaming up projects of items I could most certainly still get some use out of. That’s where my watercolor palette and gold confetti dust comes into play. I love both so much, and yet they just sit in the drawer, all lonely. So since I hadn’t yet decorated for Easter, I came up with a project to get some use out of some of my favorite, but very lonely craft items. I also love this Easter craft project because the kids can definitely get involved in it. IMG_4678 To make some last minute disco gold confetti Easter art, here’s what you’ll need my friends. Gold confetti easter art supplies
Supplies:
Watercolor paper (make sure it’s nice and thick, this is the pad I use, which I love)
Water color brush & brush for Mod Podge
Pencil
Mod Podge
Gold confetti (you could also use gold glitter if you have it. The point is to use what you’ve got, and make it disco sparkle)
IMG_4730 Begin by making some pretty watercolor art, in whichever color pattern your heart desires. Watercolors are very easy to work with if you’re just making abstract pretty art, and you can read how to work with the medium in this post. IMG_4731 I created a color gradation from pinks to blues, but get creative and do whatcha like. Let dry completely. IMG_4734 Draw a graphic shape in pencil, and don’t worry about making it perfect or having to sort of re-correct your work. The glitter confetti will cover it up once all is said and done. The key here though is to create large shapes and pictures, nothing intricate like a flower, which Taylor tried to do and it just came out like a big blob. IMG_4735 Then fill in with a light, but not faint, layer of Mod Podge. IMG_4742 IMG_4738 And then sprinkle sprinkle sprinkle. IMG_4742 Once you’ve filled in your shape, apply very light pressure to adhere the big chunks of confetti to the Mod Podge, and then shake off. You may have to use yuor finger to gently push away some of the larger edge pieces of confetti that may be obstructing your view of what the actual shape is, but no biggie. Your shape will quickly show itself and be very happy. Easter Bunny Gold Confetti Art To make the large wooden bunny, I simply took a leftover piece of plywood from the Cricut event, and applied the same exact concept as above, except instead of using watercolors, I used acrylic paint. I made sure not to apply the paint too thickly though, to create more of a weathered look. Disco Easter Eggs Gold Confetti Easter Eggs Before I knew it, I was shaking that confetti on all sorts of things. Plastic eggs. The dog. Hayden. It got crazier than Studio 56 in here. Gold Confetti Easter Art I even started creating other pieces of artwork to hang around the house (the heart preview is for another project), and I just love how they come out. They pick up so much light throughout the day, and especially at night, and definitely add a festive touch to the room.


Butternut Squash + Kale Frittata

SHARE THIS +

ftlo1 I’m excited to announce I’ve joined the Wayfair team as a new contributor. I’ll be sharing recipes, cooking tips, and maybe a DIY project or two, once a month. My first post has been published, right in time for Easter, and Mother’s Day. ftlo2 This butternut squash and kale frittata is an easy, yet impressive dish to make, and transports and stores well. My version included turkey bacon, but feel free to leave it out, and switch up the veggies. Actually, just about any veggie will do, but I love the transitional flavor combination here; perfect to bridge the gap between winter and spring. ftlo3 To get the full recipe for this Butternut Squash and Kale Frittata, please visit the Wayfair blog.


Strawberry Chia Seed Pudding

SHARE THIS +

chia-pudding I’ve been experimenting with adding new snack and breakfast items to my rotation. Things I can grab when I’m feeling hungry but have very little time. Things that will prevent me from dipping into a bag of chips or stopping at the coffee shop and grabbing a muffin. Chia pudding is a somewhat new-to-me concept, and while I admittedly don’t love these for their decadent, indulgent flavor, I love them for their ease and health benefits. Chia seeds are packed with protein, Omega 3’s and leave me feeling full and nourished, which is the true end goal when I’m craving a snack – something to fill a need so I don’t keep craving junk. All this to say, if you make these, don’t be surprised if you don’t fall head over heels in love with them. They don’t knock your socks off like a fantastic donut or leave you craving more like a bag of chips. But that’s okay. There’s a reason those other foods leave you wanting more, and there’s a reason foods like these exist; to help keep us on track.

If ever there was a crappier sell on a recipe, I’d prove you to find it, but really I’m just trying to be honest. Eating healthy isn’t always fireworks and moon beams. Many times it’s just trying to find the best version of a good-for-you health food you can find. In that case, this particular strawberry chia seed pudding recipe fits the bill perfectly. I tweaked it a few times to get it just how I like it, but feel free to add a bit more honey or maple syrup to make it sweeter, or change up the fruit to use what’s in-season at the time. At any rate, I hope you enjoy it. I divided mine up into little ramekins so I can grab and go, and they’ve done a great job preventing hangry meltdowns on my part.
chia-pudding1

Strawberry Chia Seed Pudding
 
Prep time
Cook time
Total time
 
Make this quick, easy and healthy chia pudding recipe for quick on the go snacks and breakfasts.
Author:
Recipe type: Breakfast
Cuisine: American
Serves: 6
Ingredients
  • 1½ cups strawberry
  • 1 ripe banana
  • 1¾ cups almond milk
  • ⅔ cup white or black chia seeds
  • 1 tbsp honey or maple syrup
  • ⅓ cup unsweetened coconut flakes
Instructions
  1. Place all ingredients in a blender and blend on medium speed just to combine and gently stir up the seeds. Once combined, place in a large bowl, cover and refrigerate for at least 30 minutes, then enjoy! This makes exactly 30 ounces you can divide up into 6, 5 ounce single size servings.


Happy Easter Cake Banner

SHARE THIS +

Happy Easter cake topper DIY

I should begin by admitting that I have an addiction to baked-goods accessorizing. It’s true…I can’t whip up a batch of cupcakes without throwing some sprinkles on there. Making a cake? I have to add ribbons glues to toothpicks because, like I said, I have an accessorizing problem. So when you combine the delicious decorating potential of a cake with a holiday, you know there will be some cake-topper magic in the works! For Easter I came up with a no-sew (you heard me) Happy Easter cake banner that is so easy, the Easter bunny could figure it out. All you need is a little Easter spirit (like Christmas spirit but it smells like eggs and chocolate…mmm).

Happy Easter cake topper DIY

Supplies:

– Pieces of felt in spring colors

– Embroidery string in spring colors

– Two kabob or skewer sticks

– Fabric scissors

– Hot glue gun with glue sticks

Happy Easter cake topper DIY

Step 1: I began my Easter cake topper by cutting out felt rectangles at 1.5″ wide by 2″ tall. I cut out one rectangle per letter, which is 11 rectangles if you want to say “Happy Easter” and it would be 11 rectangles if you wanted to say “Happy Spring” and it would be 21 rectangles if you wanted to say “I am a Jehovah’s Witnesses” (just a little DIY comedy for you).

Happy Easter cake topper DIY

Step 2: This step is probably the trickiest step, but I found that if I just took it slow and was thoughtful about the cuts I made the letters turned out great. For step 2 grab your scissors and a felt rectangle to create a mini felt letter. You will do this by cutting away the negative space around the letter. It helps if you use the sides of the rectangle as the boarders of the letter. For example, I pictured the two 2″ sides of my rectangle as the vertical sides of my letter “H”. Then I simply cut out the top and bottom squares that are the negative space in the letter “H”. For “A” I cut out two triangle shapes on the sides. For “S” I said some curse words and after 3 attempts got that sucker just right. Helpful hint: to make sure all the letters are the same proportions, make sure the 2″ sides are the sides of your letter and the 1.5″ sides are the top and bottom of your letter.

Happy Easter cake topper DIY

Happy Easter cake topper DIY

Happy Easter cake topper DIY

Step 3: Now comes the no-sew part (party!). For step three you will be attaching the felt letters to the embroidery string. I began by turning my word upside-down and backwards. That way I would glue it together in the correct order/direction when I flipped it around. Next, I took my first letter and applied hot glue to the top parts of my letter (for the “H” it was the top of the two vertical lines). Make sure you are gluing the back of your letter to the string. Repeat this for all your letters with each word on it’s own string. Side note: I spaced my letters about 1/4″ apart. I also threw together a little bunting banner for the fun of it.

Happy Easter cake topper DIY

Happy Easter cake topper DIY

Step 4: For the final step (woop woop!) you will simply flip around your glued words so they are facing right-side-up and tie the two string ends to your skewer sticks (one string end to each stick) creating a little banner! I did a three-tiered banner with tier one being a bunting banner, tier two as “Happy” and tier three as “Easter”.

Stick it in your cake and you are done! One cake banner fit for Easter! And now my addiction has been appeased.

Happy Easter cake topper DIY

Happy Easter cake topper DIY


Week In Review – Watching Trainwrecks

SHARE THIS +

c34b735570c1fd89bee1e3bca32ff5f0 If you are at all involved in some sort of social media, whether you blog or not, you may have heard some hulabaloo about the American Blogger train wreck that won’t quit. Basically, the trailer was released for the film, and all hell broke loose on Twitter (you can search the #americanblogger hashtag on Twitter, which has been trending for a few days now, and get a feel for how poorly it was received in just a few short seconds, or you can do a google search and see the top trending articles). What at first began as valid criticism over the clear lack of diversity in the bloggers featured (and lack of men for that matter), quickly turned into mockery and mean snark.

As most everyone can agree on, I too thought the trailer was terrible, and did a very poor job representing what could very well be an interesting topic. It also did a poor job representing some women I personally know, who are anything but shallow and vapid. But beyond that, I don’t agree it’s something those of us in the community should tear each other apart for, and I certainly don’t think a young aspiring filmmaker should have his career ruined. None of us in the blogging world are without fault and we are all subject to criticism no matter what our niche topic is. Lifestyle is often accused of presenting an unrealistic ideal way to decorate a home or dress or create. Narrative blogs could be accused of divulging too much and not knowing when to keep things private. This has all served as a good reminder to keep myself in check, try to be as real as possible, and just focus on being myself. For starters, I’m throwing away all those stupid cute paper straws. They don’t work and are useless.

There has already been so much written about the subject, so I’m not sure I can add anything useful or different to the conversation, but I will say that we as bloggers can have a tendency to get very used to praise, praise, praise. Yes, we are our own harshest critics, but by way of the medium in which we work, we can very quickly get used to the praise from people who follow us, because those who follow tend to like what we’re doing, for one reason or another. When you make a film or start writing a column like Babble, which reaches a far wider audience, you expose yourself to people who don’t regularly follow you. This week, the Wiegands exposed themselves to a much larger audience, and they unfortunately found out not everyone thinks what they do is beautiful. It sucks, and I feel terrible for them, but mostly I feel terrible for the women featured in the film. Some of whom I personally know and I can confirm are not “rich” or perfect. Talented and stylish, sure, but also hardworking and creative and yes, pretty.

I go through periods where I get pretty burnt out with this whole blogging thing, and this week was one of them. There’s so much I love about blogging, but also so much I truly despise. There are days where I haven’t felt charitable enough, Christian enough, as connected to my kids as I should be. I’ve rolled my eyes after seeing a black and white graphic nursery reveal for the upteenth time, felt a stupid tinge of jealousy seeing another perfectly stylized DIY project produced from the blogger who seems to be too big for her own breaches, and gnashed my teeth at images of stylized work-desks on Instagram. There’s people in this space who are deep and intellectual, those who are shallow, and those who are misunderstood. There’s people of all sizes, shapes, ethnicities and backgrounds, millions of them, floating along on their own piece of the internet. It’s naive to think we can all see eye to eye, that we can all be a true community, that one person could represent us all. It’s naive to also think that our every word is going to be clearly understood, not taken out of context, and our every intention seen as pure. My old boss had a saying he would repeat often: “Perception is reality.” While we may sometimes be “misunderstood”, the perception we put forth every day on Instagram on our blog, on Facebook and on Twitter, is reality to someone else. I learned a lot when one of my articles on Babble went viral last year and I took some horrible heat from it. I learned to be clearer with my words and not to be too hasty with what I publish. I learned that not everyone sees my point of view, no matter how much sense it makes to me. And more than anything, I learned that there is so much snark and meanness in this world it could ruin a person, for even just a small fraction of a second. Call it hate, snark, bullying or just plain sarcasm, when you use your words to intentionally ruin someone else, even for a second, you’re doing nothing more than adding more negativity to a world already so filled with bad.

I think a lot of us definitely agree that the tides may soon turn a little. The backlash this past week to the lifestyle niche of blogging has been overwhelming, and I wonder if it will make many of us think the next time we post a picture drinking out of a mason jar. The whole thing has been such an unfortunate train wreck I hope we can soon move past. Have a good weekend everyone.


Easter Inspired Strawberry Rhubarb Smoothie

SHARE THIS +

Strawberry Rhubarb Smoothie When I was a little girl, I would watch my grandmother stir a bubbling pot of strawberry-rhubarb sauce on the stove. It was destined for great things, like vanilla ice cream, pie, or angel food cake. And even for a picky, picky eater, that sauce was one of my favorite springtime treats. My grandmother’s garden was always brimming with both fresh strawberries and thick, red rhubarb stalks. That rhubarb plant grew wildly off to the side of her magnificent garden. It was gigantic – so large that in my child mind, it was practically a tree. I looked forward to her yearly harvest and that lovely combination of strawberry and rhubarb. Not much has changed over the years. I’m still a huge fan, which is why I had to turn my two favorite spring time fruits into a deliciously creamy smoothie. rhubarb strawberry smoothie-3

Smoothies are a daily thing at my house. I fell in love first and slowly my kids have followed. My blender is running several times a day to keep up with my kids’ new found love of slurping up their fruit (and veggies!) For me it’s about packing in a little more nutrition into our day, so I start my day with a green smoothie and share with my kids. After school I make another one for them to share. This yummy strawberry rhubarb smoothie is definitely a new favorite. It’s creamy and tart with just a touch of sweetness and a pleasant floral note from orange blossom water. Strawberry Rhubarb Smoothie

California strawberries are in season and that brings a smile to my face. We’re still a few months out from local strawberries where I live. Every time I hit up the grocery store, I come home with another pound or two of strawberries. We simply cannot get enough. Rhubarb is a little more difficult to come by. When I see it, I snatch it right up. It used to be that it was difficult to give away rhubarb – it was kind of spring’s zucchini. Everyone had it growing in their garden. But now I find it to be a little more challenging to find, so when I do it’s a real treat. Rhubarb is very tart on its own, so I added a little raw honey to tame it. Honestly, I never thought of using raw. I mean, my grandmother never did. But it’s really quite refreshing. It doesn’t have quite the same flavor that it acquires from that long simmer on the stove, but it’s wonderful nonetheless. Altogether this smoothie is so bright and refreshing. It would be the perfect addition to an Easter Brunch menu. rhubarb strawberry smoothie ingredients

Now for the healthy part! Rhubarb, as I recently learned, is a great source of calcium. One cup provides 10% of the daily recommended value of calcium. Pretty sweet. It also a good source of dietary fiber, potassium, manganese, lutein, Vitamins K and C, and antioxidants. Strawberries and oranges are also excellent sources of Vitamin C. See? You can’t go wrong here. You simply must make this to sip while you’re dipping hard boiled eggs into small pots of color (and before you gnaw off the ear of the chocolate rabbit). rhubarb strawberry smoothie-4

Easter Inspired Strawberry Rhubarb Smoothie
 
Prep time
Total time
 
Make this spring smoothie for a pre-Easter brunch, and all throughout the season.
Author:
Recipe type: Smoothie
Cuisine: Healthy
Serves: 2
Ingredients
  • 2 cups fresh strawberries
  • 1 cup fresh or frozen rhubarb, sliced
  • 1 large orange, peeled
  • ½ cup coconut cream
  • raw honey, to taste (1-2 teaspoons)
  • ½ teaspoon (or more) orange blossom water (optional)
  • ¾ cup ice
Instructions
  1. Place ingredients in blender. Puree until smooth. Pour into glasses and serve.


Daily Style – Statements In Blue

SHARE THIS +

IMG_4569 Dress – Madewell, Jacket – Zara, Shoes – Zara, Necklace – J. Crew, Bag – Reed Krakoff

The church we’ve been attending for the past few months tends to lean towards the more dressy side, rather than casual. The pastor is never without a dress shirt and sport coat, and most of the congregation makes an obvious attempt at coming to church in their version of Sunday best. I love it, both because I can lean towards a more casual look if I’m feeling like being comfortable, but if I want to get dressed up, I don’t feel the least bit out of place.

I picked up this pretty dress at Madewell right before Alt Summit, and although it wasn’t completely cocktail attire, I knew I could make it work for a number of occasions, and the $40 price tag was just too good to be true. It fits like a glove, although in these pictures it seems a wee bit short, and it’s really nicely made. It even has pockets, a favorite detail of mine for a dress. While I loved this dress best when worn with heels, I think it still works well with flats, and anticipate getting lots of use out of it all year long. IMG_4570 IMG_4579 IMG_4596 Do you snatch up dresses you love at a good price, even if you don’t have an intended use for them? If the price is too good to be true, I tend to do a little dress hoarding. It’s one of those closet items, in my opinion, you can never have too many of. I’m really glad I didn’t let this one get away. IMG_4597


Crafting With Cricut

SHARE THIS +

IMG_4563 
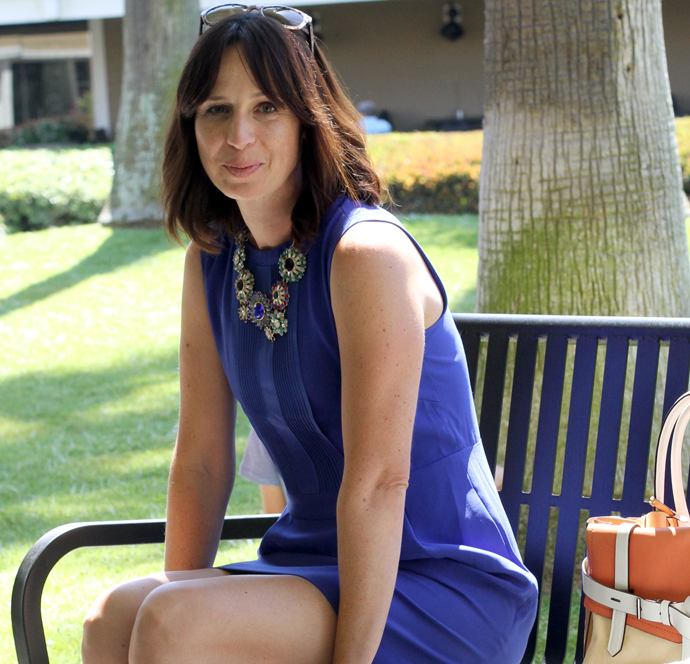
On Saturday night, I hosted an event, along with Cricut, for 20 lovely ladies. Most were friends and family, but a few were guests of friends, and it was nice to meet new faces and spend time being creative, and watch everyone enjoy themselves. The purpose of the event was to introduce craft enthusiasts to Cricut’s new machine, the Explore, and give them a chance to play with it. But the real goal of the night was to just have fun. Thanks so much to Cricut in helping sponsor the event so we could do just that. cricut2 
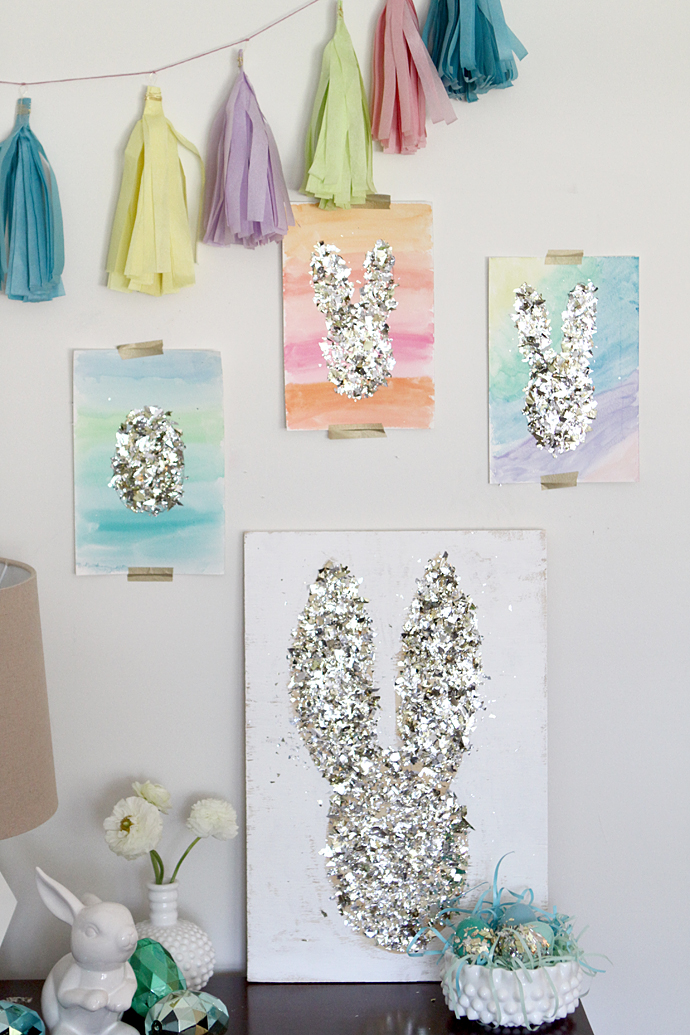
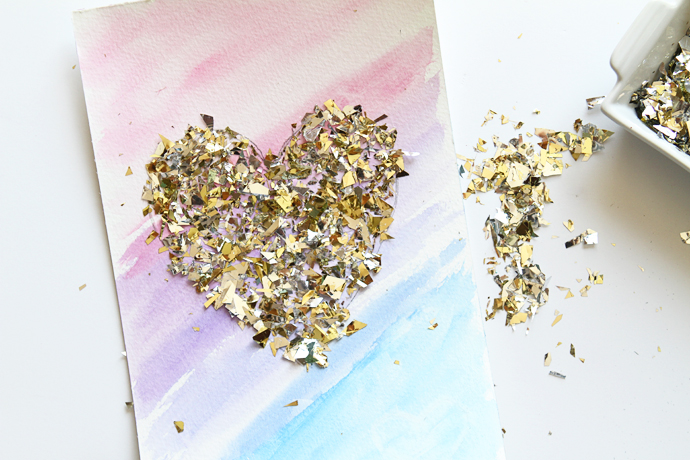
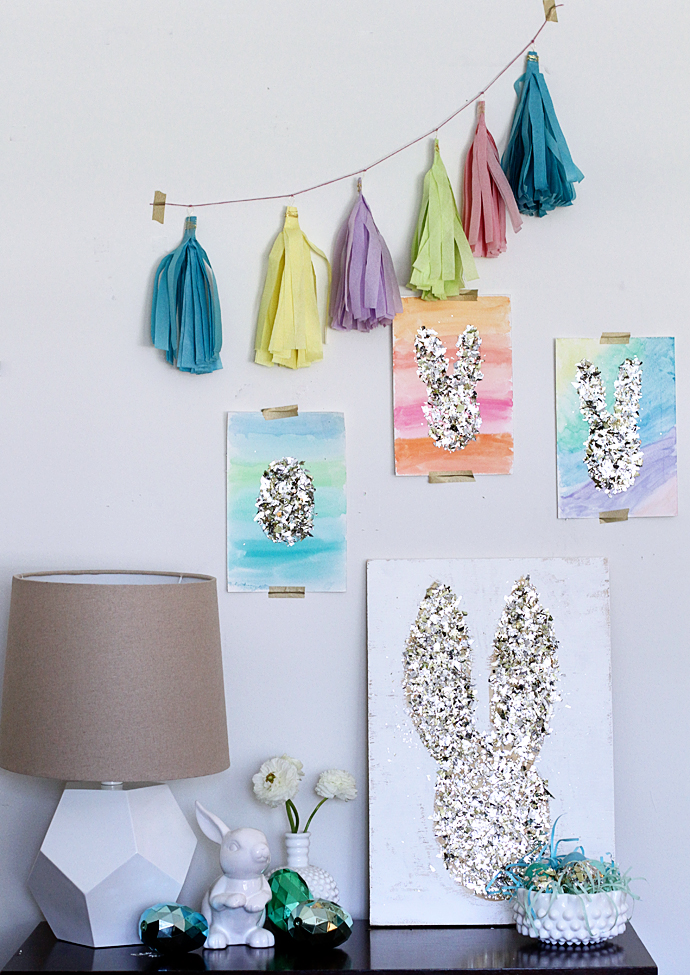
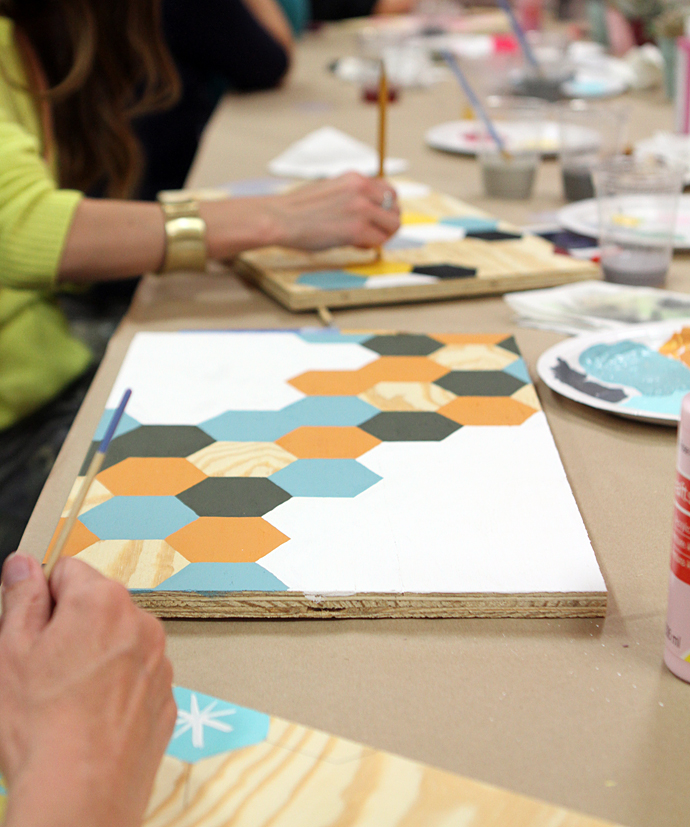
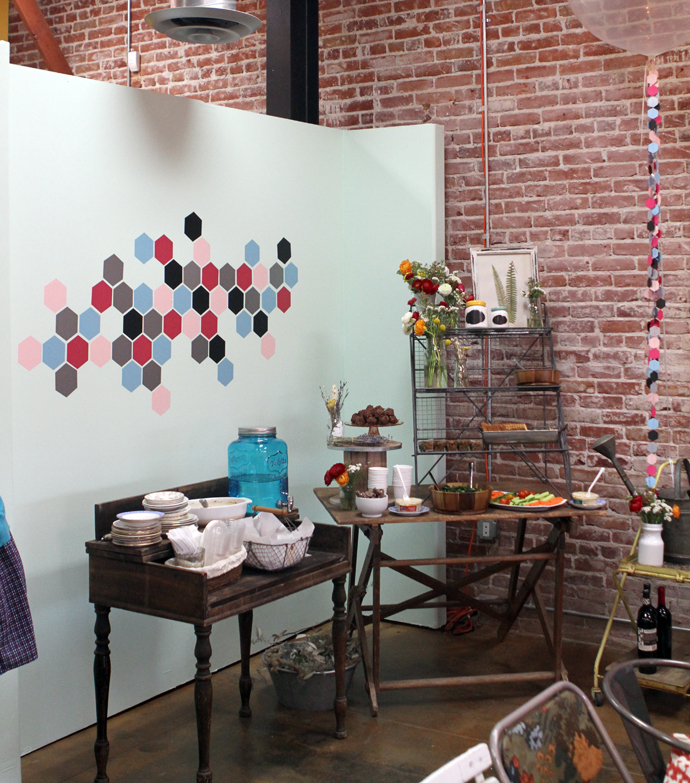
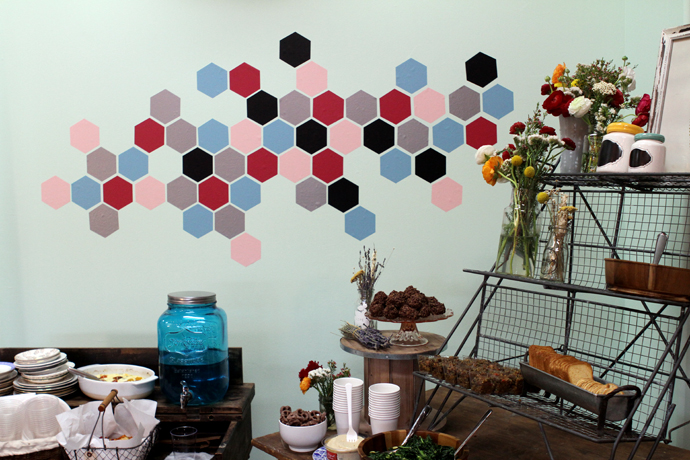
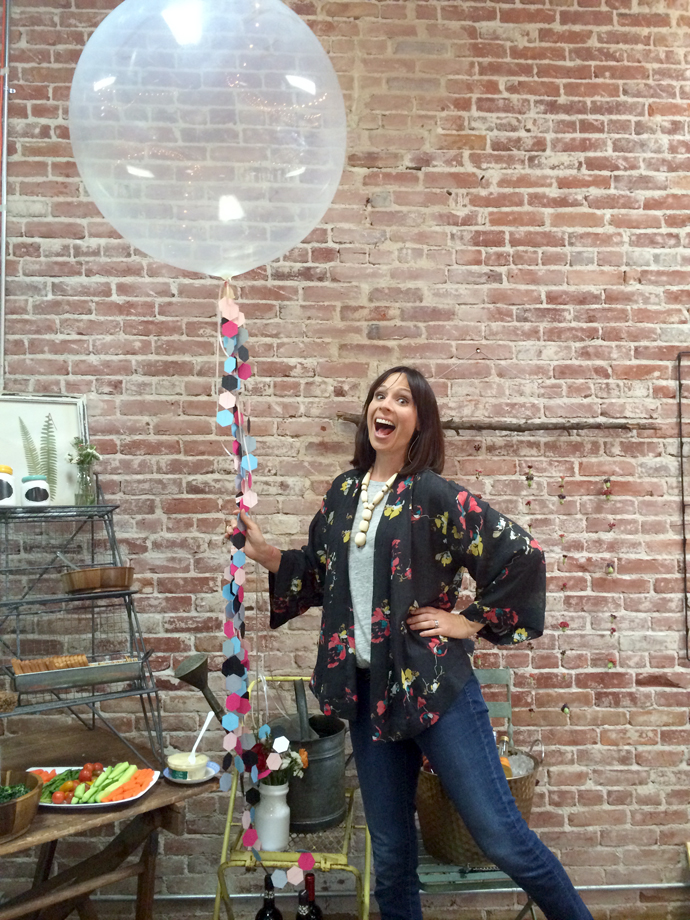
We wanted to show some of the cool and fun things the new Cricut could do, including cut through almost any type of material, while using any sort of design and/or font your heart could desire. With that in mind, I let Alix’s DIY hexagon artwork project serve as inspiration, and asked the team at Cricut to cut out hexagon stencils for us to use that night. The hexagon decor then seemed like a given. They cut out the wall vinyls that hung above the food tables, and hundreds of little hexagon confettis. They also cut out bigger hexagons, which I sewed together to create the big balloon tassels. IMG_4503 
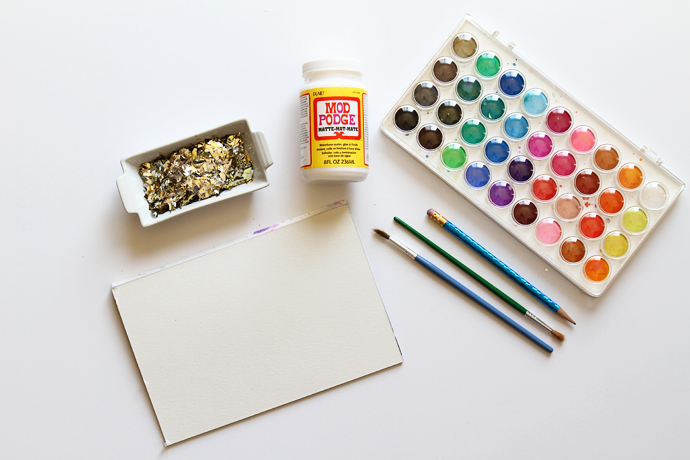
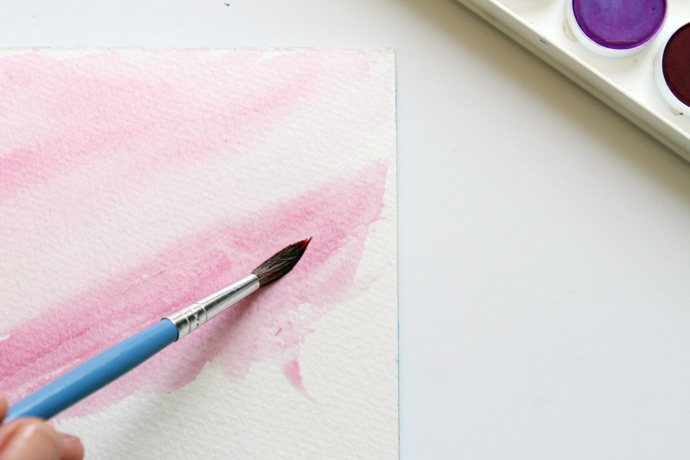
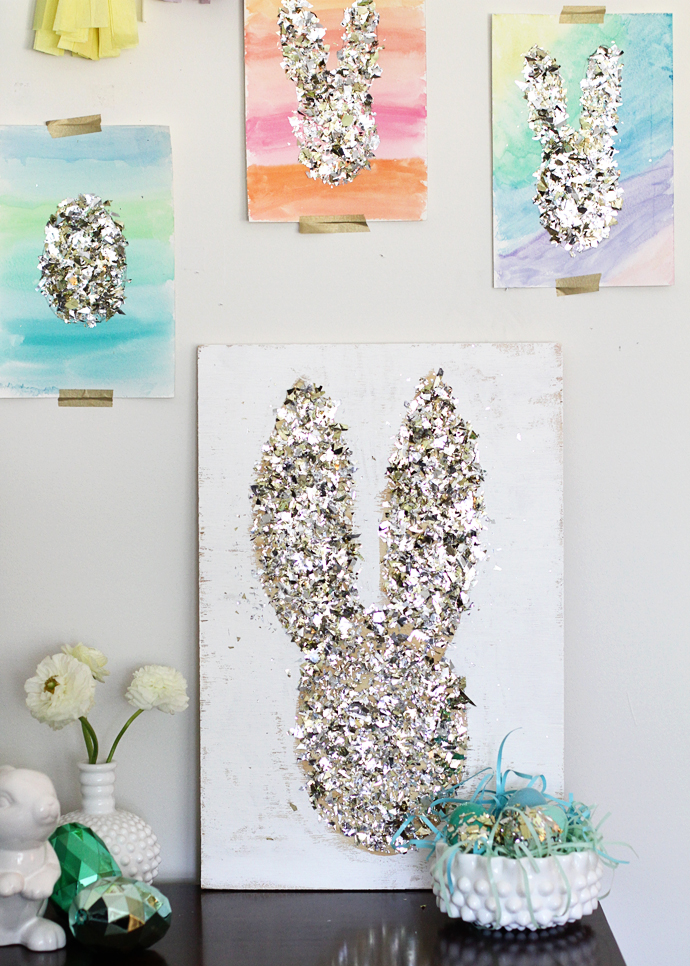
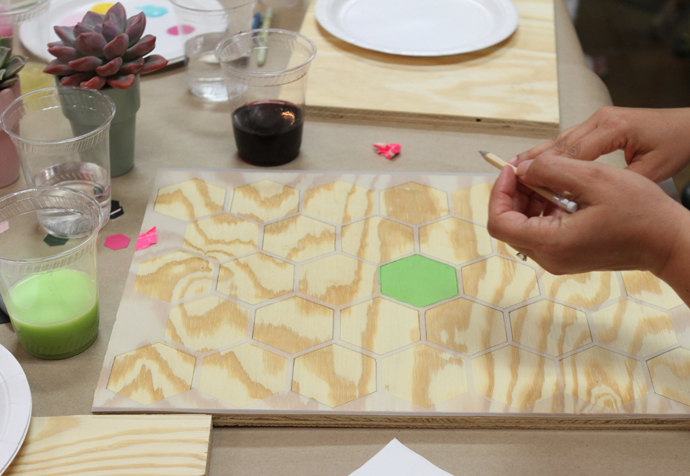
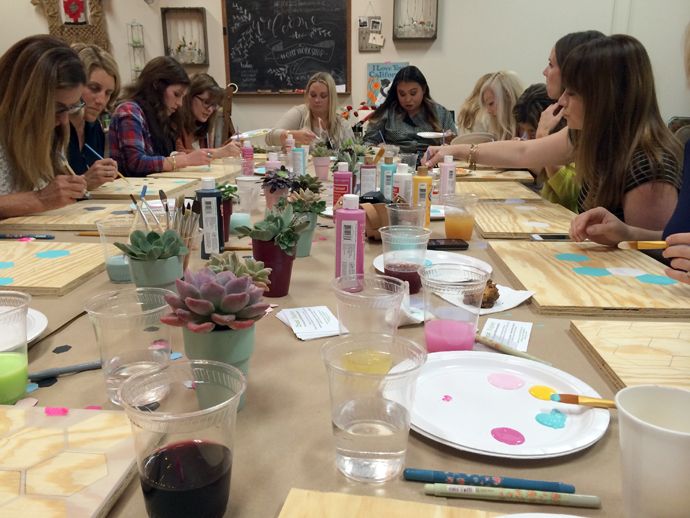
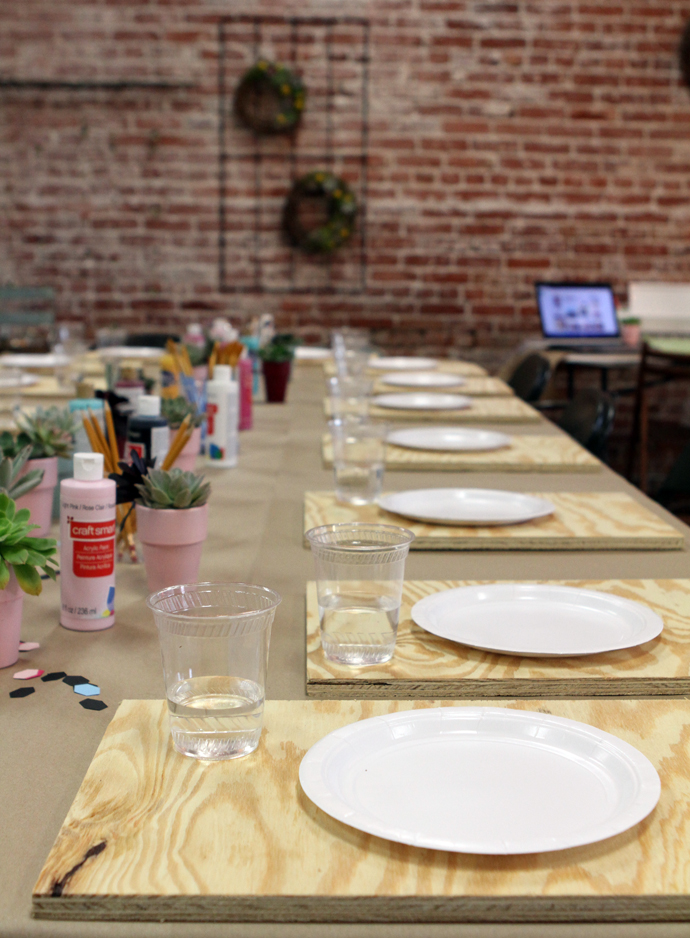
While Alix had used press board for her project, I decided to use standard 5/8″ plywood, and had the lumber yard cut out 1 sheet, which cost $40, into 20 individual pieces measuring 12″x18″. I set out the wood, along with some paint and lots of brushes and water cups at each place setting, and they looked so pretty all lined up. I love when something so ordinarily simple and drab comes together to make such a statement. IMG_4502 
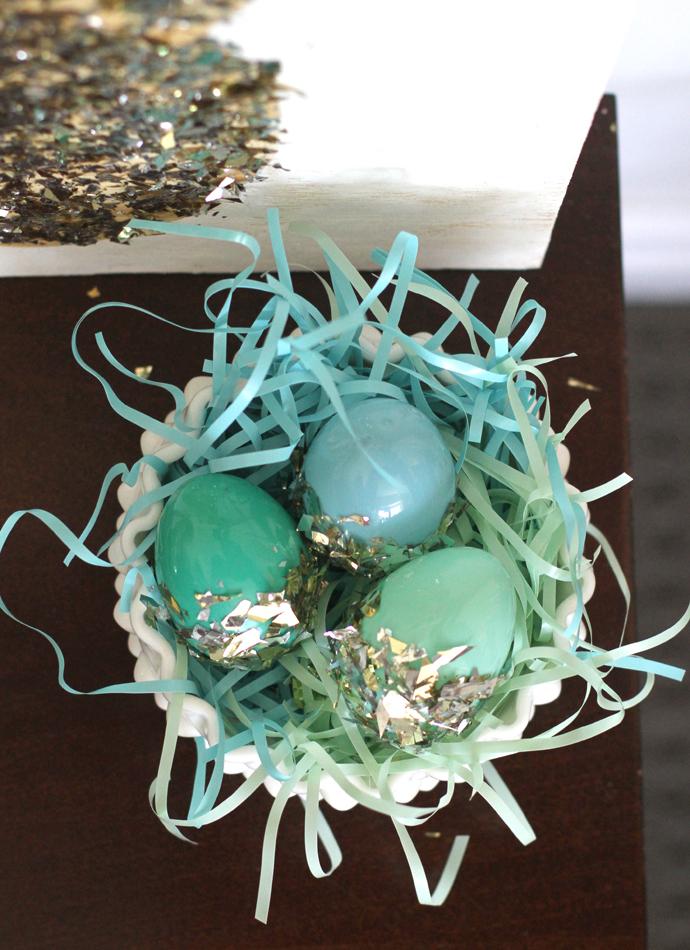
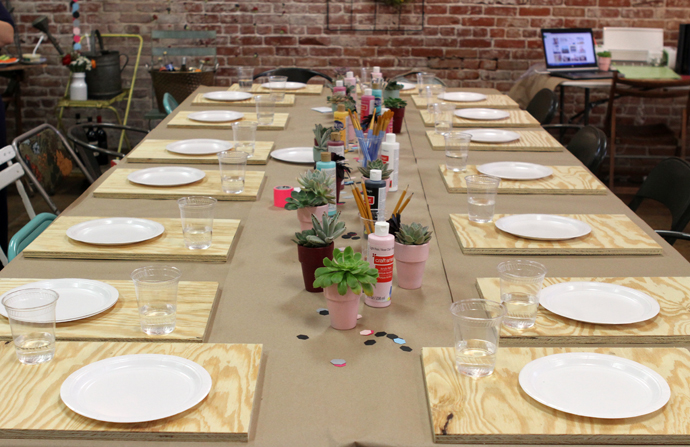
For thank you gifts, I bought small terra cotta pots from Michael’s and spray painted them the colors of the night, including minty green, burgundy and blush pink. I then filled them with succulent clippings from our yard. They served as the centerpieces all along the table and nestled next to the Cricut workstations. IMG_4507 IMG_4506 
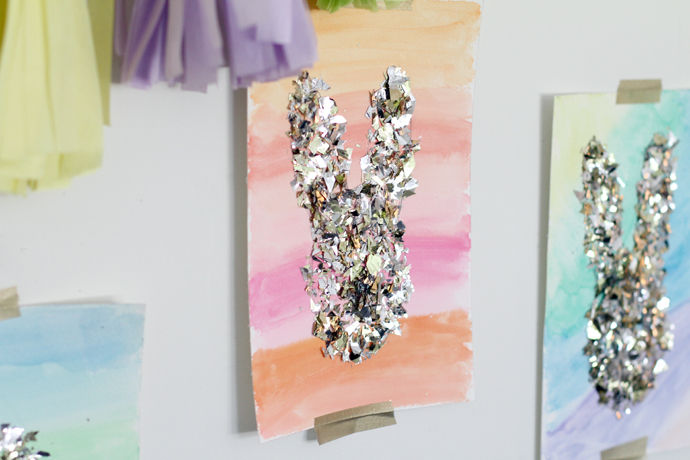
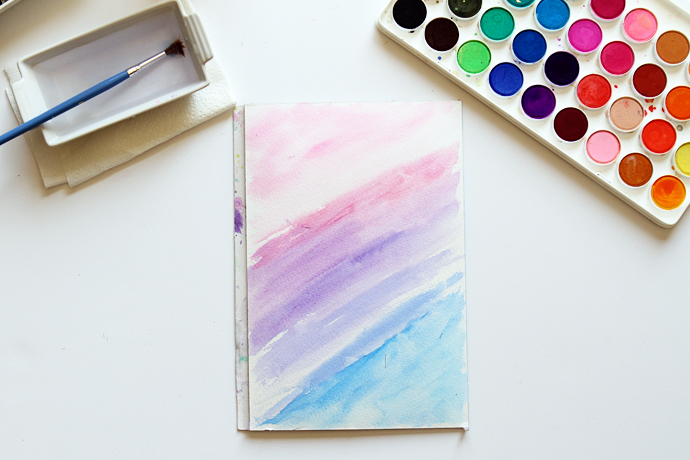
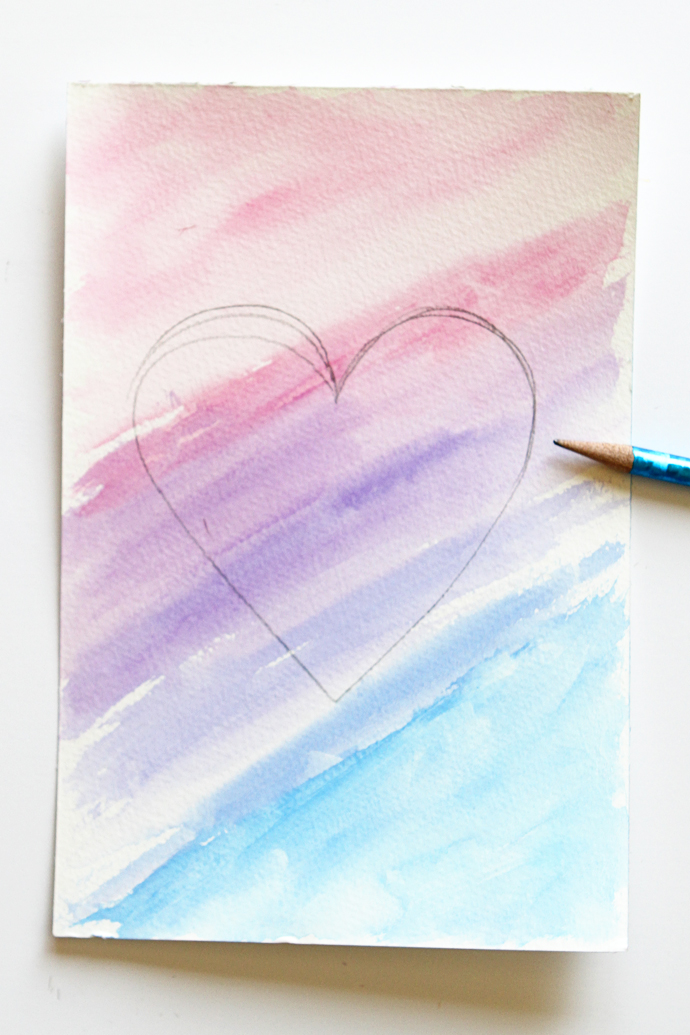
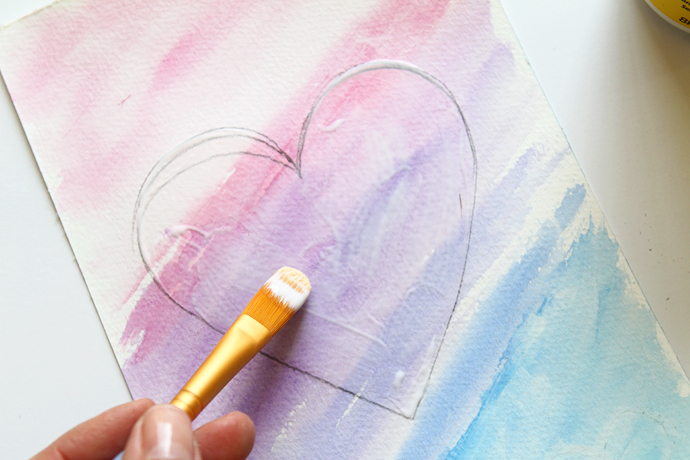
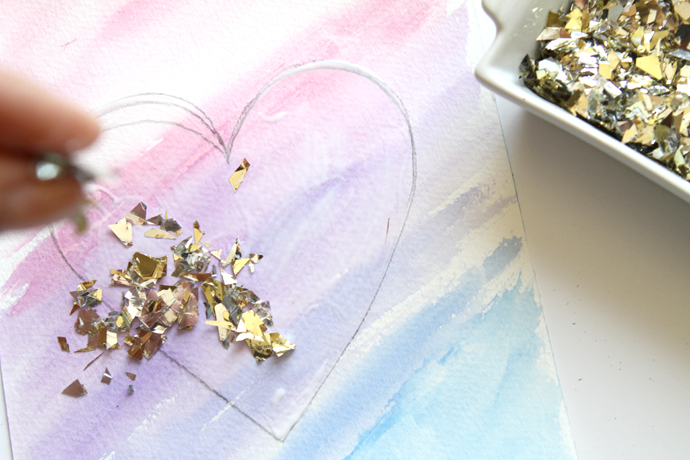
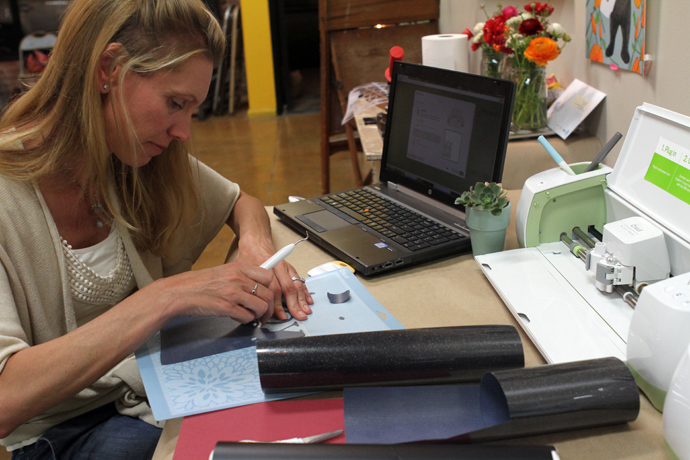
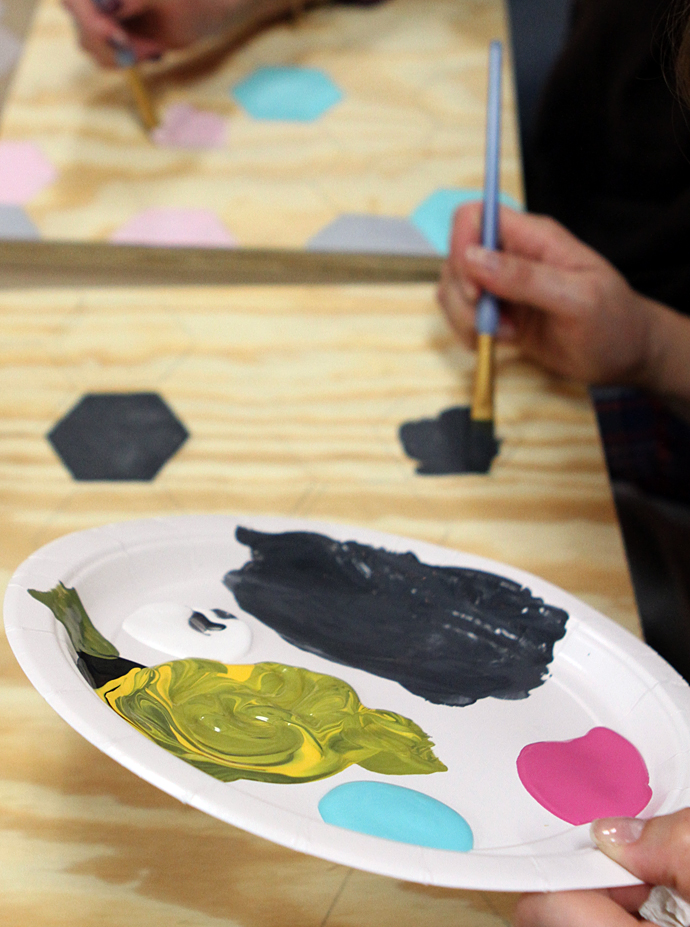
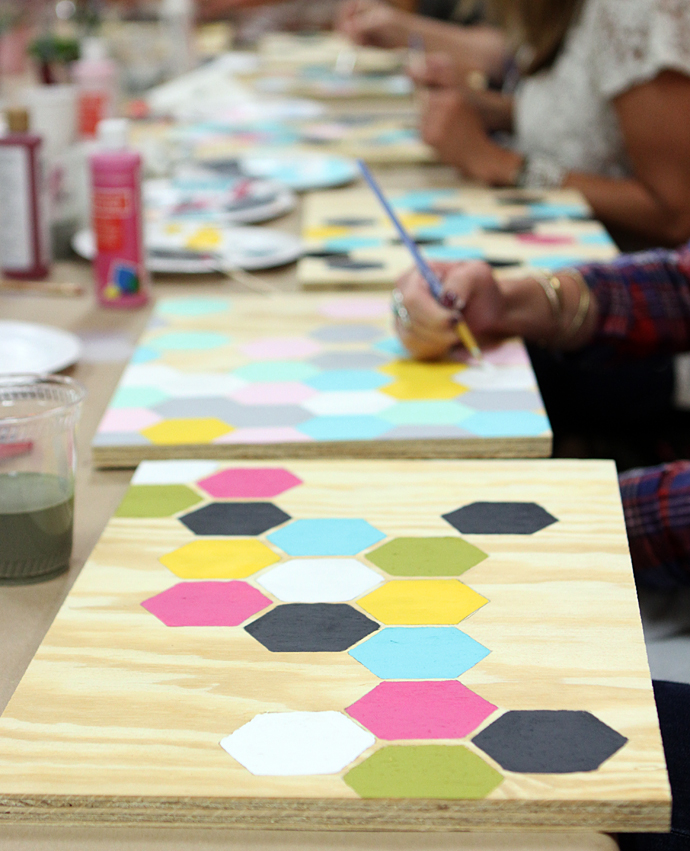
We worked in shifts, with a few friends trying out projects from the Cricut project gallery, while most others painted. Some used the stencil itself to map out their design, while others cleverly used the actual hexagon cut outs from the stencils, to create an entirely different pattern. It was amazing to see all the pattern and color variations everyone came up with. IMG_4533 Some placed the boards horizontal, and some turned the boards to create vertical artwork, something I hadn’t even considered. It’s amazing how our creative synapses fire when our brains are not busy tending to the needs and demands of tiny humans.   IMG_4526 IMG_4545 IMG_4537 IMG_4542 
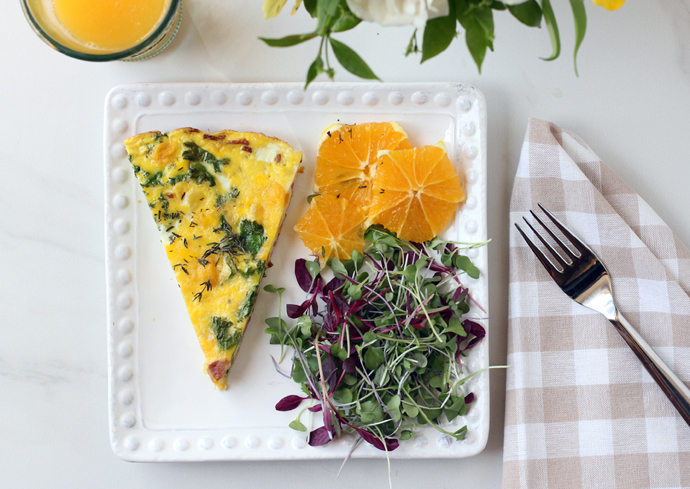
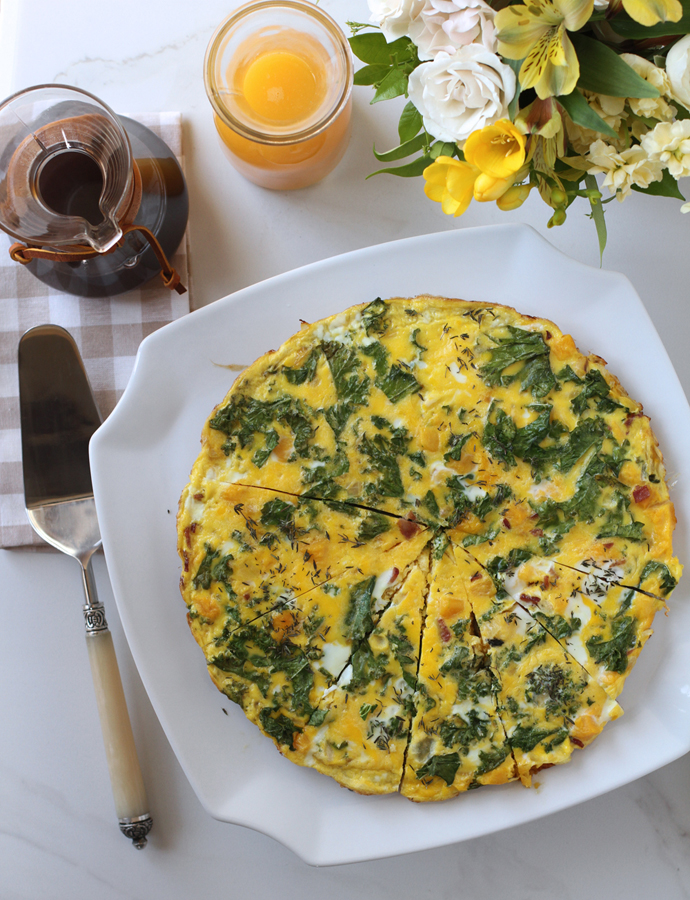
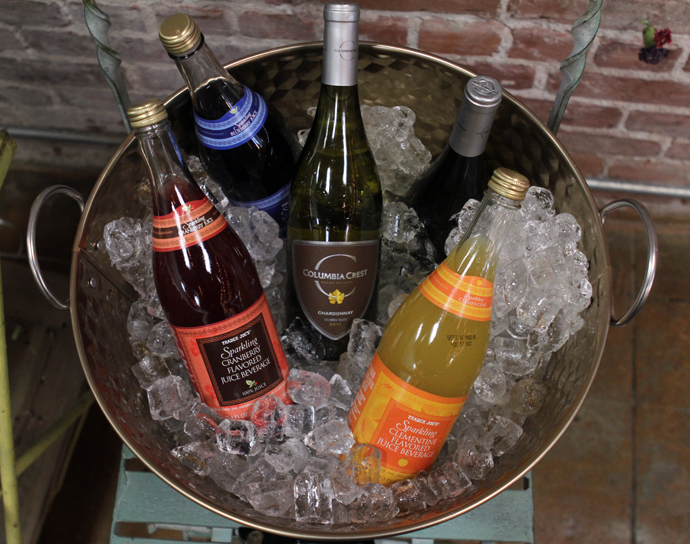
With the exception of a container of hummus, I made all the food myself. I tried to keep everything healthy and light, yet filling. We had just the right amount of food, but could have used more drinks. Of course. IMG_4508 IMG_4509 IMG_4511 
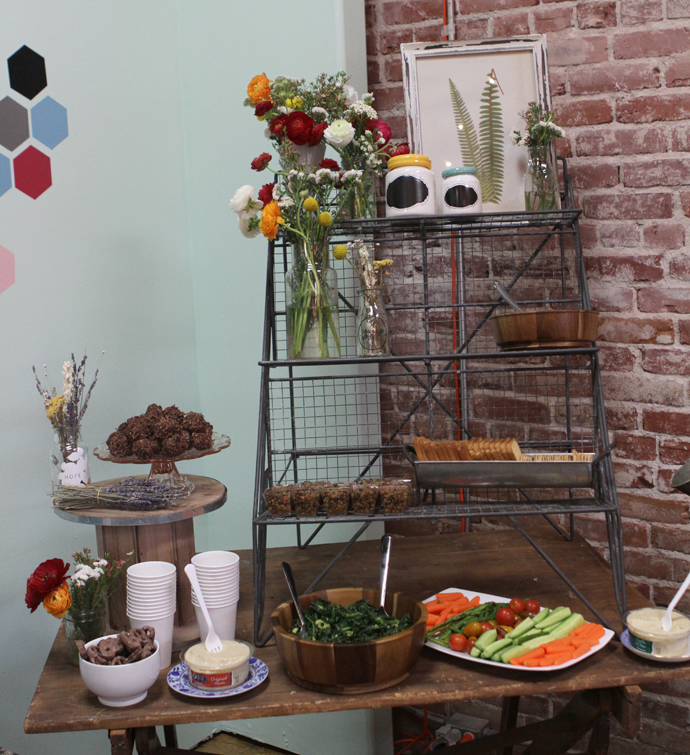
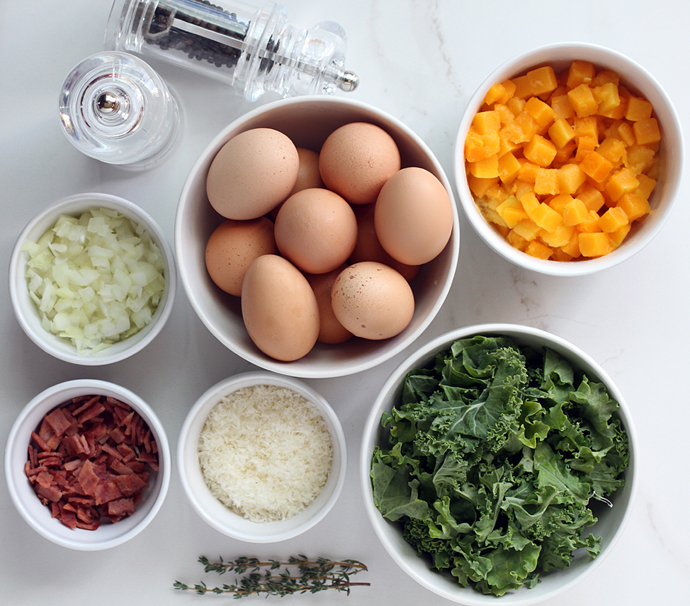
For the appetizers, I made the goat cheese & ricotta dip from the Bountiful cookbook, a lentil & bruschetta salad, an avocado & kale salad, and a veggie tray with CSA vegetables.  The lentil & bruschetta salad is super easy and all you do to assemble is buy a container of premade bruschetta and a package of cooked lentils, toss them together and serve with some little crackers or toasts. IMG_4516 
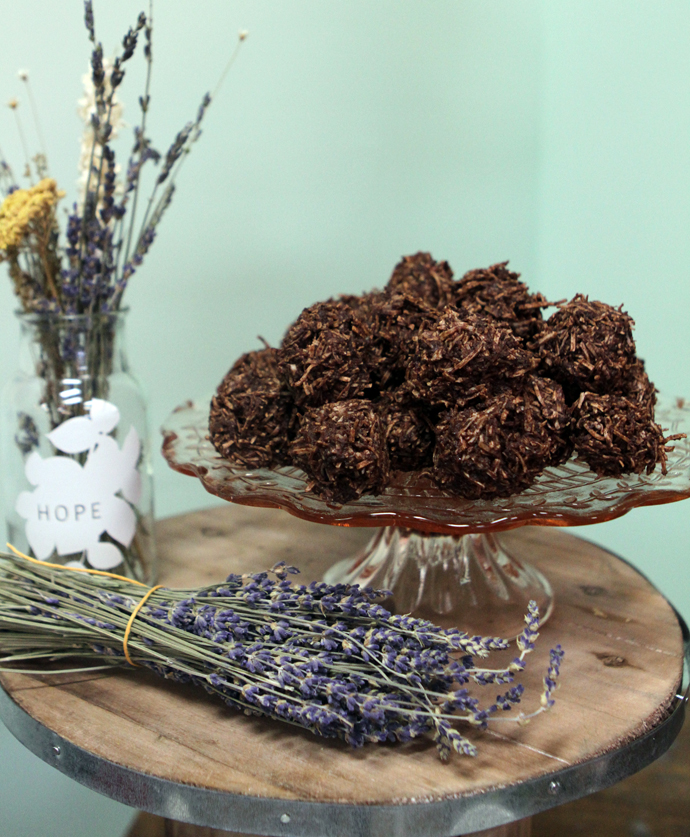
For dessert, I put out some dark chocolate covered pretzels, and made the no-bake chocolate macaroons from Oh She Glows, but added a dollop of plum jam in the center to give them a little burst of flavor. Some noticed the tartness, some didn’t. Either way, without or without the jam addition, they are a quick and easy dessert to pull together, and make for a cute and impressive presentation. I also made the sweet potato chocolate bars from Bountiful as well. IMG_4513 
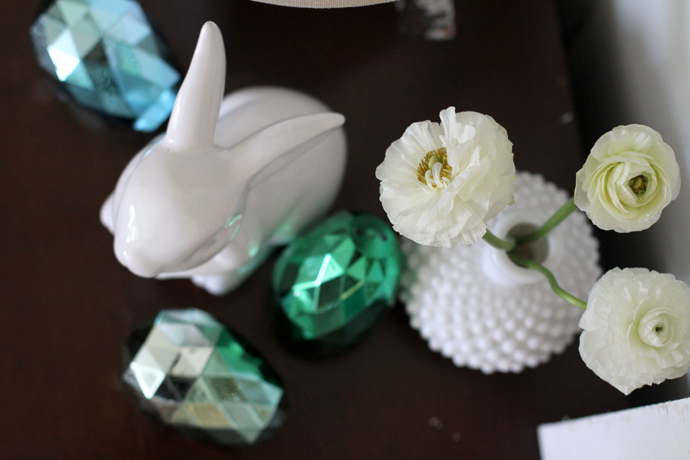
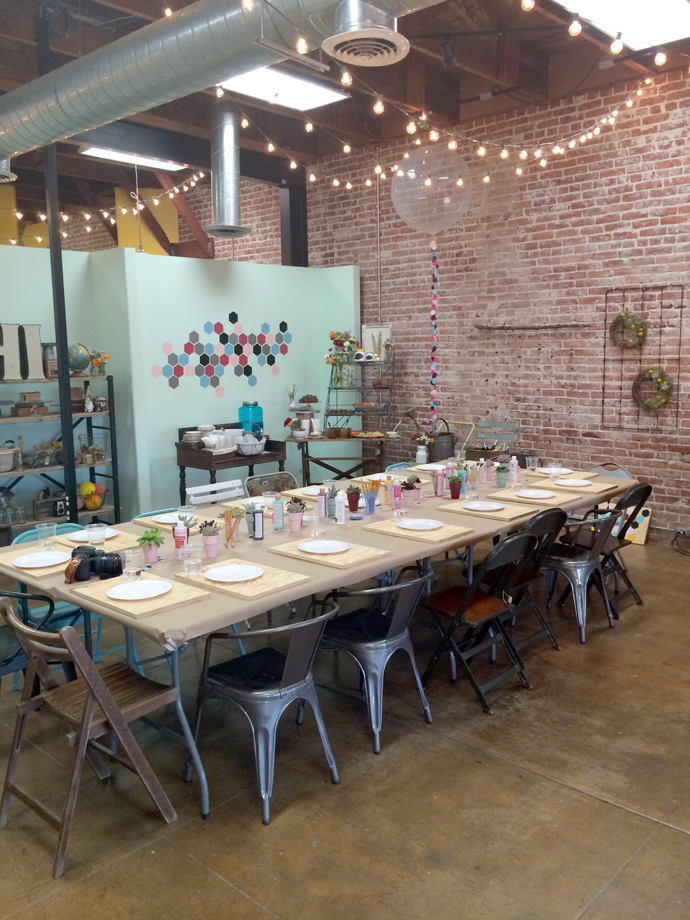
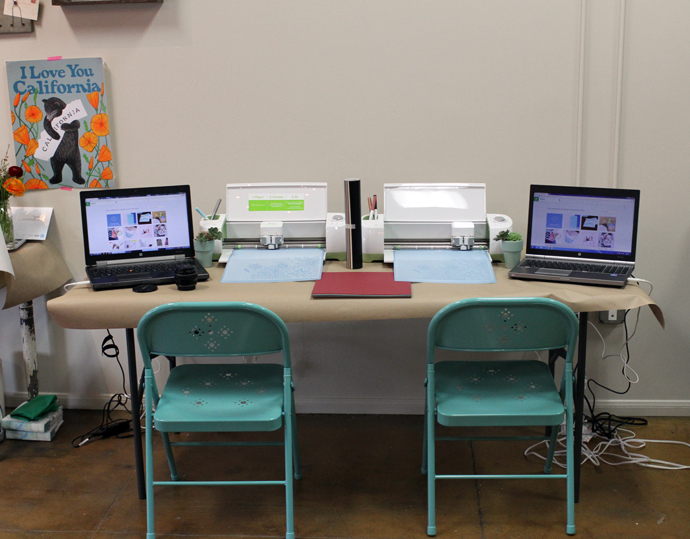
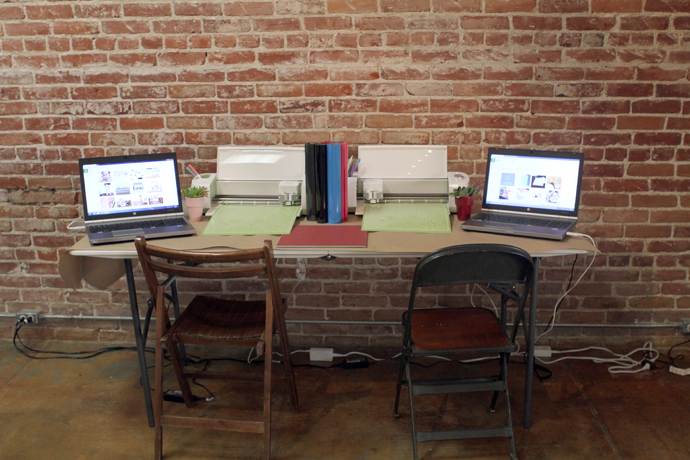
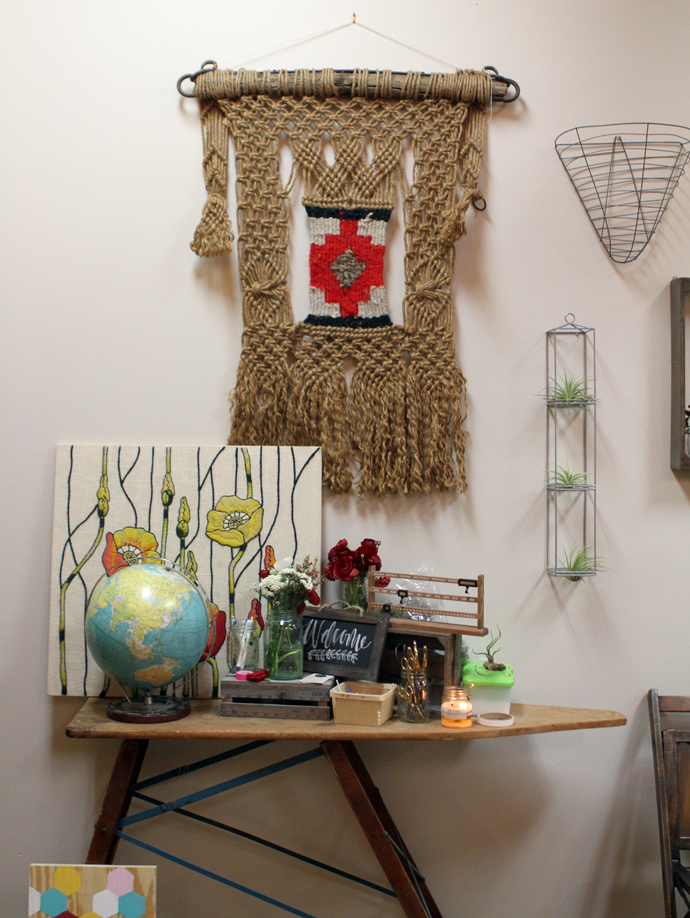
You may be wondering about the cute studio space we held the event in. It’s Oh Hello Friend’s new studio space, which they rent out for workshops and parties. Truth be told, I hadn’t seen the space in person, just heard about it from Danni. I figured it would be a very basic white studio space, but silly me, I was clearly wrong. The details, from the original brick wall, to the strung cafe lights, to the vintage and thrifted decor throughout, made it a truly enchanting place to spend the evening in. IMG_4555 cricut3 
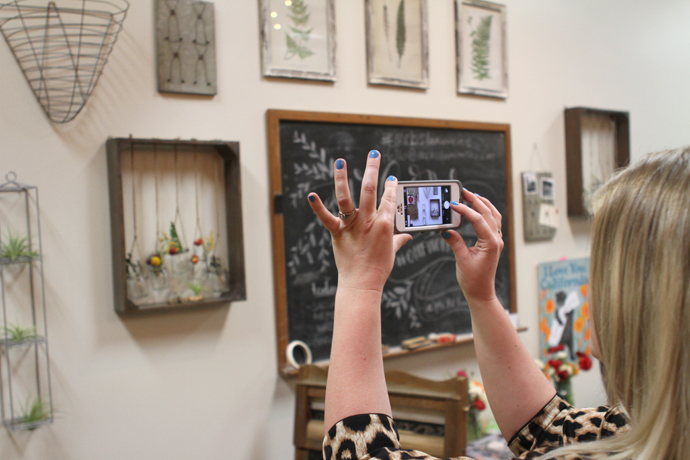
We had held our last Craft Cabinet event in Danni’s shop, and if attendees needed a break from crafting, they got up and browsed the store and shopped a little. I was a little nervous that if all the Cricut stations were taken, they would just be wandering around without anything to do. But of course it was perfect because they wandered around and just took in the visual eye candy. Even though nothing was for sale, I think everyone felt inspired and happy to just be surrounded by such charming and pretty things. IMG_4548 IMG_4547 It was a great night, and I think (hope) everyone had a good time. We gave away a Cricut to one lucky attendee, and everyone else got to go home with a piece of art and a little piece of our home, in a succulent clipping. Some days I really wish Jules and I would start up The Craft Cabinet again, because it really is amazing seeing women get together in a friendly, relaxed way, and just create. It’s inspiring and uplifting. Perhaps in the future we can figure out a way for us to continue hosting such events in a way that doesn’t completely stress us out, but in the mean time, little opportunities like this will just have to do.

For two days this past January, I got to work with the Cricut Explore and witness first hand all the cool things it can do, and the opportunities to create easy projects through the design space. If you’re interested in learning more, peek around the site and watch the video of what it can do. I can’t wait to find some time to actually play with my machine at home, and I hope I can create some projects to share with you all here. Also, if you’re wondering, the new machine does have a space for cartridges from the old machines, but going forward all the files are digital, which is so very cool.

cricut1 Thanks Cricut for helping me throw such a fun party and give me a reason to spend time with some of my favorite people! And special thanks to Cara, our representative from Cricut who flew out for the event, and was our Cricut cruise director for the night.

*This is not a sponsored post. Cricut gifted me a new Explore, and helped with the costs of the party, but all opinions are my own.