52 Weeks to create – week 2 the bedside office

SHARE THIS +

When I became pregnant with Hayden, I sort of fell apart in regards to a lot of general upkeep of the house, but none so much as the office.  I was never the most organized of people when it came to paperwork, but I at least had a system that I would keep up.  I can easily say that any system at all entirely went out the window in 2012.  Mail was opened, bills were set aside and marked with due dates, and all other paperwork that I knew I needed or wanted to keep just went in a general inbox that I stuck in the closet.  Once bills were paid, those were also sent to the same box and just piled up.  For a year. office-3

When we decided to do some remodeling to turn the office into Hayden’s nursery in July, that haphazard system even went out the window because everything was transferred into the garage until we could figure out where the pieces of the office would fall.  My “filing system” was shoved into one of our garage cabinets and quickly forgotten about.  We set up my desk in the living room for a little while, but it was near impossible to work when I had a sitter here, with the kids running around the house, constantly coming up to me, instead of the sitter, asking for a snack or telling me they had to go poop.

So we decided to set up my desk in our tiny room.  Luckily it fits just next to the bed, in the same spot we had set up the pack and play for Hayden.  It’s a tight fit but at least I have some peace and quiet now.  Still though, the filing system suffered.  All paperwork was literally thrown in a shopping bag till I could figure out a system.  Finally when the craft cabinet was built, thing started to fall into place.  Space was freed up in the little cubby storage box you see below, and I decided to turn that into a place to hold my filing system.

So yesterday I finally tackled a years worth of paperwork.  Fueled by The Golden Globes, a husband that did bed time, and some encouragement from my friends on Instagram, I stayed up till midnight and finished it all.  It feels so good, and especially wonderful that our 2012 tax prep for our personal stuff is now taken care of too.  We are usually always scrambling before our appointment in March.   office-4

We are getting our room painted (white!) tomorrow so I’m still waiting to hang the wall pocket folders from the Martha Stewart line, but for the most part all of the filing and organization is complete.  I filed away all of 2012 and put that in the garage until it’s time for our tax appointment.  I created files for all of 2013 and are ready to just be filled, and I set up a little stationary and mailing station in the desktop box, which actually makes me really happy.  No more scrounging around in my desk for a note card and matching envelope.  I used some things I already had on hand (the kraft boxes and magazine holders from The Container Store), and bought the aqua accessories you see from the Martha Stewart line at Staples.  I’ll admit the pretty folders and pencil holder aren’t exactly necessary, but they make office organization a bit more exciting.     office-1

I’ve also begun to hang a few prints that I’ve been holding onto for a while, waiting until we remodeled or moved and I had the “perfect” office space.  Well you know what?  I’m tired of waiting for perfect, because that is no way to live, and perfect will probably never come.  So I’m making the most of my tiny little bedside office area.  When the paint dries and I hang the rest of my items, I’ll repost new pictures taken with my real camera, which is unfortunately in the shop right now for repair.  I think you’ll get a kick out of the tiny space I work from.  office-2

This was my biggest creating of the week; office organization.  It feels pretty spectacular.  Now give me some stuff to file!

So what did you create this last week?  I’m so excited to see the #52weekstocreateJan feed fill up!  In just a week almost 100 pictures have been uploaded, sharing inspiring things you all are creating, from food to organization projects to home decor to crafts.  It’s been so exciting and fun to watch it all come through.  Thanks so much for playing along.  If you want to know more about the project, you can read my post from last week here.  Please feel free to join in and play along and use the hashtag for anything you create this month for a chance to win $30 credit to The Container Store!


Making Clothes Work For You – Part 1 The Tank Dress

SHARE THIS +

IMG_9027 I’ve heard quite a bit lately that I look great, and I don’t even look like I just had a baby 4 months ago.  I always say thank you and appreciate the compliment, but I am always a bit perplexed when people say I don’t look like I just had a baby.  I always wonder what discerning factor tells those of us that gave birth in the last year, apart from those that have not, besides the little baby in our arms.  I’m still about 20 pounds overweight from my prepreganncy weight, I still have a very obvious pooch, and my prepregnancy button up pants still don’t fit, but either way I’ll take the compliment.  All swelling has gone down in my tummy though, so at this point, this is the body I have for the time being, so this is the body I’m going to make the most of, whether I lose anymore weight or not.  So when I get compliments that I don’t look like I just had a baby, I would politely beg to differ and tell people that I have just learned to dress my body in its current state to hide some of those obvious tell tale signs.  What does that mean?  Accentuate the positive, of course.  Let me give you an example. IMG_9065 IMG_9041

The tank dress; I’ve had this one in my closet for the last couple of years, and while it’s admittedly not the easiest style to wear, I wanted to use a bit of an extreme example to start off.  From the front view it doesn’t look so bad, right?  But then I turn to the side, and whoa, look at that pooch!  I easily look 3-4 months pregnant here, and while in my book it’s still perfectly acceptable to look this way, especially since I’m still breastfeeding, it’s not acceptable to dress in a way that will flaunt those “trouble” areas.  So let’s see what we can do to correct this situation a bit, shall we? IMG_9043

The first thing I’ll do is add a long layering tank.  I’m not sure why these work so well, but long tanks perform some sort of magic when it comes to helping to hide a tummy.  It’s like an extra layer of defense, or a deflection tactic.  You can’t even see that I have it on, but it gives me an extra bit of security knowing that if I raise my arms you’ll see the tank.  Call me strange.  Anyhow, once I have my layering tank on, I’ll add a loose fitting sweater.  But the key to this look working is to have your top layering piece, such as this sweater, be loose, but also form fitting in the arms and to have a bit of a lower neckline.  Why? IMG_8997

The form fitting sleeves elongate the arm and make them look overall more slim.  It also gives the look a less bulky feel.  The slight scoop in the neckline shows off a bit of skin and again, makes the sweater look less overpowering.  The loose silhouette in the body drapes right over that tummy and pretty much hides it entirely, and the length is long enough to cover the tummy, but short enough to show off a bit of my bum, which I still consider to look pretty decent for a 36 year old mom of 3.  Accentuate the positive right? IMG_8999 IMG_9010

And while I’ll admit that a form fitting tank dress is a tough look to pull off, I think this is a great example of making any piece work in your closet (that fits, that is!) work for your postpartum phase.  With some creativity and experimenting, you can make the most out of what you’ve already got in your closet, instead of having to rush out and buy a bunch of new clothes for your new body.

My arms and my tummy are right now, my problem areas.  I plan to do a few of these series in the future, showing different staples to choose to help with these problem areas, focusing on dresses and tops.  But are there any other “trouble areas” you’d like me to consider and work with?  I’d love your feedback and questions, if you have any!


The Craft Cabinet

SHARE THIS +

IMG_8967 {our dining room, free of the head chairs and centerpiece}

I never intended to become a DIY blogger, it just happened by chance.  Over a year ago I posted a tutorial showing how I had made a necklace, just for fun, and within a few weeks and many thousands of page views later, I started thinking of other tutorials I could share with readers.  In a matter of months, I went from blogging about crafts and simple projects I was creating just for fun, to purposefully thinking of tutorials that would attract readers and would garner plenty of “Pins”.  I slowly, but eventually fell into a trap last year where I wasn’t blogging what I created, but creating to blog.  It got me plenty of traffic, but left me feeling tired and anything but creative.  It also left me with very little time to complete the unfinished projects around the house, and the feeling to freely create on a whim.  By the end of 2012, I knew I wanted to blog about the things I created in a very different way.

In 2013 I’d like to continue to offer you guys DIY’s, but also the other things we create for fun or necessity.  Sometimes we(I) pigeon-hole ourselves into thinking that “creating” is all tied up in a perfectly styled tutorial, complete with pretty pictures and plenty of pins.  We forget that we have the opportunity, and often do in fact create every day, several times a day.  A freshly organized closet, a twist on a classic family recipe, a simple after school craft project with the kids; these are all ways that we in fact create a life and a home, and memories for our family.  This year I’d like to update the 4 year old family framed photos around the house, finally hang some artwork in our family room, organize a good filing system, craft more with my kids, and yes, create some pretty and unique tutorials to share with you all.  So I’ve set a challenge for myself.  Each week I’ll create something, but my challenge is to share what I’ve created, whether it’s simple and imperfectly styled, shot with my iPhone, and not at all “Pinterest worthy.”

I have 52 weeks to create a home I feel happy and content in, free of blank walls and outdated pictures staring at me.  52 weeks to get creative in the kitchen and try new recipes.  52 weeks to make messy art with my kids and sit down and spend time with them.  So going forward each Monday I’ll publish a new 52 Weeks To Create post showing how and what I created the week before.  I’m excited and feel that this will be a big part of helping me find the joy in “craft and DIY” blogging again.

Care to join me?  I’d love for us all to share ways we are creating in our lives and in our homes.  Join me on Instagram all year long (I’m @fourflights), and post your pictures of how and what you’re creating.  I find inspiration in so many things, from blogs, to magazines, books and most especially Instagram.  I’d love to share with you my favorite sources of inspiration, craft items and projects, so I’ll be giving away something new each month to one of you that joins along on Instagram.  No catch at all, you don’t even have to follow me on Instagram 🙂  Just use the same hashtag each month, with the month at the end for ease of categorizing, so for January, tag your posts: #52WeeksToCreateJan (in February it will be #52WeeksToCreateFeb, etc).  At the end of each month I’ll pick a winner out of those that participated!  Remember, it can be anything from organization projects, to cooking and baking, to anything crafty.  Use the tag and enter your photo in the creative pool!  The January giveaway is a $30 gift credit to The Container Store!  Start the year off right and help get your supplies and life a bit more organized and in order with the biggest selection of organization products around.  I love the Container Store and can literally spend hours in there dreaming of ways to make my life complete 🙂

So ready to see what I have been busy creating this last week?  Perfect organization for my craft supplies in my very own craft cabinet, that’s what.  When Hayden took over the office, we were left with zero storage for the very large abundance of arts and craft supplies we own.  In fact everything that was housed in the old office closet including extra blankets and table linens, are all now housed outside in the garage.  Our house does not have a single linen closet.  Our dining room addition does, however, have a huge recess in the wall, so it struck me a while back that it would make the perfect spot for a built-in.  We sat on the idea for the last 2 years and got various quotes and shopped around until we found someone we could trust, recommended by our friend Shelly of VanRozeboom Interiors, and was within our budget.  He completed the cabinet just before Christmas, and we spent the last couple of weeks adding lighting to the upper cabinets which saved us $1100 by doing it ourselves, and organizing it so that everything fit just right and made sense.  Apologies in advance for the awkward pictures, as I don’t have a wide enough lens to shoot properly in this small space, but hopefully you get the idea. IMG_8956 IMG_8961 IMG_8970

The upper cabinet holds all of our china and white party ware.  We wanted wooden shelves as opposed to glass, so we ended up having to add LED lighting under each shelf so the entire cabinet lit up, and we also added lighting underneath the upper so it lights up the serving area.  The lowers consist of solid door cabinets on either side, and 4 nice and large self-closing drawers.  All of the shelves are adjustable.  At this point the overall look is very minimal and clean, and it’s taking me all my might not to want to fill up the uppers with little tchotchkes, or to place crap on the serving area.  I see a horizontal surface and I want to accessorize it, I can’t help it! IMG_8982

While I had storage containers for all of our craft supplies, none of them were cohesive and when placed in the cabinet and drawers, they didn’t make the best use of the space, so I set out to find unison storage containers that would work and be affordable.  After much time shopping around and roaming the aisles of the Container Store, Target and Bed Bath & Beyond, I found our solution in shoe and accessory boxes from the Container Store.  The shoe boxes were $1.89 each, and the smaller accessory boxes were $1.69 each.  They are clear so I can see what is in each box and no need for labels, and the dimensions make the best use of space.  The quality is excellent considering the price.  I used 10 shoe boxes and 4 accessory boxes, making this organization project come in just around $25. IMG_8984 The top drawer holds the majority of my jewelry supplies, including beads, wire and cording, and all my tools that I use on a regular basis.   IMG_8985 The second drawer holds my stash of fabric paints for making all those canvas bags, wrapping supplies including cute bags, washi tape and bakers twine, and a whole box dedicated just to Mod Podge items! IMG_8986 The third drawer holds my collection of special pens and markers, and the kid’s stash of markers and crayons, stickers and sparkly things for making crafts. IMG_8987 Finally, the bottom drawer holds random items like thread, glue gun, extension cord, Pantone fandecks, and my giant roll of freezer paper to create stencil crafts. IMG_8973 The left side cabinet holds my sewing machine and all of my fabric.  My machine had been banished to the garage for the last 6 months, so it’s nice to finally have a place for it so I can finally start sewing again when I have some time. IMG_8977 The right cabinet isn’t quite as pretty and organized, but it just holds the kids messy art supplies so I figure it works just fine for now.  Eventually I’d like to get all matching containers, but that’s for another time and budget. IMG_8990 IMG_8991 IMG_8993 Here are close ups of the storage containers.  They’re quite nice for how inexpensive they were, and are by far the most affordable storage option I found.  The smaller acrylic containers pictures on top, which hold my thread and some beads were a bit more expensive, and are also from The Container Store, and were $3.99 and $4.99 each.

So that’s what I was up to this past week. I feel great knowing that all of our supplies are easily accessible and everything has a place.  Organization isn’t necessary for many people to feel creative, but it’s essential for me.  When our supplies are a mess, I’d rather ignore them than even bother digging them out.   I’m hoping that this project will inspire much more creativity in the coming weeks and months of 2013.

Happy creating!


chipping away at the life list

SHARE THIS +

IMG_0206 
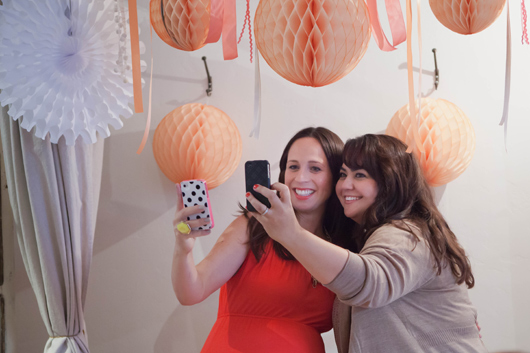
In November of 2010, I attended Camp Mighty.  We had homework to do before we arrived, and it was in the form of writing a life list; 100 things you would like to do during your life.  Boy, I had no idea the emotions it would stir up for me.  100 items is a lot to try to think about accomplishing in what we have left of our lives, and at the end I admittedly added some spot fillers just to get to 100 items.  Things like zip lining with the kids in a rainforest???  I saw that tonight and I honestly can’t even remember why I added the “in a rainforest” part.  To sound more adventurous?  Sure, I would like to visit a rainforest one day, but really I could die tomorrow, and having not visited a rainforest wouldn’t be my main regret.  At any rate, writing the list was daunting, a bit silly and fun to dream of these wild things, and also very emotional.

In some ways it helped to fine tune my dreams and desires for what I want my life to look like in 50 years, and it also helped me to realize that if I had to whittle that list down to 10 things, I could.  Some of those things aren’t items you can even put down in words as things to check off, but rather, take years of hard work and prayer and hope, and maybe even just some good old dumb luck to see realized.  And some of those things aren’t even in my control.  Things like raise happy and well adjusted kids, and watch them get married and have babies.  Have a passionate, loving and mutually fulfilling marriage.  Have a personal relationship with Jesus Christ.  These are the most important things to me, and the things I want the most out of life, but they most certainly aren’t things I can just mark down on a list and one day cross them off and call it good.  So as you take a look at my list below, many of the items I’ve listed are things that would hopefully help to lead to these really big ticket life items.

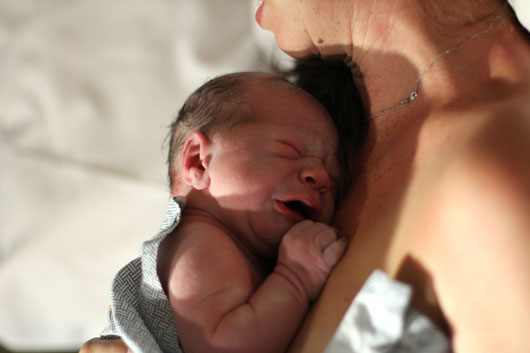
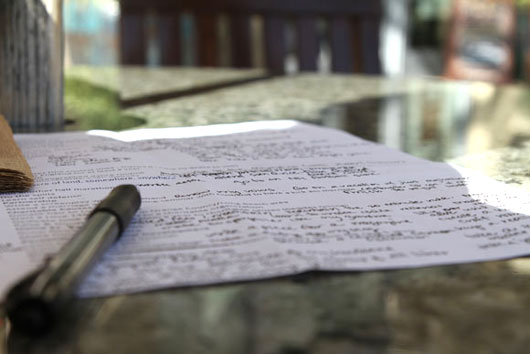
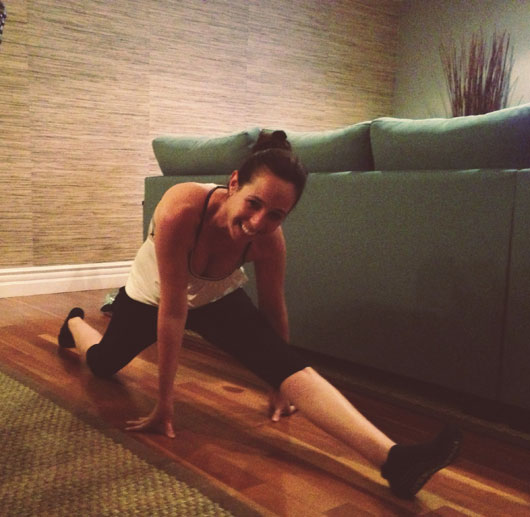
Shortly after I attended Camp Mighty, I got pregnant with Hayden, and as the realities of pregnancy and taking care of 2 busy children set in, the Life List got pushed to the back burner.  We still managed to unintentionally check off a couple of things last year, but in no way was I focused or ambitious in really trying to chip away at it.  A few days ago though I realized that this year I would like to start taking a stab at some of these items.  While many of my life list items are crazy and may never happen, or not be possible for many years, there are plenty of easy and very doable things that if I take the time and focus, can be accomplished over the next year.  So out of the almost 100 items below, the five I would like to try and tackle this year are: become flexible enough to do the splits (I’ve already started practicing below), donate hair to Locks Of Love, take the kids to an Angels game, organize digital photos, and perform at least 26 random acts of kindness. photo

I deleted a few of the items on my list tonight that just seem so out of place over a year after creating the initial list, and so I have some spots open to make it an even 100.  I’m leaving them open for now because I’d like to add some new ones reflective of our new family of 5.  And over the years I’m sure some other items will be added and deleted and I may look back on this list in 25 years and realize that half of these things are just silly.  But for now, this is where I am today.  My goal for this year is to enjoy life more.  For me that means slowing down a bit so that I can take the time to enjoy life more.  Plan some adventures, be intentional with how we spend our time as a family, as a couple and on my own.  Don’t let work or chores or ambitions stop me, and us, from living life.  I read this today and it sums up what I hope for this year, and I guess just life in general:
“I think the main intention that I’ve uncovered today though, is joy. The joy of being in the wild, of being with my loved ones, of being a family, of being by myself, of being healthy, of faith. I want to be more aware of the joy that is presented to me every day. It sounds simple, and fundamentally it is. Yet all too often I find myself breezing past a chance to feel joy, because I’m too caught up with what I’m missing, what I’m waiting for, what went wrong, what I’m worried about, other people’s messy emotional and physical lives.” from The Girl Who Married A Bear

This is the year I start taking this life list thing seriously.  How about you?  What do you wish for in 2013?  And if you have a life list, please share it!  I love reading others life lists, they’re so inspiring and thought provoking.

Family
Teach my kids how to fish
Organize a family reunion
Throw my parents a big party to just say thanks
Visit all major museums in the US
Sublet a Manhattan apartment from Thanksgiving Day-New Years (parade, tree lighting & times square)
Stay on a ranch/farm
Take the kids zip lining
Teach kids how to snowboard/ski
Teach kids dirt bike riding (Art’s in charge of this one)
Go sledding in White Sands New Mexico with the kids
Make a family movie
Teach kids how to drive
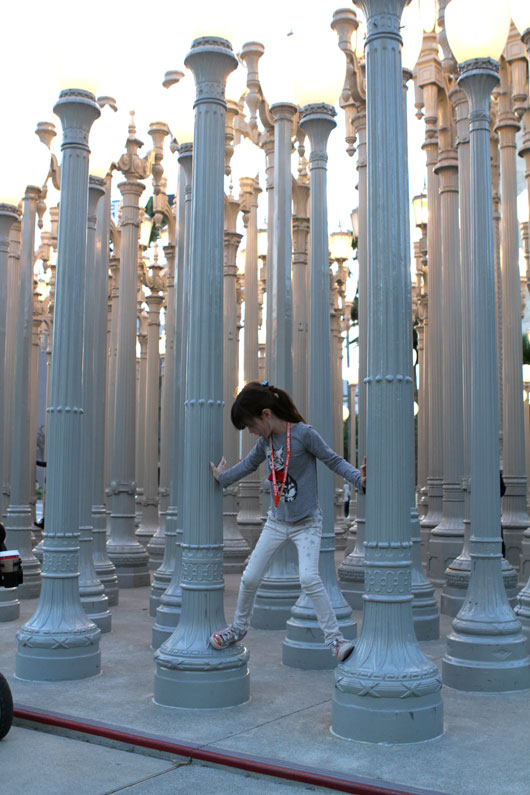
Take kids to their first Angels game
Digitize all film & organize footage
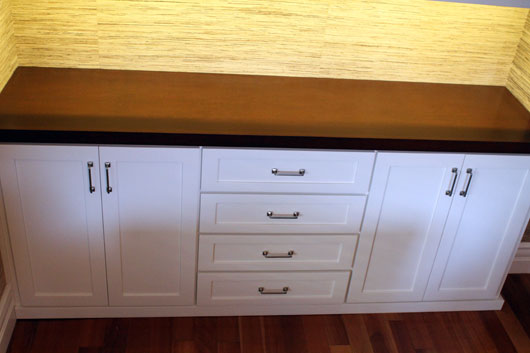
Organize all digital photos
Hot air balloon ride
Create some sort of journal/book/photo album for each of the kids

Spirituality
Read the Bible cover to cover
Go on a Mission trip
Visit the Holy land
Have a 1 on 1 session with a Pastor & ask all the questions I’m afraid to ask in public
Attend Bible study on a regular basis & study all the books of the Bible
Visit my brother’s grave annually

Travel & Adventure
Visit all 58 of the US National Parks (Acadia, American Samoa, Arches, Badlands, Big Bend, Biscayne, Black Canyon of the Gunninson, Bryce Canyon, Canyonlands, Capitol Reef, Carlsbad Caverns, Channel Islands, Congaree, Crater Lake National Park, Cuyahoga Valley National Park, Death Valley National Park, Denali, Dry Tortugas, Everglades, Gates of the Arctic, Glacier, Glacier Bay, Grand Canyon, Grand Teton, Great Basin, Great Sand Dunes, Great Smoky Mountains, Guadalupe Mountains, Haleakala, Hawaii Volcanoes, Hot Springs, Isle Royale, Joshua Tree, Katmai, Kenai, Kings Canyon, Kobuk, Lake Clark, Lassen Volcanic Park, Mammoth Cave Park, Mount Rainier, North Cascades, Olympic, Petrified Forest, Redwood, Rocky Mountain, Saguaro, Sequoia, Shenandoah, Theodore Roosevelt, Virgin Islands, Voyageurs, Wind Cave, Wrangell-St. Elias, Yellowstone, Yosemite, Zion)
Live in New England for a year
African Safari
Spain
Italy
Greece
Great Britain
France
Canada
Australia
Japan
China
Germany
New Zealand
Swiss Alps
Visit all 50 states (Alaska, Arizona, Arkansas, California, Colorado, Connecticut, Delaware, Florida, Georgia, Hawaii, Idaho, Illinois, Indiana, Iowa, Kansas, Kentucky, Louisiana, Maine, Maryland, Massachusetts, Michigan, Minnesota, Mississippi, Missouri, Montana, Nebraska, Nevada, New Hampshire, New Jersey, New Mexico, New York, North Carolina, North Dakota, Ohio, Oklahoma, Oregon, Pennsylvania, Rhode Island, South Carolina, South Dakota, Tennessee, Texas, Utah, Vermont, Virginia, Washington, West Virginia, Wisconsin, Wyoming)

Just For Fun
Learn a choreographed dance routine
Go to the Winter Olympics
Go to the Summer Olympics
Create a bottle of wine with my name on the label
Attend Sundance Film Festival
Attend Cannes
Get teeth professionally whitened
Go to an NFL game
Own an acre of land, somewhere, anywhere
Watch 100 Best Movies of All Time (AFI’s 10th Anniversary edition)
Own a 2nd home for vacationing

Health
Run another half marathon
Become flexible enough to do the splits
Learn self defense
Complete a 1 month detox
Go to a wellness spa

Partnership
Write a screenplay with my husband
Attend a marriage and counseling seminar with husband to have a kick ass marriage
Renew my vows
Celebrate 50 years of marriage
Go on a romantic vacation just the two of us
Finish the book we’ve had for a long time

Charitable Causes
Donate time together as a family
Donate hair to Locks of Love
Start a Love 146 task force in Orange County/Long Beach area
Dedicate time consistently to a charitable organization
Raise & Donate at least $2000 in a year to charitable causes (besides tithing)
Build a house with Habitat for Humanity
Donate money anonymously
Perform at least 26 Random Acts of Kindness

Home Ec
Grow flowers from bulbs
Make homemade pasta
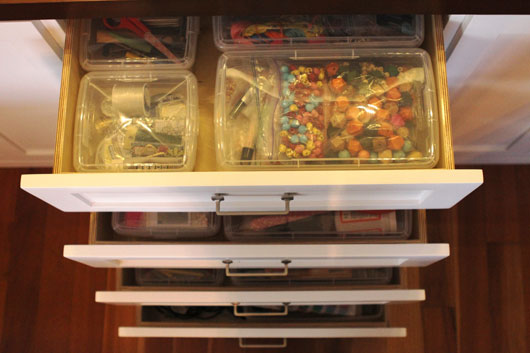
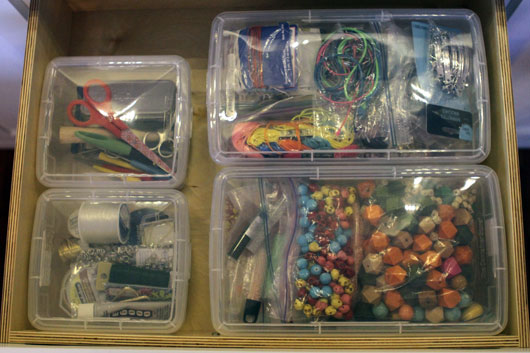
Create & maintain organized files/records
Maintain the 20 minute rule
Make authentic Spanish paella from scratch
Make sopapillas like my Grandma used to make
Learn to make Chile Rellenos
Master a basic pie pastry recipe
Create a working office/craft room
DIY an office desk
Invest in a quality sewing machine
Pay off mortgage
Get all ducks in a row for financial investments

Personal/Professional Development
Learn to speak fluent Spanish
Learn to play the piano
Grow a blog to a successful level
Take a photography class
Take a graphic design class
Learn Photoshop well enough so I don’t need Art’s help
Read at least 50 of the books on the 100 Classics List of All Times (between the US/UK versions)
Take an art class
Take a religious studies class
Take an advanced sewing class
Take a jewelry making class


Styled Post Photography Tips

SHARE THIS +

As I continue to slowly get into the swing of things in the new year, I thought I would introduce you to a very talented friend, Ashley of House of Lovelock.  Ashley shoots weddings on the weekends and stays home with her four beautiful children during the week, while her husband works at a local Christian College.  I asked Ashely to share some styled post photography tips for those of us that shoot weekly style posts and want to improve them a bit, and she came up with some great advice.   And in fact this is great advice for any one just wanting to feel and look better in pictures.  I know plenty of fellow mommas who stay behind the lens because they just “hate” taking pictures.  Here’s some tips to help you feel better getting in front of the camera too!  Thanks for sharing Ashley!

While I don’t write many myself, style posts have to be one of my most favorite things in the world to read. I love getting ideas for hair, make-up, and occasionally I even find something I need. Unfortunately, my “professional” eye seems to get the best of me at times – I tend to knit pick. I often notice that lacking photography gets in the way of well written posts + beautiful outfits. So much so sometimes, that rather than admiring all the great things that are there, I’m just distracted by the bad things. For a while I thought this was just me, but then a couple of non-photographer girls I know mentioned that they felt the same, and then Andrea asked me to write a post on styling people/photography. When it came down to writing this post, I thought the most helpful thing all around would be to focus on “5 Tips To Better Style Posts” from my professional perspective. Of course this helps the most in styled photography, since real life photos don’t have to have as much of a rhyme or reason, but some of these points can be helpful all around! Make no mistake, there is no secret and easy route to being a better photographer. These are just some tips that will get you there more directly + some that will help you make the most of the resources you  currently have.

1. Read your camera’s manual. There, I’ve said it all… almost! It may not be a professional-line camera, but you can maximize what you get from it by knowing all of its details. Take the manual out with you when you shoot and work on it, rely on it for awhile until you have it down. It is just about the same education you would get if you took a basic class on photography, and it is specific to your camera. (Really couldn’t be better, right?!)

2. Watch the nose. This is the most common mistake I see in blog photography, especially when it comes to styled posts, and it’s one that really bothers me because it takes so little effort to change it! (If you are perfectly symmetrical and look like a Swedish supermodel, you are free to flaunt your nose how you please without care, but for the rest of the world, we need to note this.)

I felt like I had to use a picture of my self so I can be blunt with this one, but do you see the problem with the above pictures? I’ll be the first to admit that I don’t have a tiny nose, but the left hand picture makes it look a whole lot bigger than it does on the above right. The important thing to remember is to keep your nose on your face. Meaning, angle your face so that your nose is contained on your face. In the example on the right, my nose doesn’t go outside of the outline of my face making it appear much smaller. A nose, in photographs, can sort of act like a compass for how professional looking your portrait (or styled) photos are. If I read a blog where the nose is always off the face in weird angles like the picture on the left, I would automatically assume the person has zero photograph skills even if a lot of others things about the picture were good. If photos have nicely placed noses, I think the blogger either has an incredible eye to notice such details, or they are more studied in photography. This tip comes in especially helpful in make up shoots when you have lots of close ups.

3. Pretend like you can’t edit & take pictures you like from the start. What if editing wasn’t a possibility? What if you had to shoot something like you couldn’t edit like, gasp, film?!? I really believe that digital is nothing more than a knock off of film. Think of it that way, and try to take the kind of pictures you want. You will save yourself time on editing and you will become a better photographer much quicker. Don’t get me wrong, I love what editing does for photos, but it’s important to use editing as if it’s an accessory to an already fabulous outfit.

4. Eyes & Lips. Even if you don’t wear eyeliner or lipstick/gloss in real life, I believe that is a must, must, must if you want professional looking style photos. While photography can be a thing of beauty, photos are also a very harsh reflection. Things that you wouldn’t notice in real life are so much more pronounced in photos…brace yourself…

Above Left: Dry lips, tired eyes, looking somewhat, if not totally, haggard. Above Right: me 5 minutes later – all I added was lipstick, eyeliner & mascara.

That’s it. 5 minutes of make up just did for this photo what no amount of editing could have done. My eyes are brighter, my teeth are whiter, and while I still feel half dead from a mere 5 hours of sleep, I look much more alive than before!

5. Be critical. Ask for Honest opinions. Don’t be offended. It’s important to give yourself good, healthy, critical opinions of your photographs. Ask a few people you respect and trust to give you their opinion on photos of yourself – listen to them and don’t be offended! Sometimes we’ll think our arms are our problem area in photos, but we are totally missing how awkwardly (and much more noticeably) we place our feet, or head, or slump our shoulders. If you want to have unbiased blunt opinions (and have enough courage to not get upset by whatever people might say) join a group or online board for beginning photographers. It can be hard to have people you don’t know give you pointers on styling, but it is a great way to keep learning and growing as a photographer.


Daily Style – An Afternoon At the Museum

SHARE THIS +

IMG_8865 Sweater and Pants – James Perse; Booties – Sam Edelman last seen here; Crossbody – Marc by Marc Jacobs

Well helloooo there my friends!  Happy New Year and welcome back to reality, live and in living color in the year 2013!  I hope your holidays were warm and wonderful.  Ours were very special since we had a new little buddy celebrating his first Christmas with us this year.  Hayden was a trooper through many late nights and skipped naps and all around wild ruckus by loud cousins, and overall seemed to enjoy his first Christmas immensely.  I actually don’t know if he really even knew what was going on, but he smiled a lot so I’ll take that as a good sign.  I myself enjoyed a bit of rest and all around house-organization while I took a few days off from the blog, enjoying time with family and friends.  During my time away I thought some about this blog, and while 2 days into the new year I’m still fine tuning my “goals”, I will say that in 2013, I know that I plan to enjoy life more.  While that may mean I will post a bit less here, it doesn’t mean I will sacrifice quality of content, and am now more than ever, committed to posting content that is meaningful to me, or that I think will be inspiring and helpful to you.  Less fluff, more solid substance.  Life is too short, and life is definitely too short to waste even 30 minutes of my day publishing a post just for the sake of posting, and asking you to read it.  So hooray for 2013, and all the good stuff it shall bring!

One of the things we hope 2013 will bring for us is more adventure, now that Hayden is a bit more transportable.  Since the kids have been on vacation and Art has been taking some time off of work, we decided to visit the Los Angeles County Museum of Art (LACMA).  Quite a few new additions and exhibits have been added in the past 25 years since I had last visited, so a trip was in order.  We visited for about 3.5 hours and didn’t even make it to the Boone’s Children’s Museum, but there was still so much for all of us to enjoy.  We took lots of pictures that I wanted to share with you, and at the bottom of the post look for a few bullet point tips for making the most of your visit to the LACMA if you live in the Southern California area or are visiting. And let me know if you have any questions.   IMG_8869 IMG_8864 IMG_8833 IMG_8828 IMG_8824

IMG_8815 IMG_8816 IMG_8788

IMG_8783 IMG_8803

Untitled-1

Untitled-2 IMG_8820

To See:
-The “noodle” exhibit is a hanging structure of thin yellow plastic tubes, resembling noodles, located in the courtyard adjacent to the west entrance. The kids could have stayed playing in there for an hour.
-Metropolis is the matchbox car racetrack pictured above. It runs every other hour I believe so make sure to get a schedule when you arrive so you don’t miss the track in action.
-The Giant Rock is outside, north of the entrance right next to the great lawn. Take a walk up and down the rap and if you dare, stand beneath the giant rock.

To Eat:
-There are a few restaurants on site to choose from but we found the most family friendly option to be the LACMA Cafe and Coffee+Milk for a snack and a good cup of coffee.

Save Some Cash
-The museum has a program called Nexgen. Basically, sign up your kids for a membership, for free, and 1 adult per child gets in for free when visiting with the child, until they turn 18. So bottom line, our whole family visited for free. Helped to make up for the $10-$18 parking fees and the overpriced food. There is no catch by the way, it’s just to encourage families to visit. Simply fill out this form and take it to the Welcome Center upon your arrival.


Looking Back Through 2012

SHARE THIS +

When you decide to ditch your other blog and start a new one from scratch, there’s usually some anxiety that comes with it, but when I launched For the Love Of with my first post in March 2012, I had no doubt that this was the place for me.  I have been blogging since 2008 and while I loved my old space, I started to feel like I had lost control of it.  It had changed names, changed designs, changed focus several times in its life that I wanted more than anything a place where I could start fresh and continue to develop my voice and how I had grown as a mother, a writer, a blogger.  Starting this blog was for me, the best thing I could have done, and I’ve been asked so many times if it was scary starting all over and without hesitation I can say no.  I knew I would lose some readers, but I also gained plenty of new ones and feel good with the space I’ve been able to carve out here.  I am continually grateful that any of you read this blog, and while it was originally intended to strictly be a “style blog”, it has evolved a bit in the past few months to reflect the many dimensions of me as a woman, and I like that.  I hope you do too.  If you don’t mind, I thought I’d do a little reflecting and share with you some of my favorite posts over the past year.

One of my very first posts on the blog was from the series Insiders, taking a look at those working behind the scenes in the Fashion industry, and I introduced you to my friend Spencer from St. John.  Funny thing is, he has since left that company and moved to a modeling agency in LA.  I may have to visit him in his new space and talk about his new role.  While Insiders wasn’t the most popular of series, it was fun for me to reconnect with old friends and I hope to get back into the series again in 2013. quote

March was filled with a lot of content, from quite a few style posts, like what I wore to Blissdom, to one of the most popular DIY’s of the year, the Ombre Seed Bead Necklace. IMG_4488

April picked up where I left off with Neon Week, and more than anything, it solidified my place as the blogger of all things neon (I even took the trend all the way through Christmas).  I still get tweets or comments on Instagram from readers and friends telling me they saw or bought something neon and thought of me.  That makes me all sorts of happy.  The DIY Glittery Notecards and the Easter Table With a Neon Twist I designed for Making It Lovely were my two favorite projects of the week.  I also loved the DIY flower arrangement post from April. glitter-notecards IMG_6064 IMG_7886

One of the best things about starting this blog in 2012 was that I was able to document my pregnancy in such a memorable and fun way, by sharing with you all my favorite style posts during my maternity phase.  May saw the belly continue to grow and I continued to rely on flowy dresses, maxi skirts and long layering tops.  One of my favorite pieces throughout my whole pregnancy was the Forever 21 tie dye dress I found for about $20.  It reminds me that I should do a maternity style recap for you guys, and list my favorite pieces that got me through the entire pregnancy.  Something to do in 2013 for sure.  You can see all of my Maternity Style posts here.  And also speaking of Forever 21, May was the month I wrote the post How To Shop Forever 21 As A Grown Woman and it was one of the most popular posts of the entire year.  #1 hint: skip the entire front of the store.  IMG_9474 May also brought the most popular DIY I have ever done, How To Make A Statement Necklace, which I wrote for Making It Lovely.  It’s to date been pinned over 27,000 times! IMG_9988 In June I continued to grow, and can’t believe how big, at about 30 weeks, my belly looks here in this post!  I also continued my obsession with neon by sharing this fun DIY for Neon Polka Dot Pots, using office stickers and plain white pots from Ikea.   IMG_1704 IMG_1879

July I started to slow down a bit from being hugely pregnant and tired, but I still celebrated baby with a maternity photo shoot so big it had to be split up into 2 parts AndreasMaternity-1085 August is when Jules and I launched The Craft Cabinet, 12 days before my due date, and we will indeed relaunch it in early Spring of 2013, so stay tuned.  While I wrote a few other posts in August of 2012, nothing else compared to the one where I got to introduce you all to Hayden Arthur Howe, born on August 27th, 2012.  He has changed me, our life as a couple and as a family and I am eternally grateful for the opportunity to be his mommy everyday.   Words really can’t express how intensely hard I’ve fallen for this guy.  2012 could have ended right there and I would have been happy.    The-Craft-Cabinet-24 424258_4534878449052_1905988239_n The rest of 2012 has been a bit of a blur.  I began documenting my postpartum style each week, I wrote Hayden’s birth story, and I wrote some emotionally, and even politically, charged posts talking about my life as a Republican and part of my reaction to how the world of social media swirled around the Sandy Hook tragedy.  I also added a lot more of our family life in here as well, sprung on by the Things I’m Afraid To Tell You movement, in the post This Is Me. IMG_6354 IMG_5029 IMG_5939 IMG_4601

In 2012 I started a brand new blog, began writing for Disney Baby as a regular weekly contributor, started and stopped as a regular contributor for Making It Lovely, attended a conference, spoke at a mini conference, created 34 DIY’s for this blog alone, and documented 70 Daily Style Posts, including the one where I showed the world my postpartum arse in The Best Skinny Jeans For Real Women.  Many times I felt like I was running a race and many times I was exhausted and frustrated, but in the end, my passion for blogging continues, and if anything I want to find more of that passion in 2013 by taking it a bit slower.  Trying to return to viewing blogging in this space as a hobby rather as a job, and enjoying life more.  I continue to feel blessed and lucky to have you guys to share my life with, and love the online community I’ve found.  I want to cultivate that more in 2013 by producing less content of more quality, and free myself up to have the time to converse with you all more.  I look forward to seeing you all around these parts in the new year.  Much love to all of you, and Happiest of New Years.


Merry Everything

SHARE THIS +

Card Hello friends.  This is my last post of the year and I’m looking forward to taking some much needed time off with family and friends over the next week and a half.  I’m wishing you all a wonderful Christmas and rest of the year.  Before I sign off, I wanted to share with you a few things.  I spent a lot of time online this week, trying to focus on reading things that were uplifting and inspiring.  There was no shortage of that to be found.  It seems in the wake of a tragedy, the country is coming together and attempting to heal in wonderful ways.  Here were some of my favorites:

Newtown As I Know It by Simple Homeschool

The Rebirth of Slow Blogging by Erin Loechner (I have huge respect for Erin and she is as kind as they come, after having met her in real life at Blissdom I can attest to that.  In many ways she took the words and feelings right out of my mouth).

Wishing You Love & Light by Bene Brown (via Jules).  My favorite part of this post is about practicing gratitude for what we have: “When you honor what you have, you’re honoring what I’ve lost.”  Beautifully said.

Ann Curry’s Call to Action with #26Acts.  I’ve started with my acts and so far have completed 3.  I’m sharing most of them on Instagram, not as a way to boast, but as a way to inspire, as Ann Curry encouraged us all to do.  I like that.  If you’re taking part and are sharing in some form, please let me know so I can follow along and get inspired as well.   I’m @fourflights on Instagram and twitter; please share your handles in the comments.

Brickyard Buffalo’s Operation Sandy Hook. Various small businesses taking part in raising funds for Sandy Hook, with 100% of proceeds going to the Sandy Hook families of victims.  My good friend Heather Myers of River and Bridge, who also designed our Christmas card this year, is taking part and offering this beautiful print.

I’ll admit I didn’t cry when Columbine or Virgina Tech occurred, but I have cried every day since this happened.  This article probably explains why.

Lastly, on a lighter note, Hayden is still no where close to sleeping through the night, but I’m trying to stay positive.  A few things I’m trying to consider when up between 2 and 4 am.

*Christmas Card photos taken my M. Shanti Photo, design my River and Bridge, inspired by this.

See you in 2013!  Blessings and love to you all, and thank you for reading.


New Years Eve Style – Entertaining At Home Addition

SHARE THIS +

My Christmas list is almost complete, having pretty much finished all of my shopping, baking and now just some wrapping to get done, which I always like saving till the last minute anyhow.  Something about the harried rush of trying to wrap every single gift in between the kids trying to sneak a peek, gives me a rush.  I never claimed to be normal.  Anyhow, it’s about this time, with just a few days to spare, that I start to think about New Years Eve plans.  We’ve always tried to do something special on New Years Eve, even after having kids.  Some years we get a sitter and go to a party, some years we host a small family gathering at our house where kids are welcomed, and some years we go out to dinner but rush home in time to ring in the new year with the kids, east coast time.

This year with Hayden being so fresh and new, read, still not sleeping through the night, we plan to take it easy and stick around home, and just enjoy some time with a couple of friends that also have kids.  We’ll do light appetizers, some desserts and a specialty cocktail.  I’m thinking this Blueberry Lemon Fizz would be perfect.  Nothing fancy at all.  Even though we’ll be sticking around home, I still want to look and feel festive and ready to start 2013 feeling pretty, so I’m thinking my entertaining at home outfit will look something like this.  Rich, tonal cream, colors with splashes of gold and silver to add some shine.  Very wintery fresh.  Let’s break it down shall we? Old-Navy-Sweaters-2 1. Blanket Wrap Cardigan – I know I’ve said before that the blazer is the new cardigan, but that doesn’t mean that a good, updated cardigan doesn’t have a place in your wardrobe.  I love the over-sized feel of this one.  It’s nice and long, so it can work well with a pair of skinnies, or a legging.  The color is neutral but the silhouette makes it anything but boring and ordinary.  It would look great cinched at the waist with a wide belt too.

2. Textured Layering Blouse – So here is why I prefer blouses right now, as a layering piece, as opposed to a form fitting tank top or shirt.  A blouse, especially a cute printed one like this, adds texture and depth to the look.  It makes it look like you’ve got a bit more going on, and that you put a bit more thought into your look.  Sure a white tee or tank would be a perfect run to the store look, but the blouse takes it up a notch and gives it a richer look.  I also love blouses right now because they hide my postpartum tummy!  You can sort of tuck it in and pull it up a bit to camouflage the pesky midsection, if you have this problem.  It hides the weight as opposed to highlighting it as a tight tank or tee would do.

3. Brushed Cords – Instead of pairing the above with a regular pair of skinny denim jeans, I love the added texture of yet another fabric, these soft brushed cotton cords.  I like that it also makes the look feel much more seasonally appropriate, since cords tend to be a fall and winter fabric.  This would definitely work with a darker pair of cords, like this olive color, but for my New Years Eve look, I’m sticking with the all over tonal cream colors.

4. Sequined Scarf – We’ll have the fire pit going in the backyard, and so to stay warm I’ll add a bit of functional sparkle with this sequined scarf, available in black as well.

5. Sequined Ballet Flat – While I’d love to be able to prance around the house in a pair of gorgeous boots or heels, reality calls for something comfortable and a bit more practical.  Practical doesn’t have the be boring though, so I’ll add some gold to the look with these sparkly flats.

6. DIY Star Hair Clips – I’ll add some big loose curls to my hair for an easy style, and add a couple of these star clips I made for myself a few months back.

Makeup calls for some shimmery gold lids, and a pretty pop of a red lip.  I’m loving Mac’s Ruby Woo right now, for the very matte and long lasting look.  I’ll keep the rest of my accessories simple and skip the watch and any necklaces.

So what are your plans for New Years Eve?  Will they be a simple gathering at home, like ours, or do you have any fun plans to go out?  I’m looking forward to taking a few days off next week and just spending time with the family around home.  Art has been working way too much so it will be good for us all to reconnect.  I wish you all a very happy holiday week and thank you all so much for being here.  Merry Christmas and Happy New Year you all!


This post is brought to you by Old Navy. Find your sweaters for the Holidays at Old Navy!


Looking Forward

SHARE THIS +

IMG_8428 leggings and sweater – H&M; boots – Hunter

I was wondering how after the last few days, and my own feelings on the way we conduct ourselves online, I was going to genuinely segue back into daily style posts.  More so, I was wondering how I would post something so trivial as what I’m wearing without making myself look like a hypocritical jack ass.  I know that these posts are downright silly, and so I’ve always ‘tried’ to make them somewhat helpful by including tips and options and calling it ‘inspiration’.  And deep down I know I’m certainly not changing lives, but if anything perhaps offering some options.

Anyhow, as many of us do at this time of year, and especially in light of recent events, I’ve been looking forward to the new year.  How I want my life as a mother and wife to look, how I want my family’s life to look, how I want this blog to look.  So I’m starting today with this post and showing a bit of honesty.

See these leggings?  The baby peed on them soon after I took these pictures yesterday.  He was sitting in my lap and he plain and simple, had a diaper malfunction.  You know what else?  I didn’t change out of them.  It wasn’t much pee, nothing a good swipe with a Costco wipe couldn’t fix.  So I continued to wear them because I have about 3 pair of bottoms that fit me and I need to preserve the ones that fit for as long as possible.  You want to know something else?  These leggings are great camouflage, but really really flimsy and they do a horrible job of holding in my belly, so I’m just gonna wear long sweaters to cover that scene up because my postpartum belly still looks about 4 months along.

I haven’t worn makeup since Sunday because I’m tired and drained and can’t put forth the effort to put it on.   This is what I look like when I’m tired and drained and with no makeup.  I also haven’t dried my hair in at least a week?  This is what it looks like air dried.  Originally I was going to crop out my face and just show you the outfit, but what the hell?  Since we’re opening up and being honest here.

As a “style” blog I’m supposed to provide inspiration.  I’m supposed to look my best at all times so that you get ideas or whatever, and want to look your best too because look good feel good, right?  And for the most part I believe that.  But sometimes the best inspiration and pep talk anybody can give is to show you reality and honesty, and let you know you’re not alone and no, you’re not a loser for not styling your hair every gosh darn day.  I haven’t dried my hair or put on makeup in days, and I’m wearing pee-pee pants, but hey, at least they’re cute pee pee pants.  So if you’re thinking I always look put together I’m here to tell you, heck.no.  The only reason I look somewhat put together on most days is because I choose, for the most part, to put on clothes that I love because I truly believe putting on a pair of leopard leggings require just as much effort as putting on a pair of yoga pants.

So cheers to no makeup, crazy frizzy hair, and pee-pee pants!  This is my life.  And I love it, every last minute of exhausting minute.  Cheers to you, and cheers to me.  We are beautiful.  How about a little more of this in 2013, yes? IMG_8448 IMG_8432 IMG_8450